
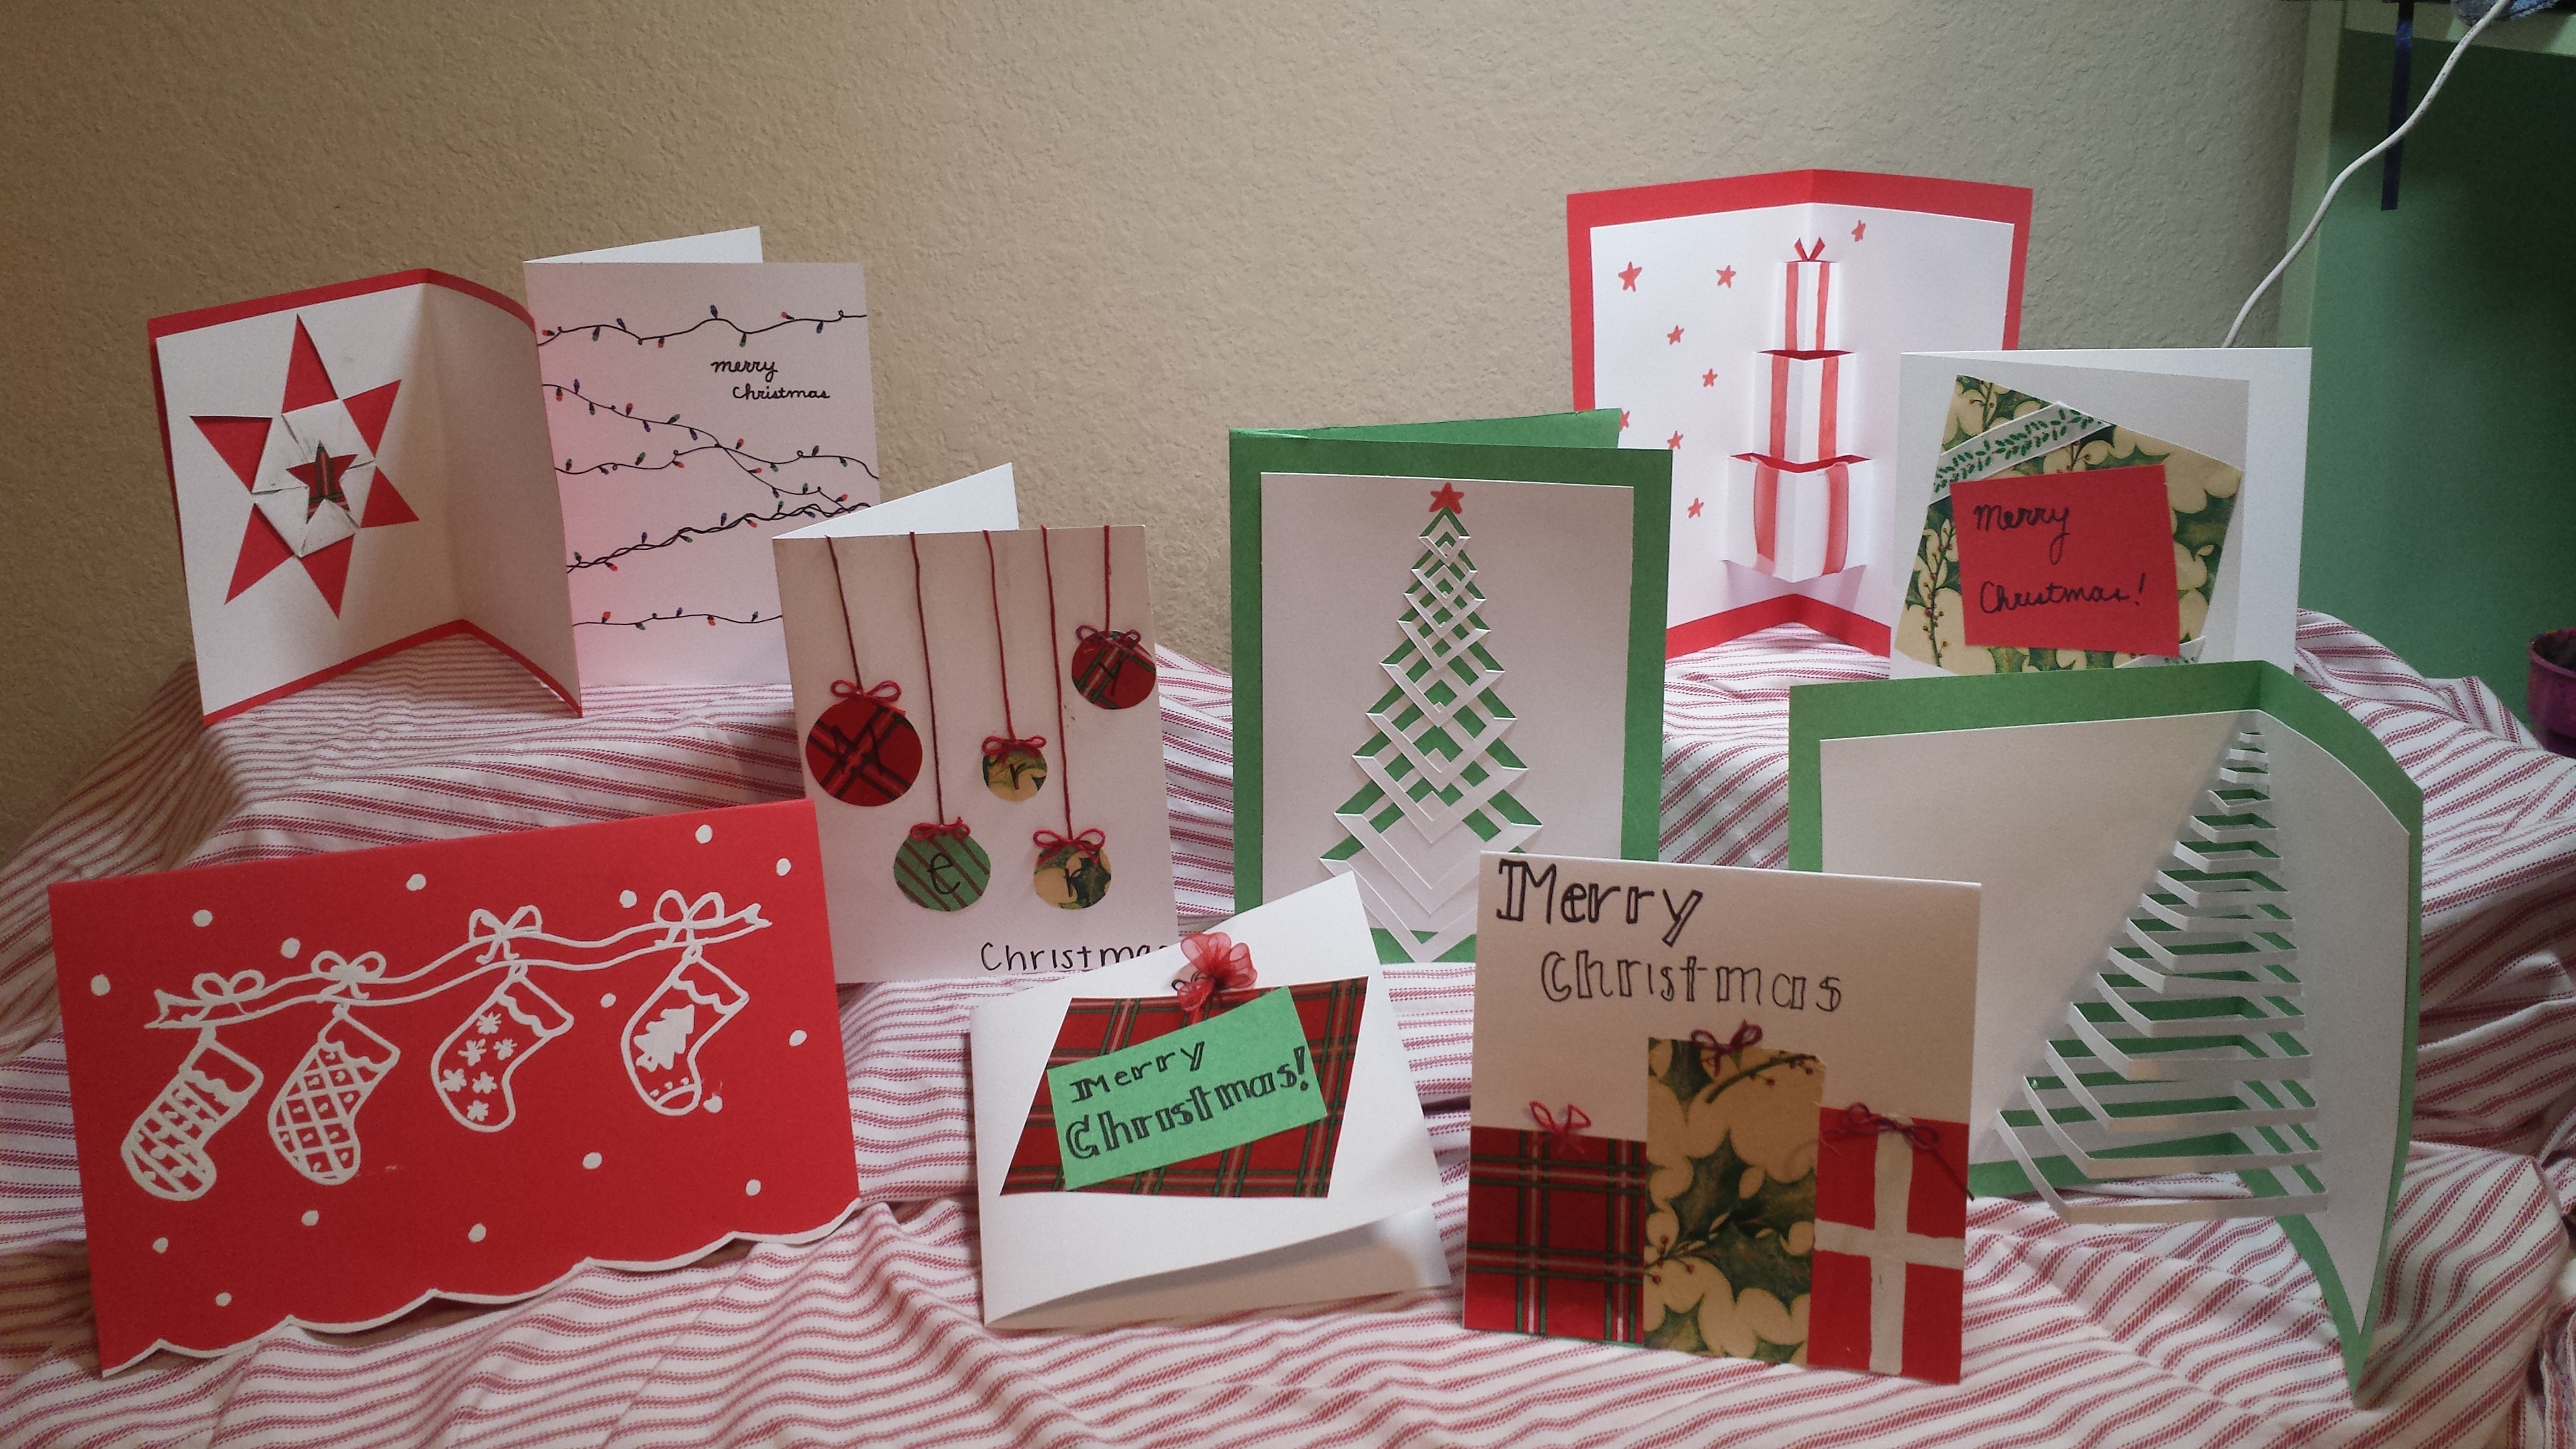
 When we give someone a gift, we usually accompany it with a card. This holiday season, say goodbye to store-bought cards! There is something special about giving and receiving a homemade card, so today I’m going to teach you how to make 10 quick and easy holiday cards that you can make with supplies you already own. If you don’t have the exact supplies needed, don’t worry! Many of the supplies needed can be swapped out with other household items. Let’s get into it!
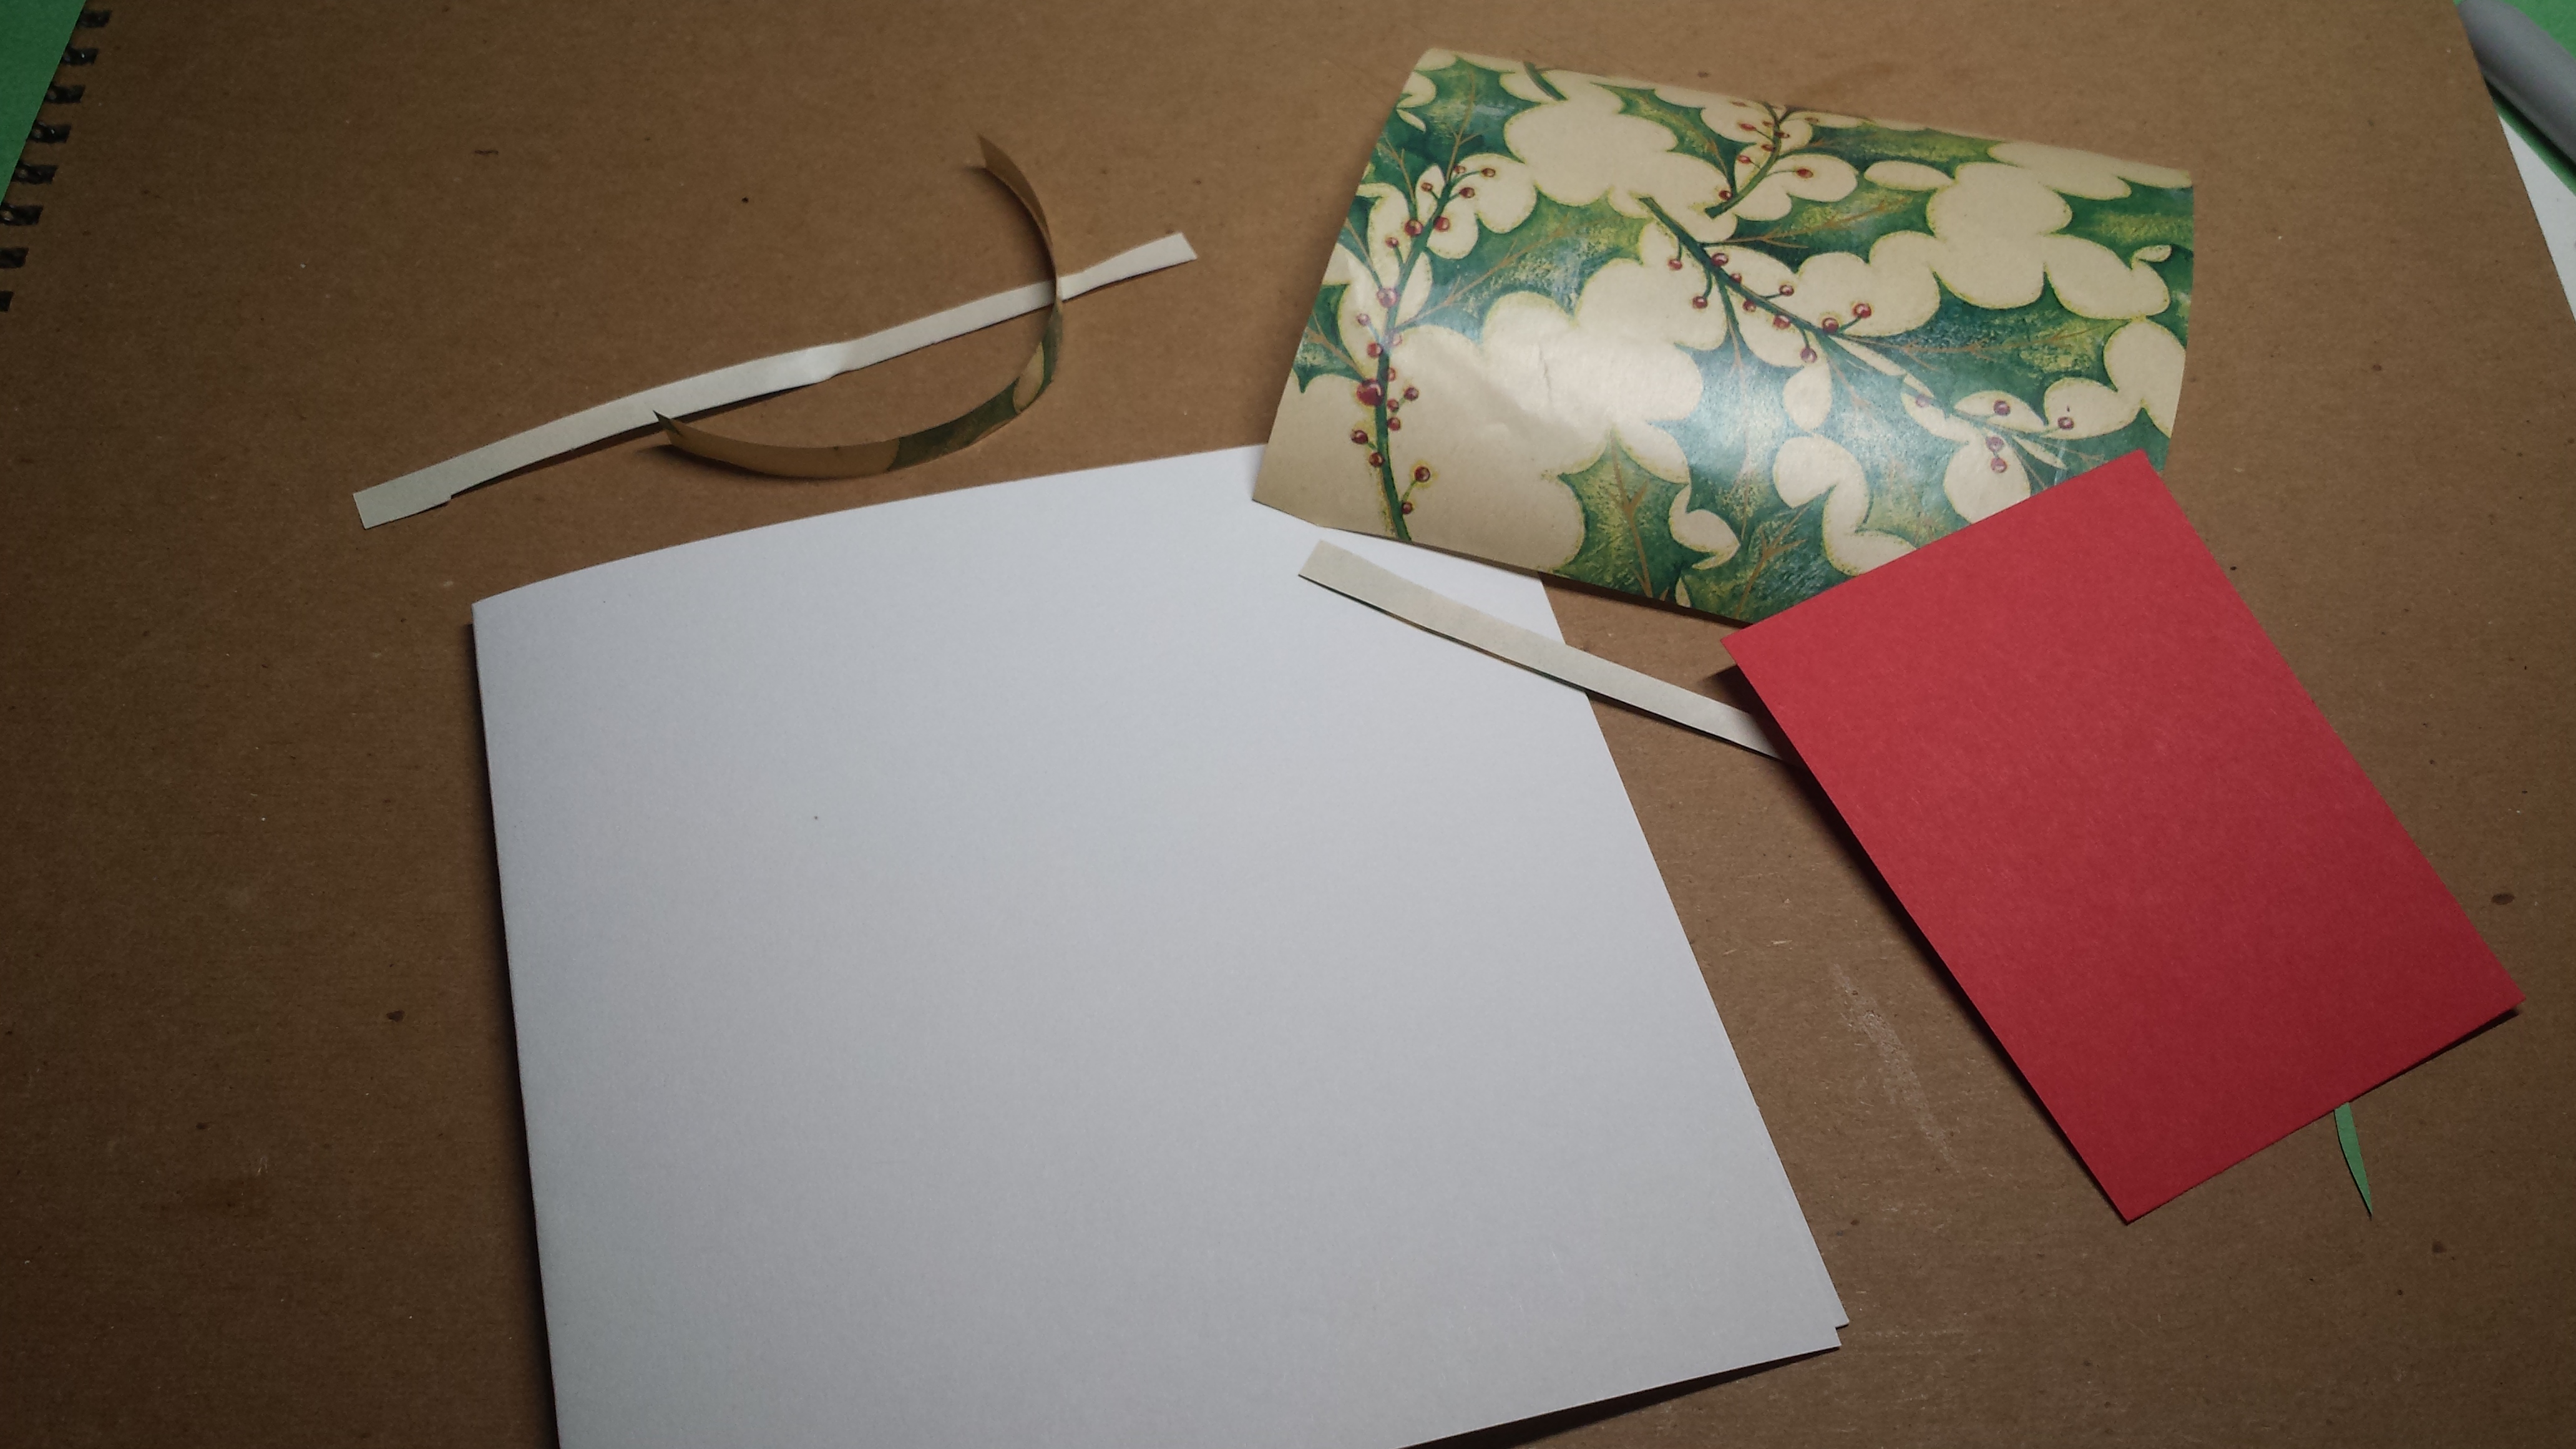
Supplies needed: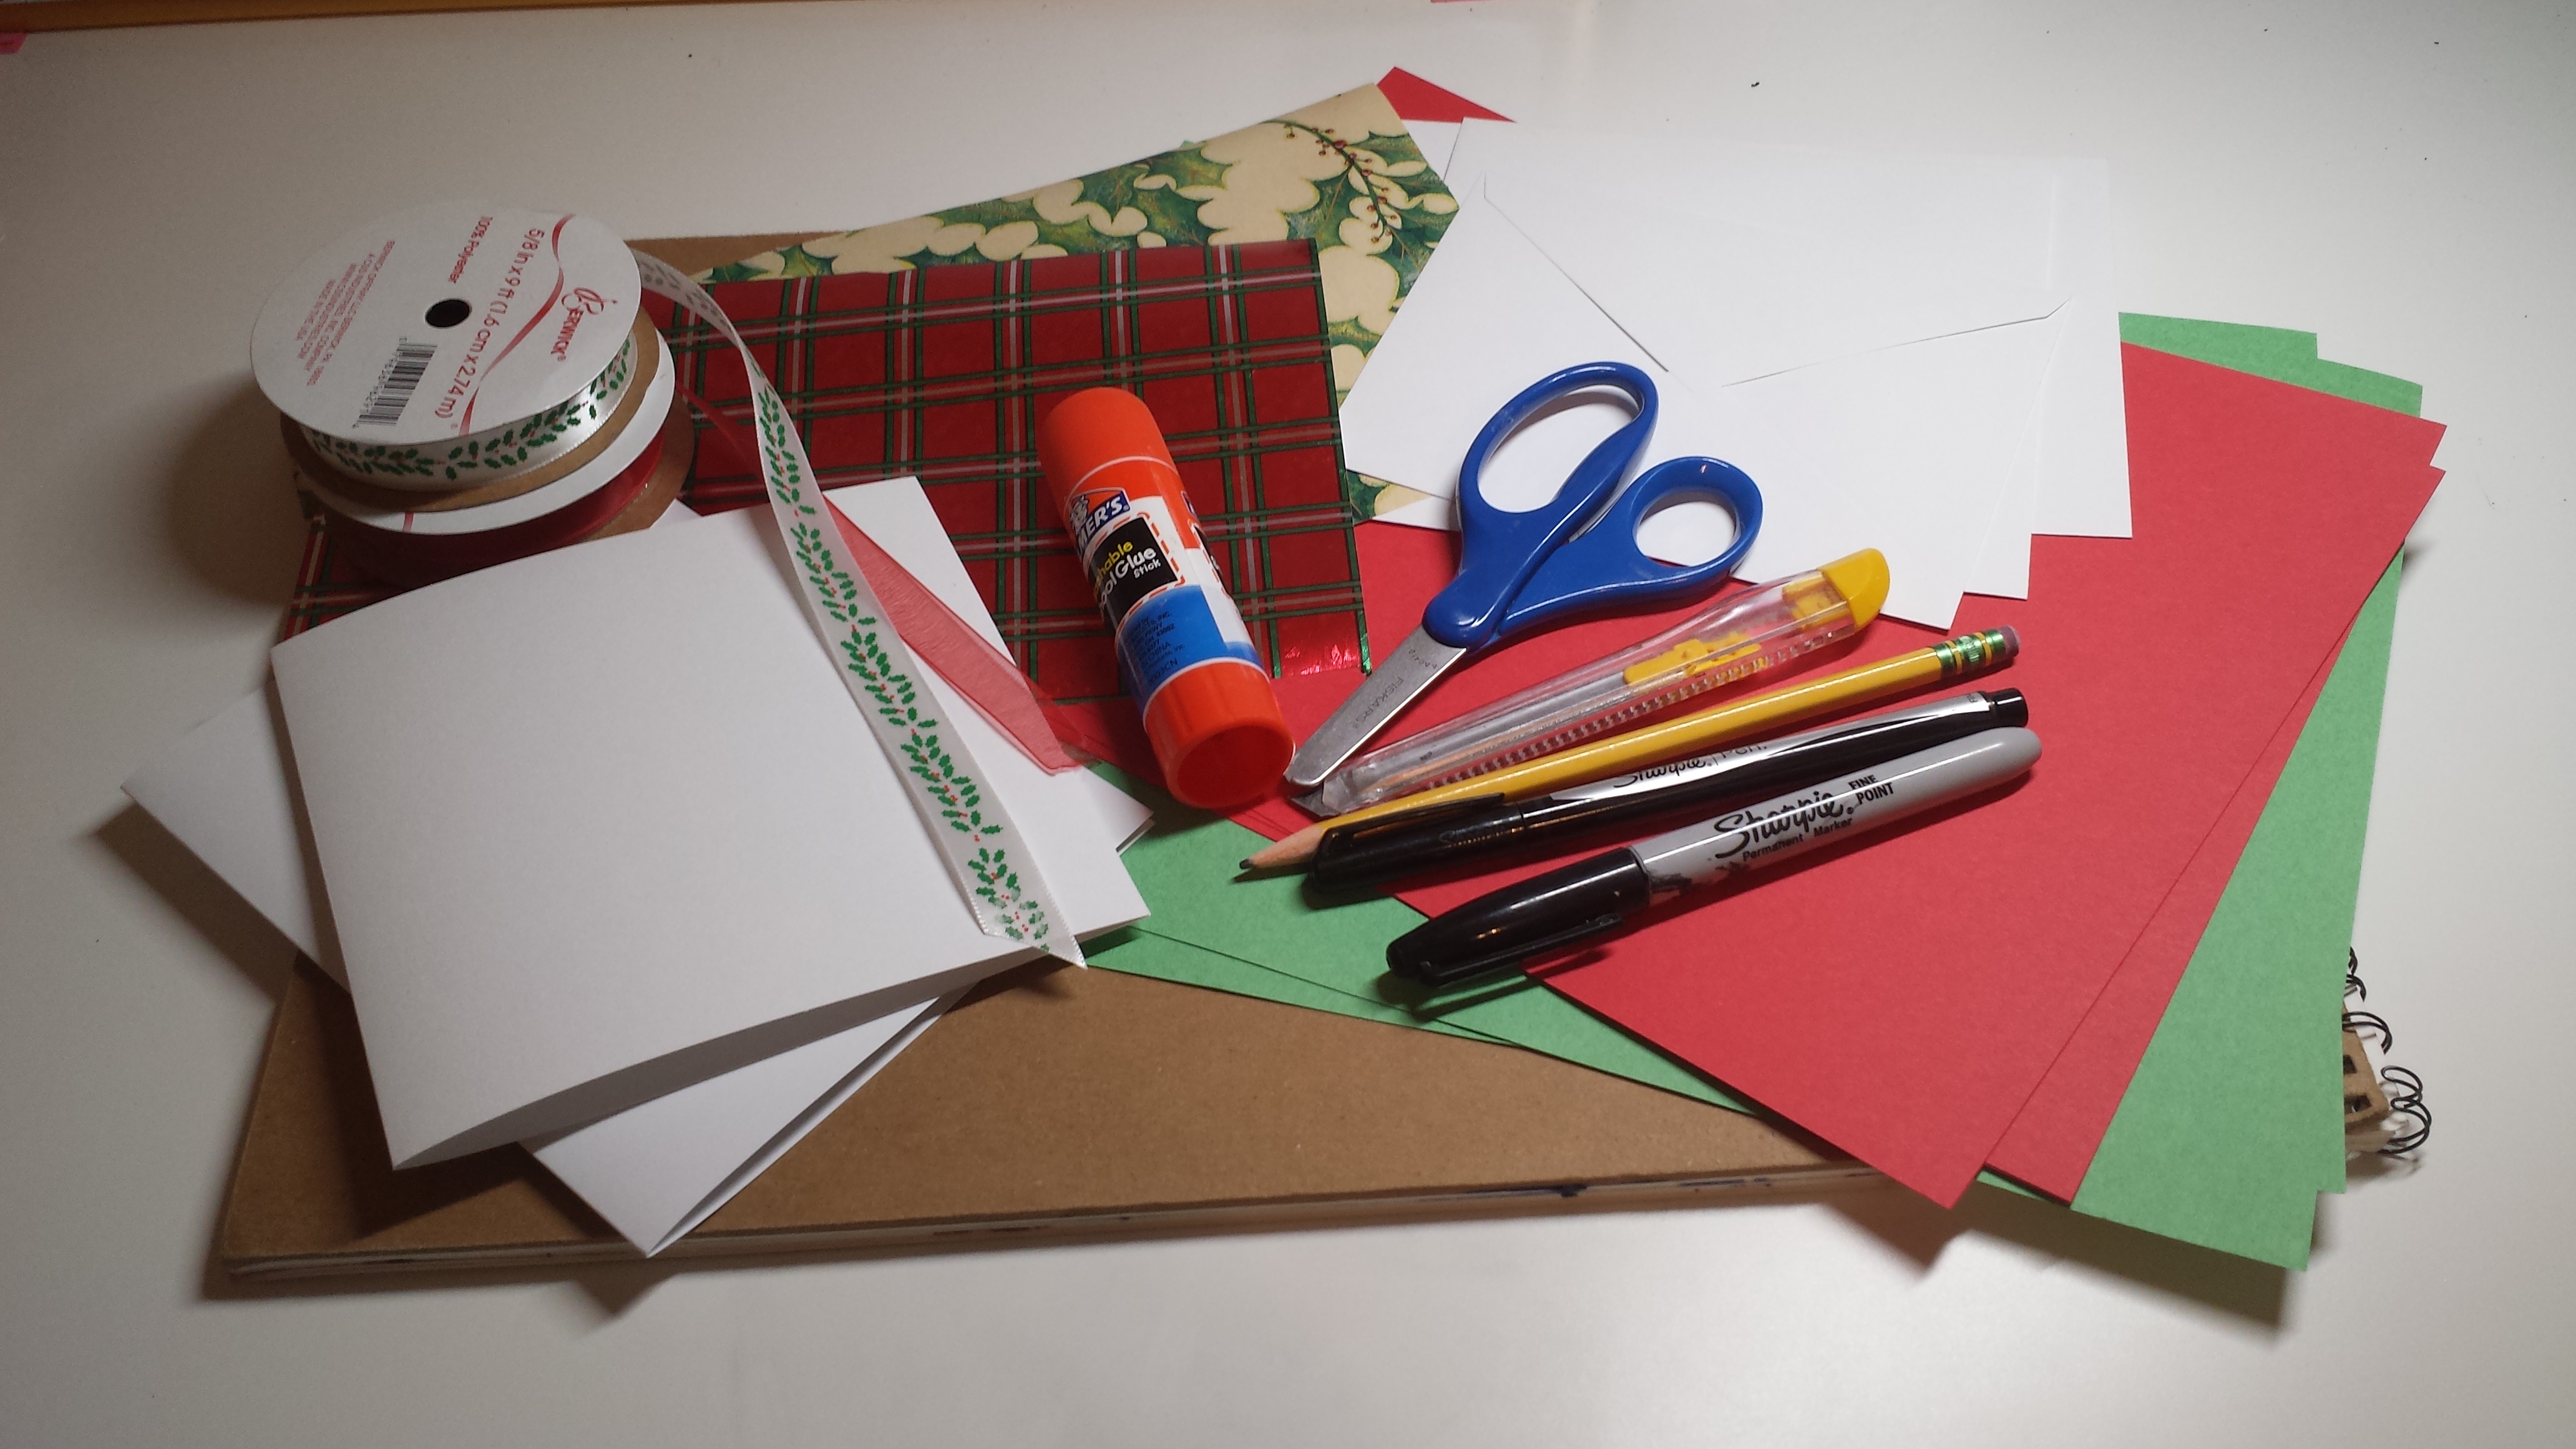
- scissors
- glue
- Sharpie
- colored markers
- ribbon
- wrapping paper
- white cardstock paper
- red and green construction paper
- exacto knife
- envelopes (optional)
- pencil
- piece of cardboard or a hard surface
- wite out pen (optional)
*I definitely encourage using scraps of wrapping paper or ribbon you have left over from wrapping*
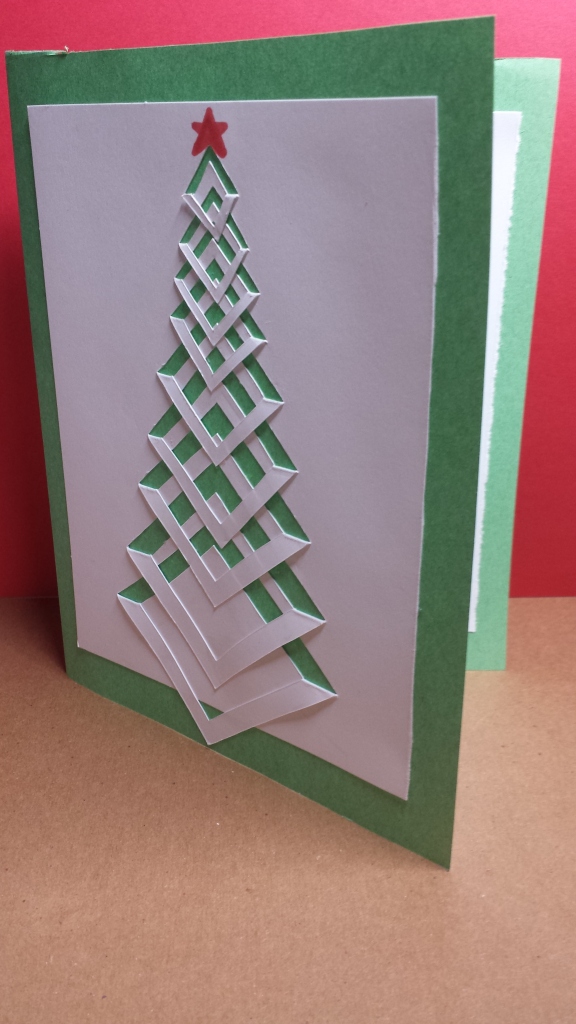
CARD 1
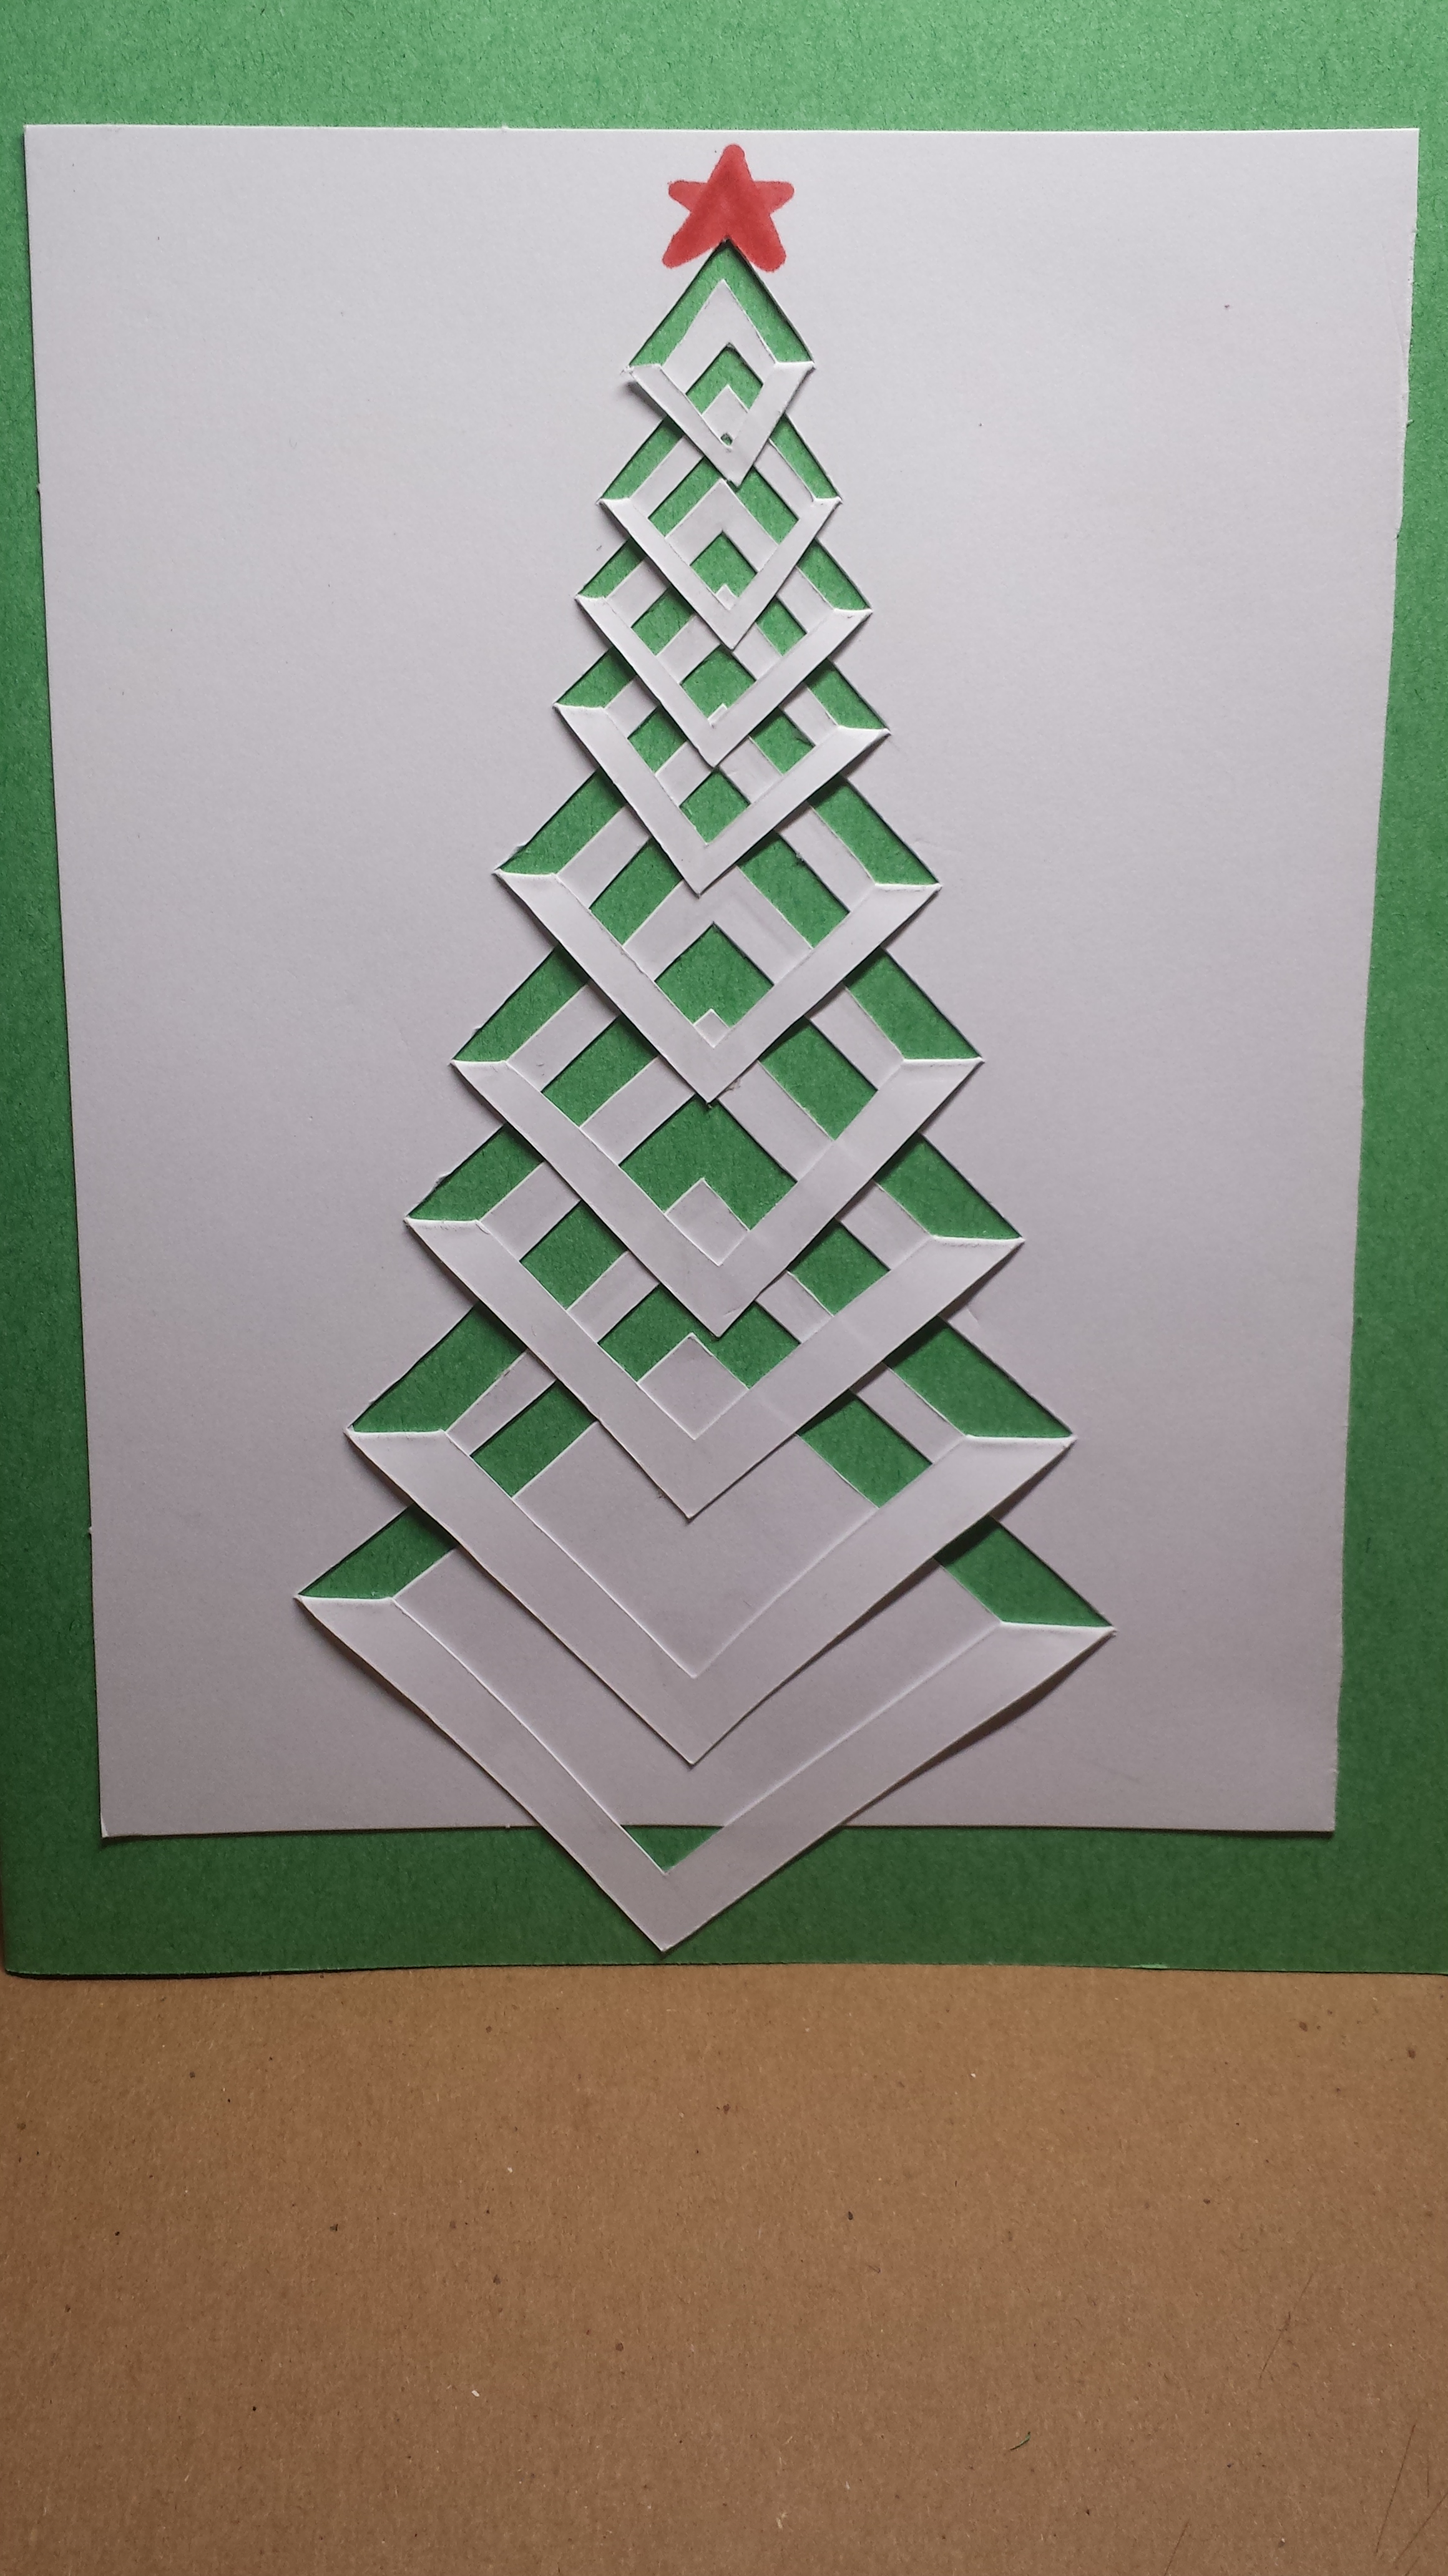
Supplies needed: Green construction paper, white cardstock paper, exacto knife, pencil, glue, scissors, red or gold marker
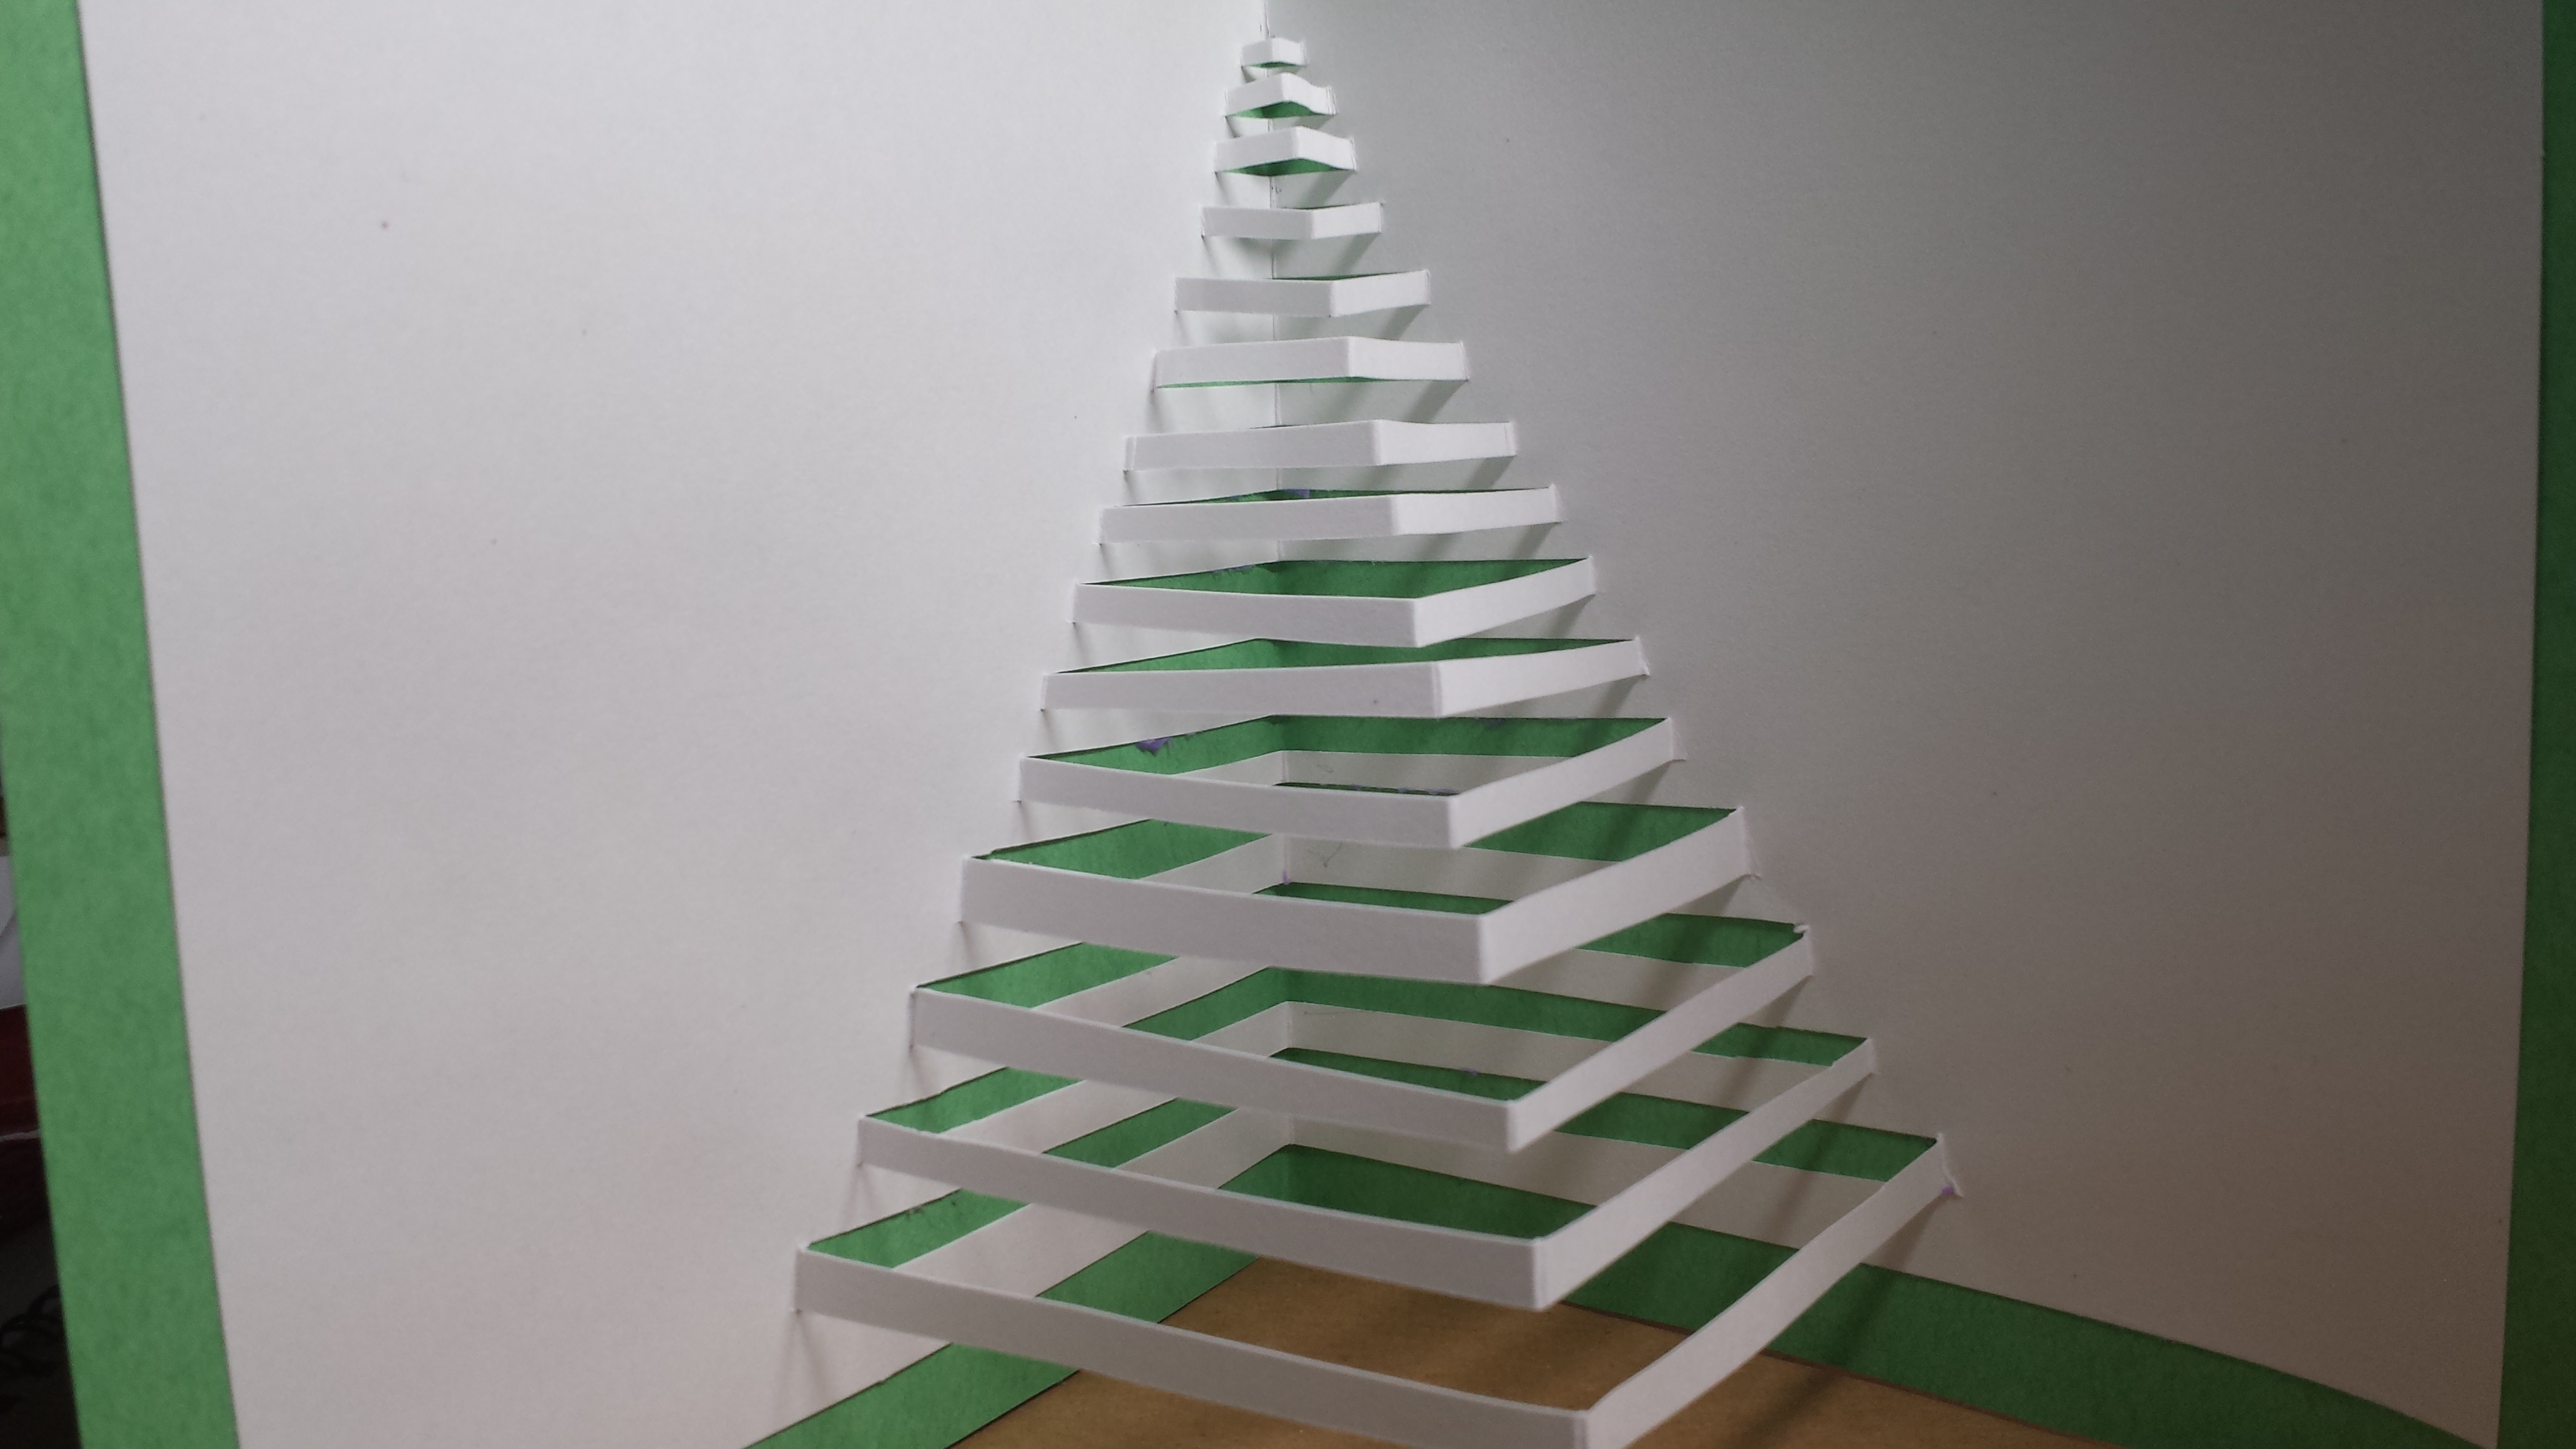
- Make sure your white cardstock paper is smaller than the green construction paper. Cut it if necessary.

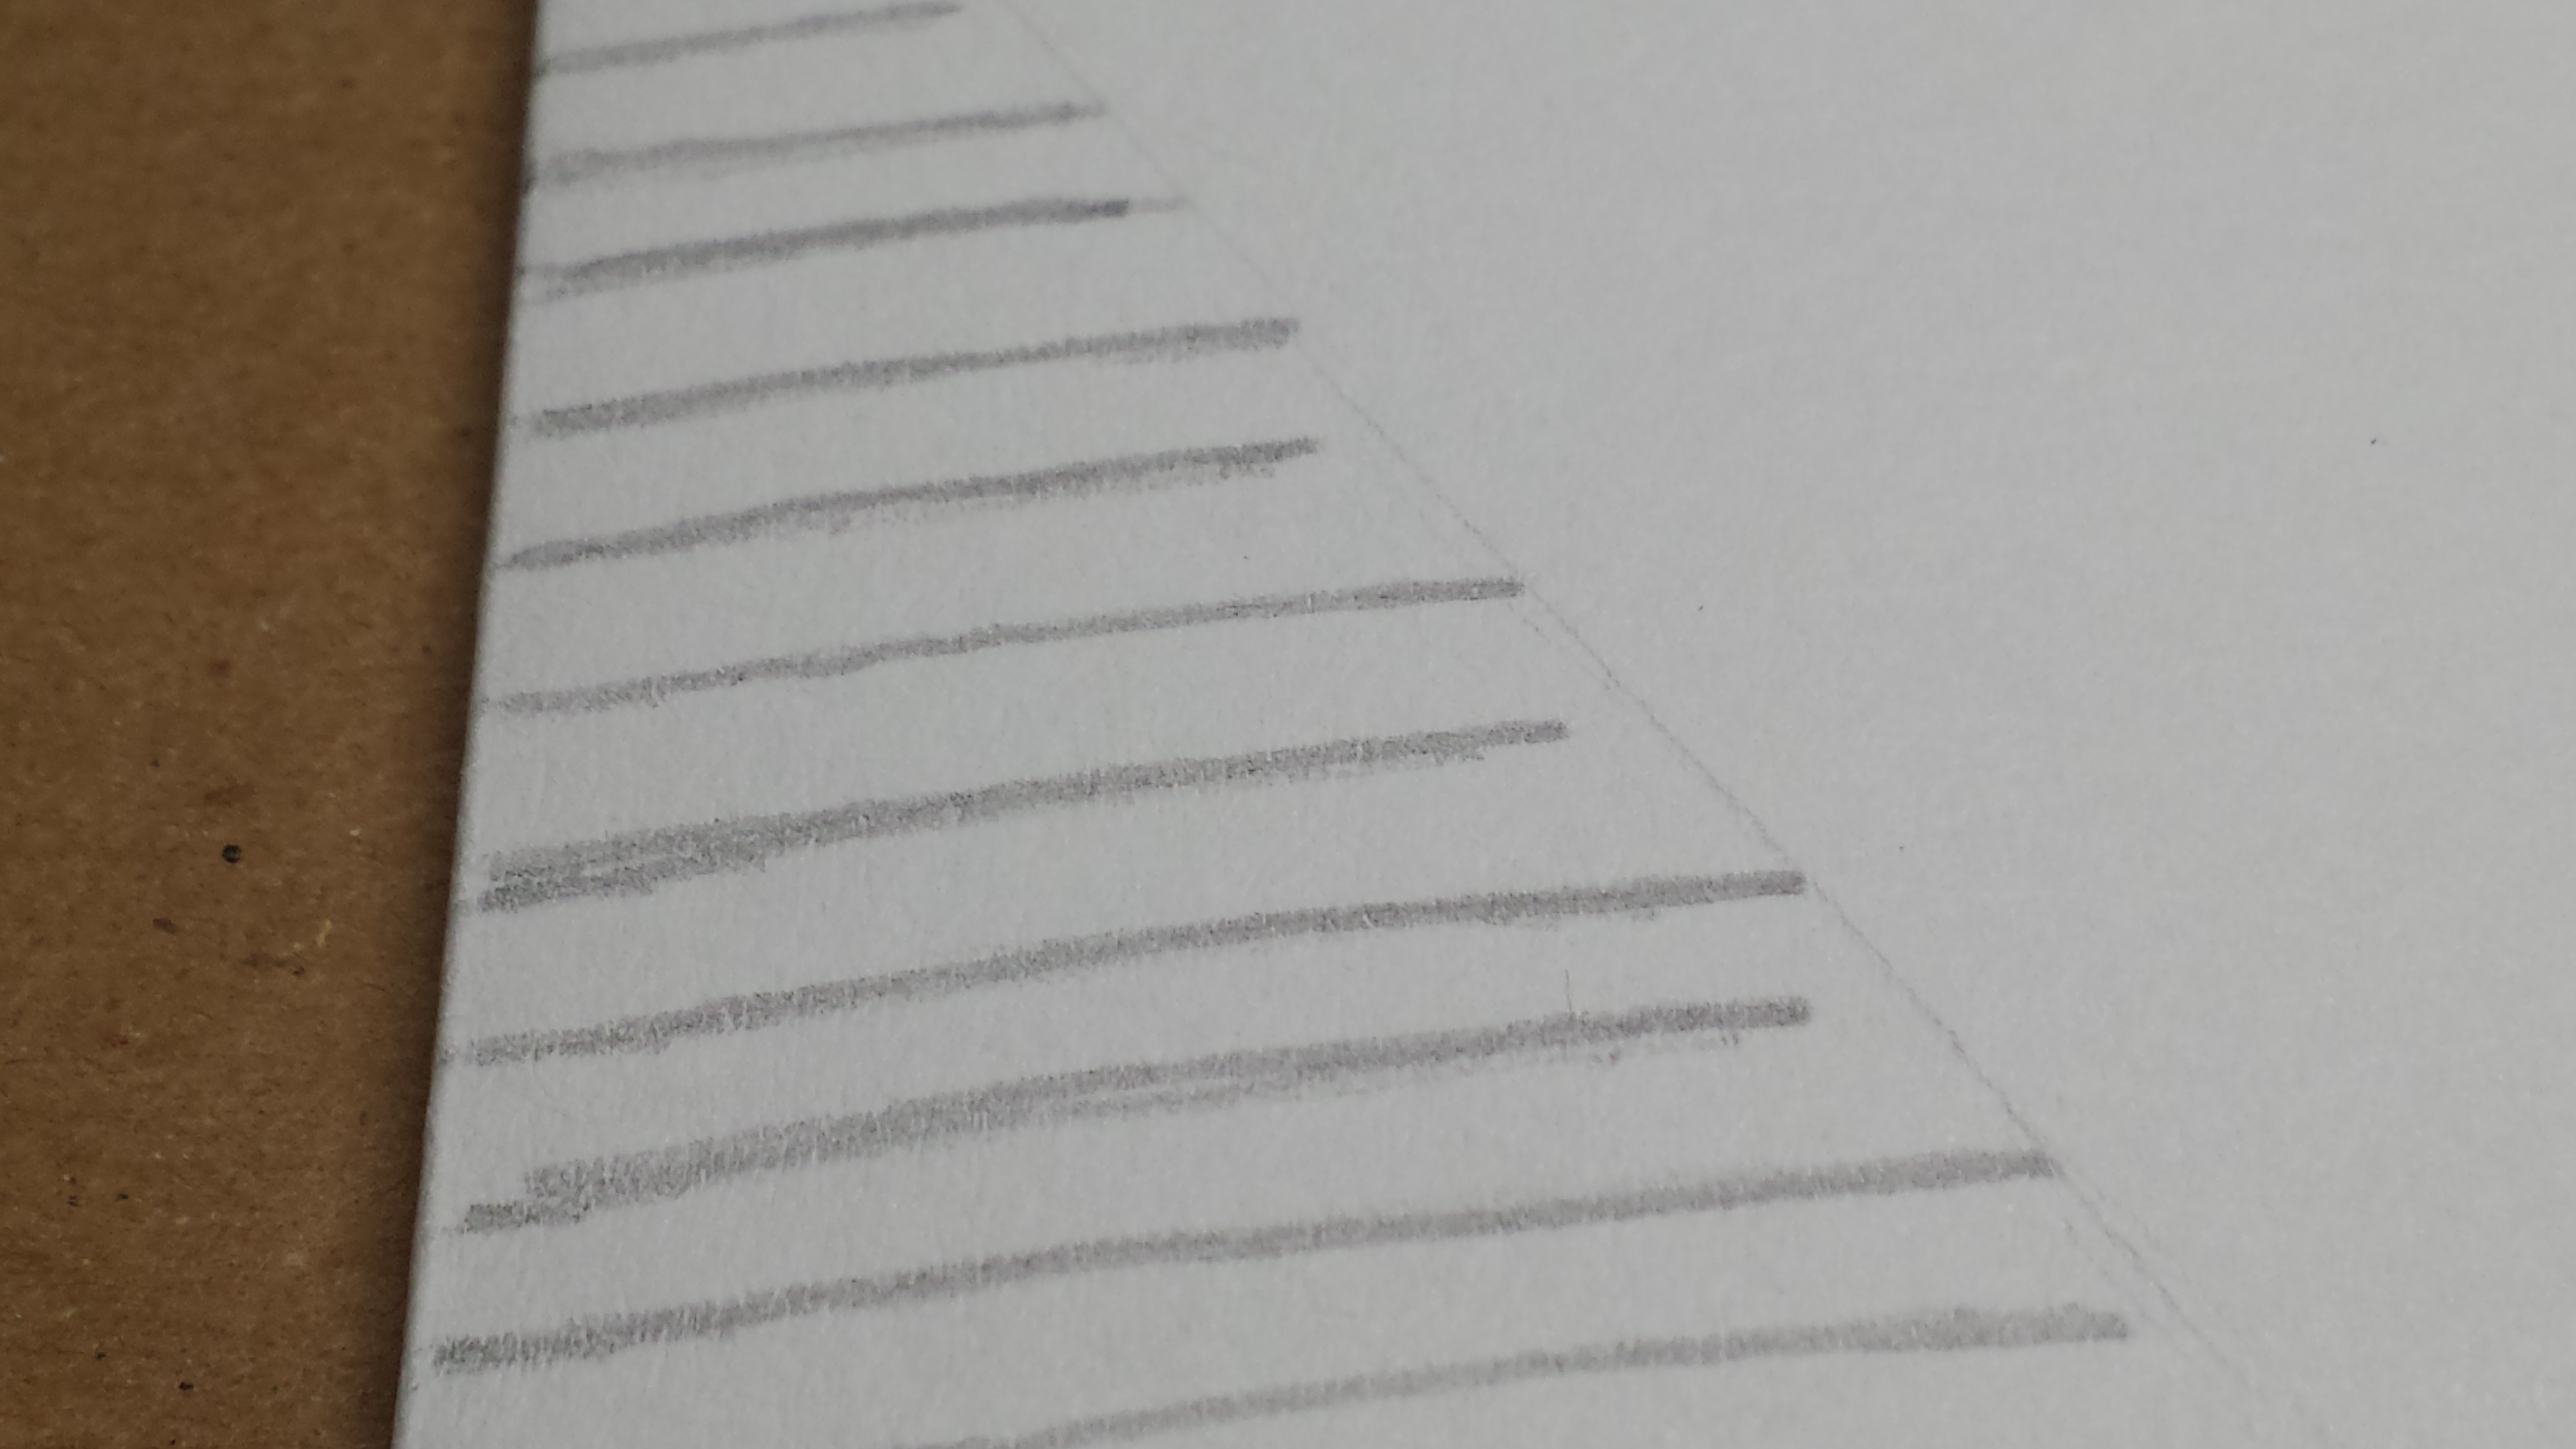
2. Draw the design seen in the photo below on your piece of white cardstock with your pencil.
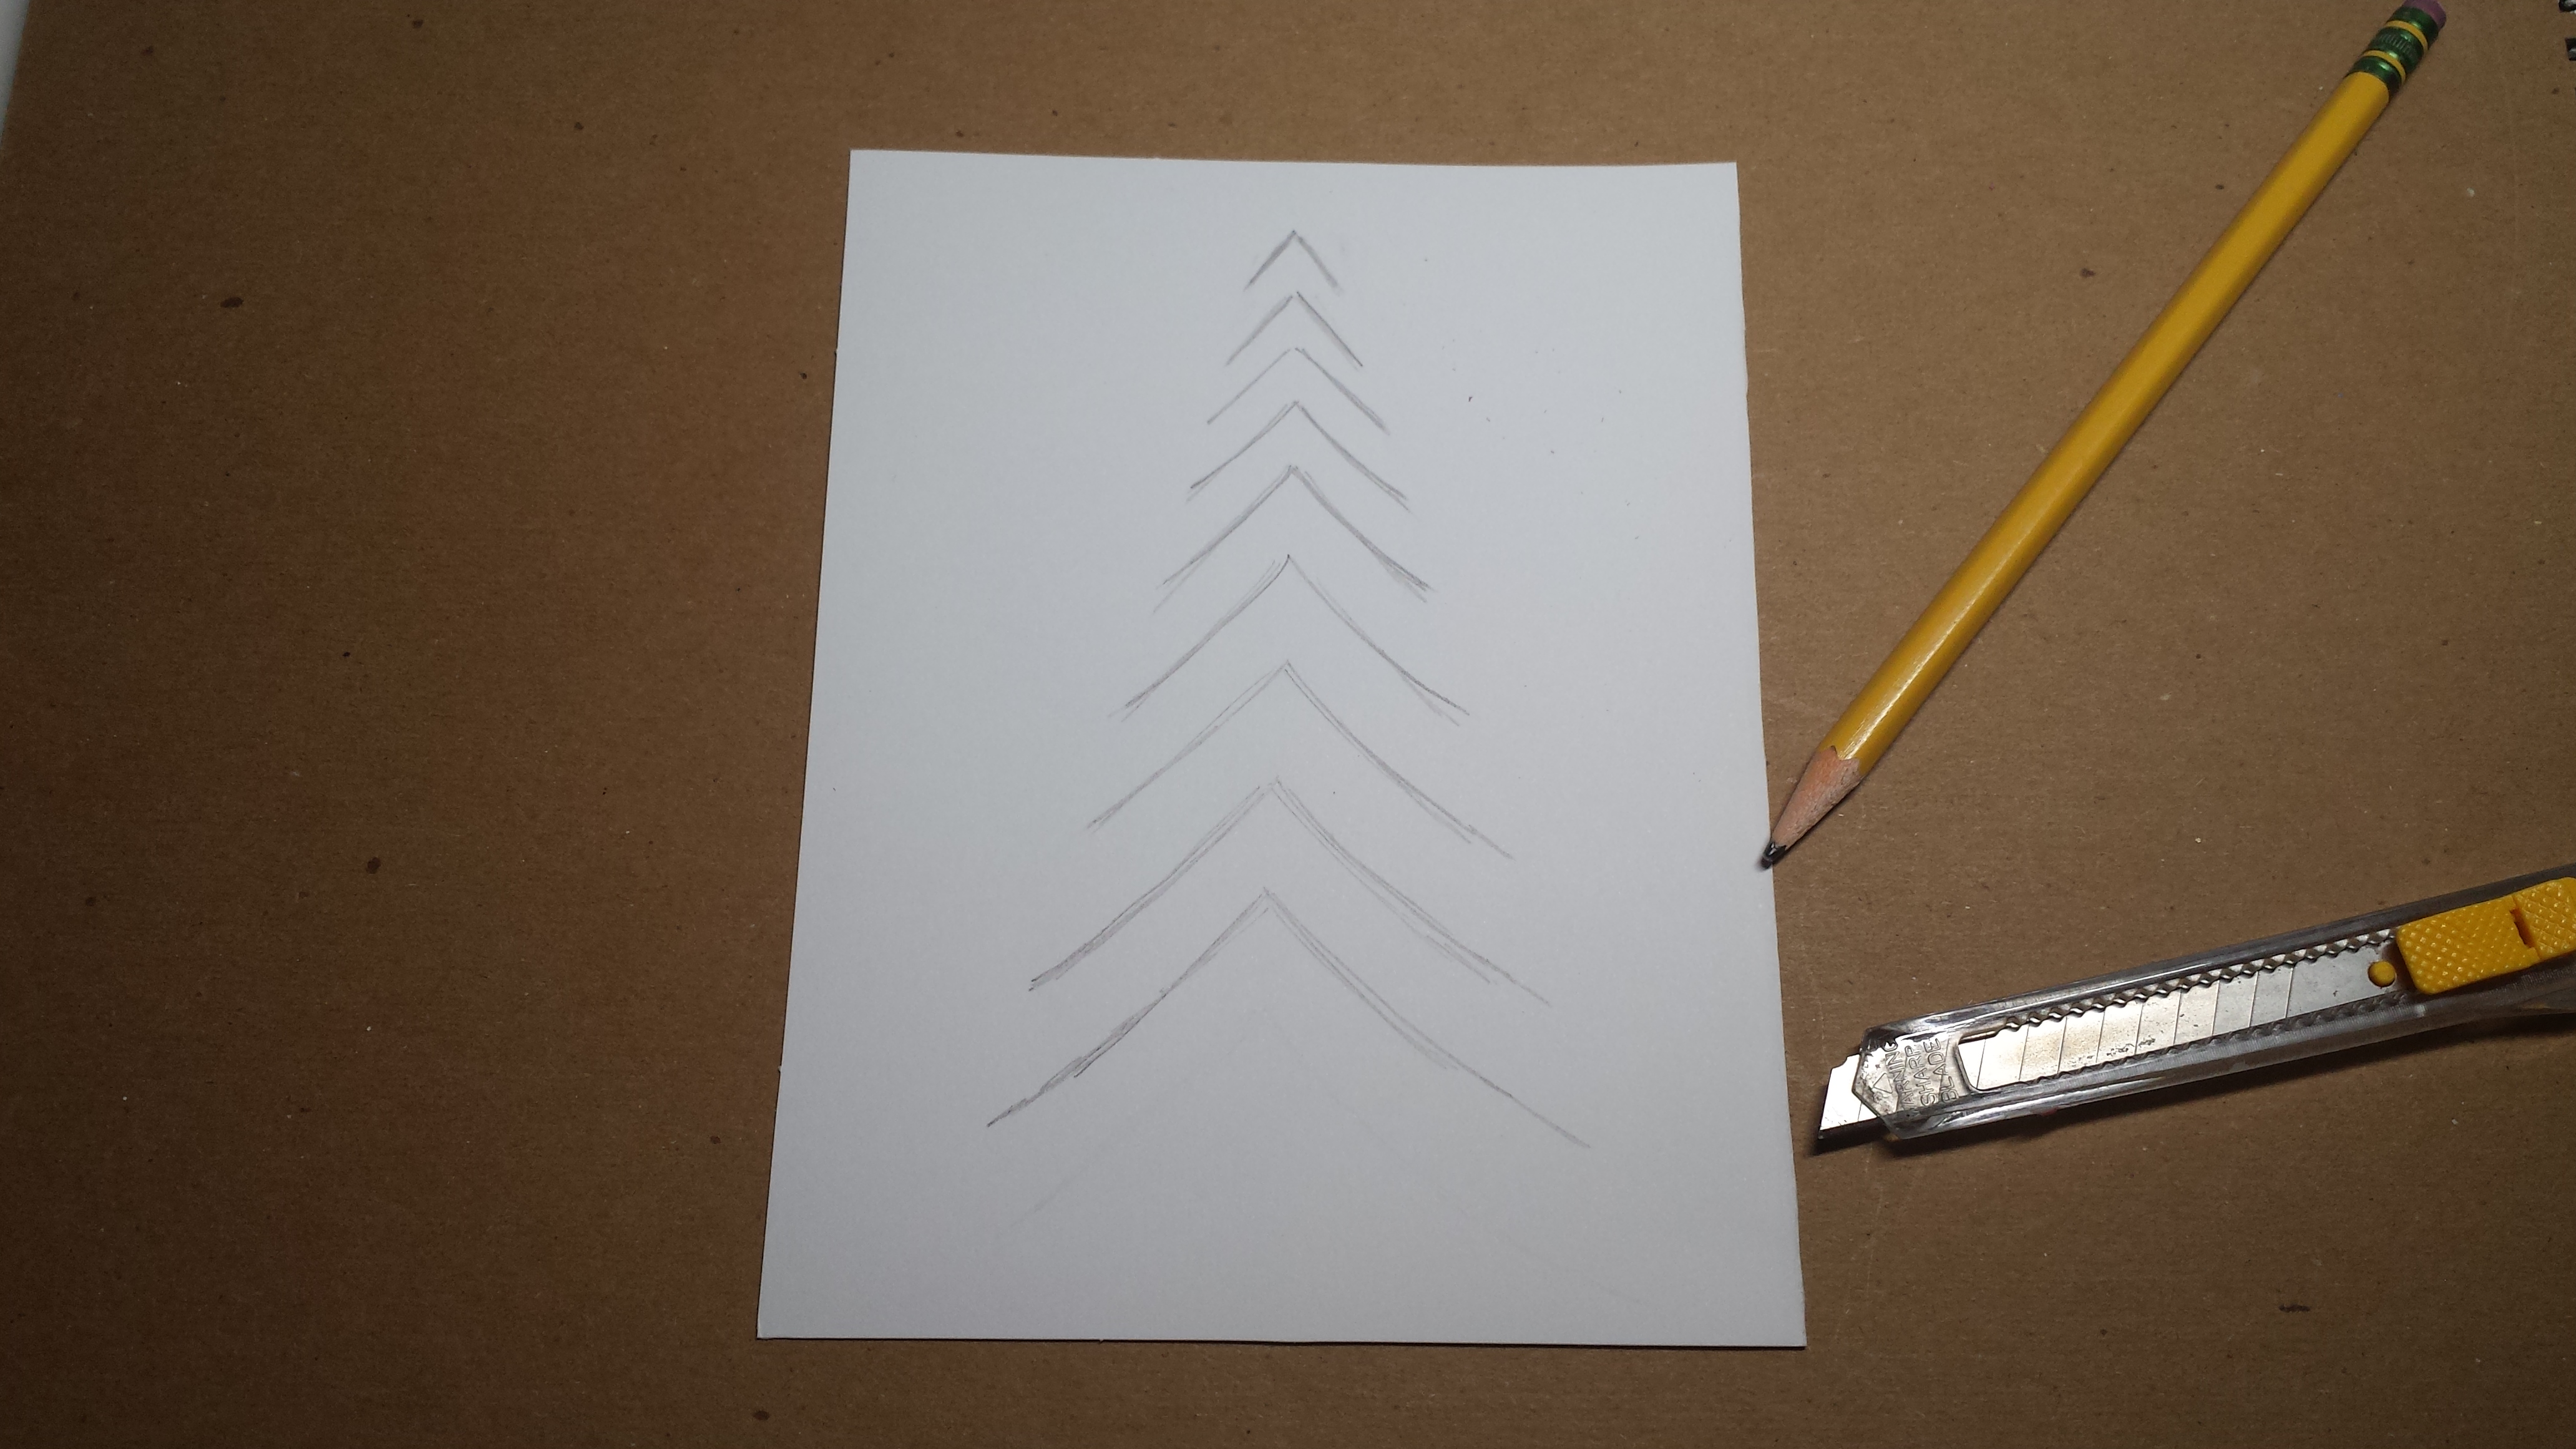
3. Take your exacto knife and cut around the line in pencil you made at the top of the tree. Be sure not to cut the bottom because that is where you will be bending the paper.
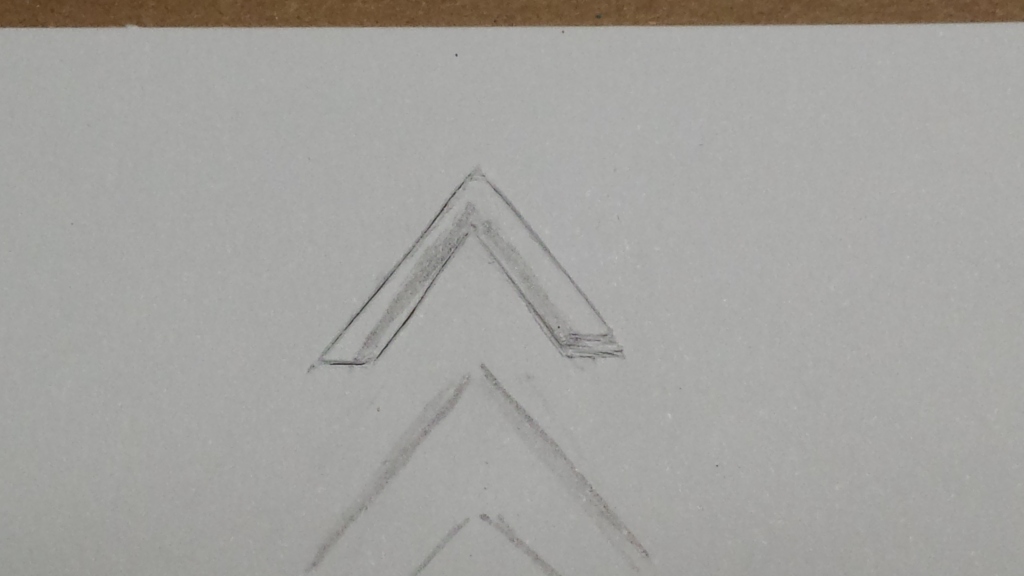

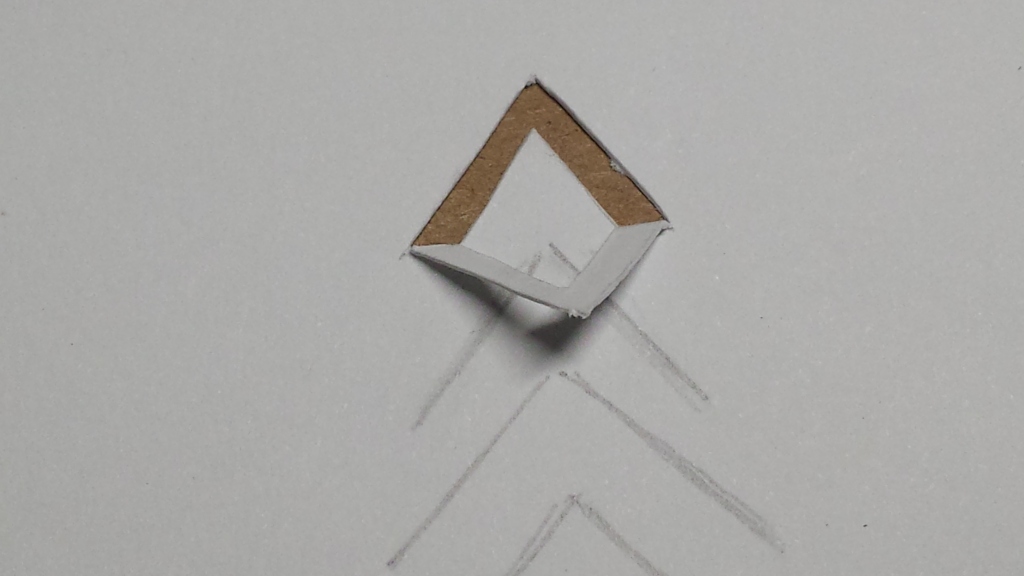
4. Repeat this step until you are at the end of your tree. Then flip back all of the little triangles you just cut, starting from the bottom and moving to the top.
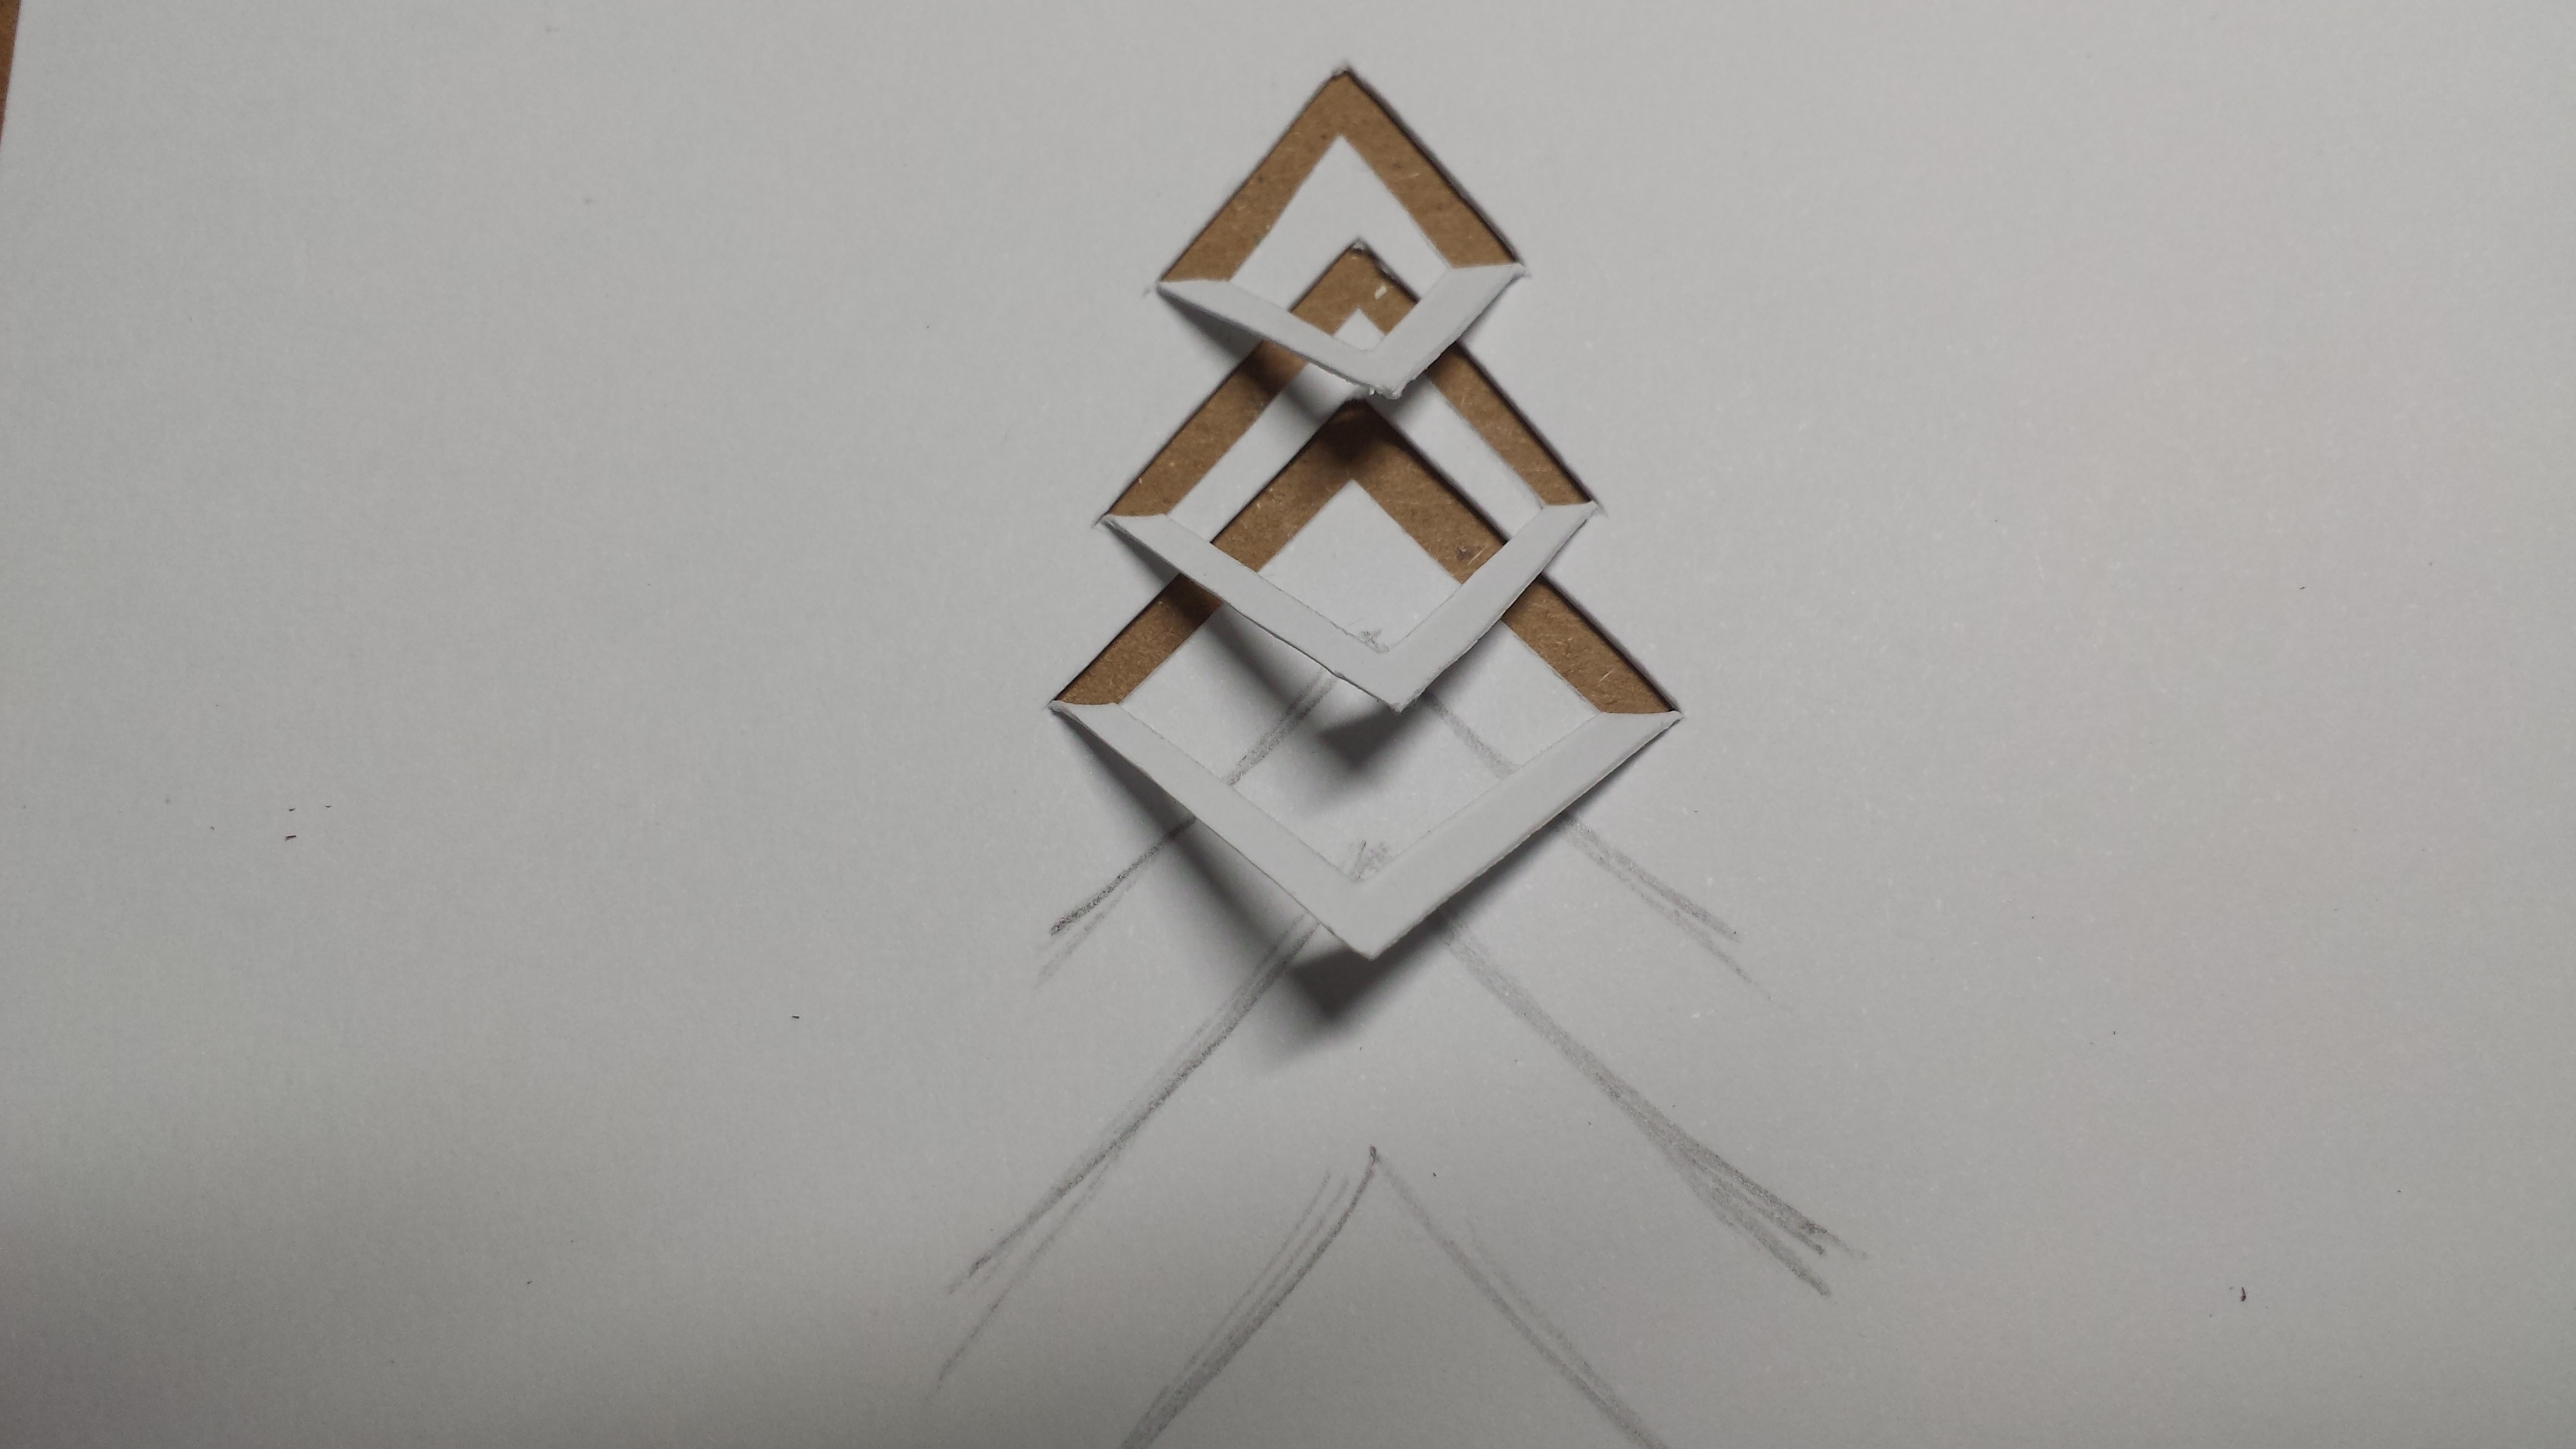
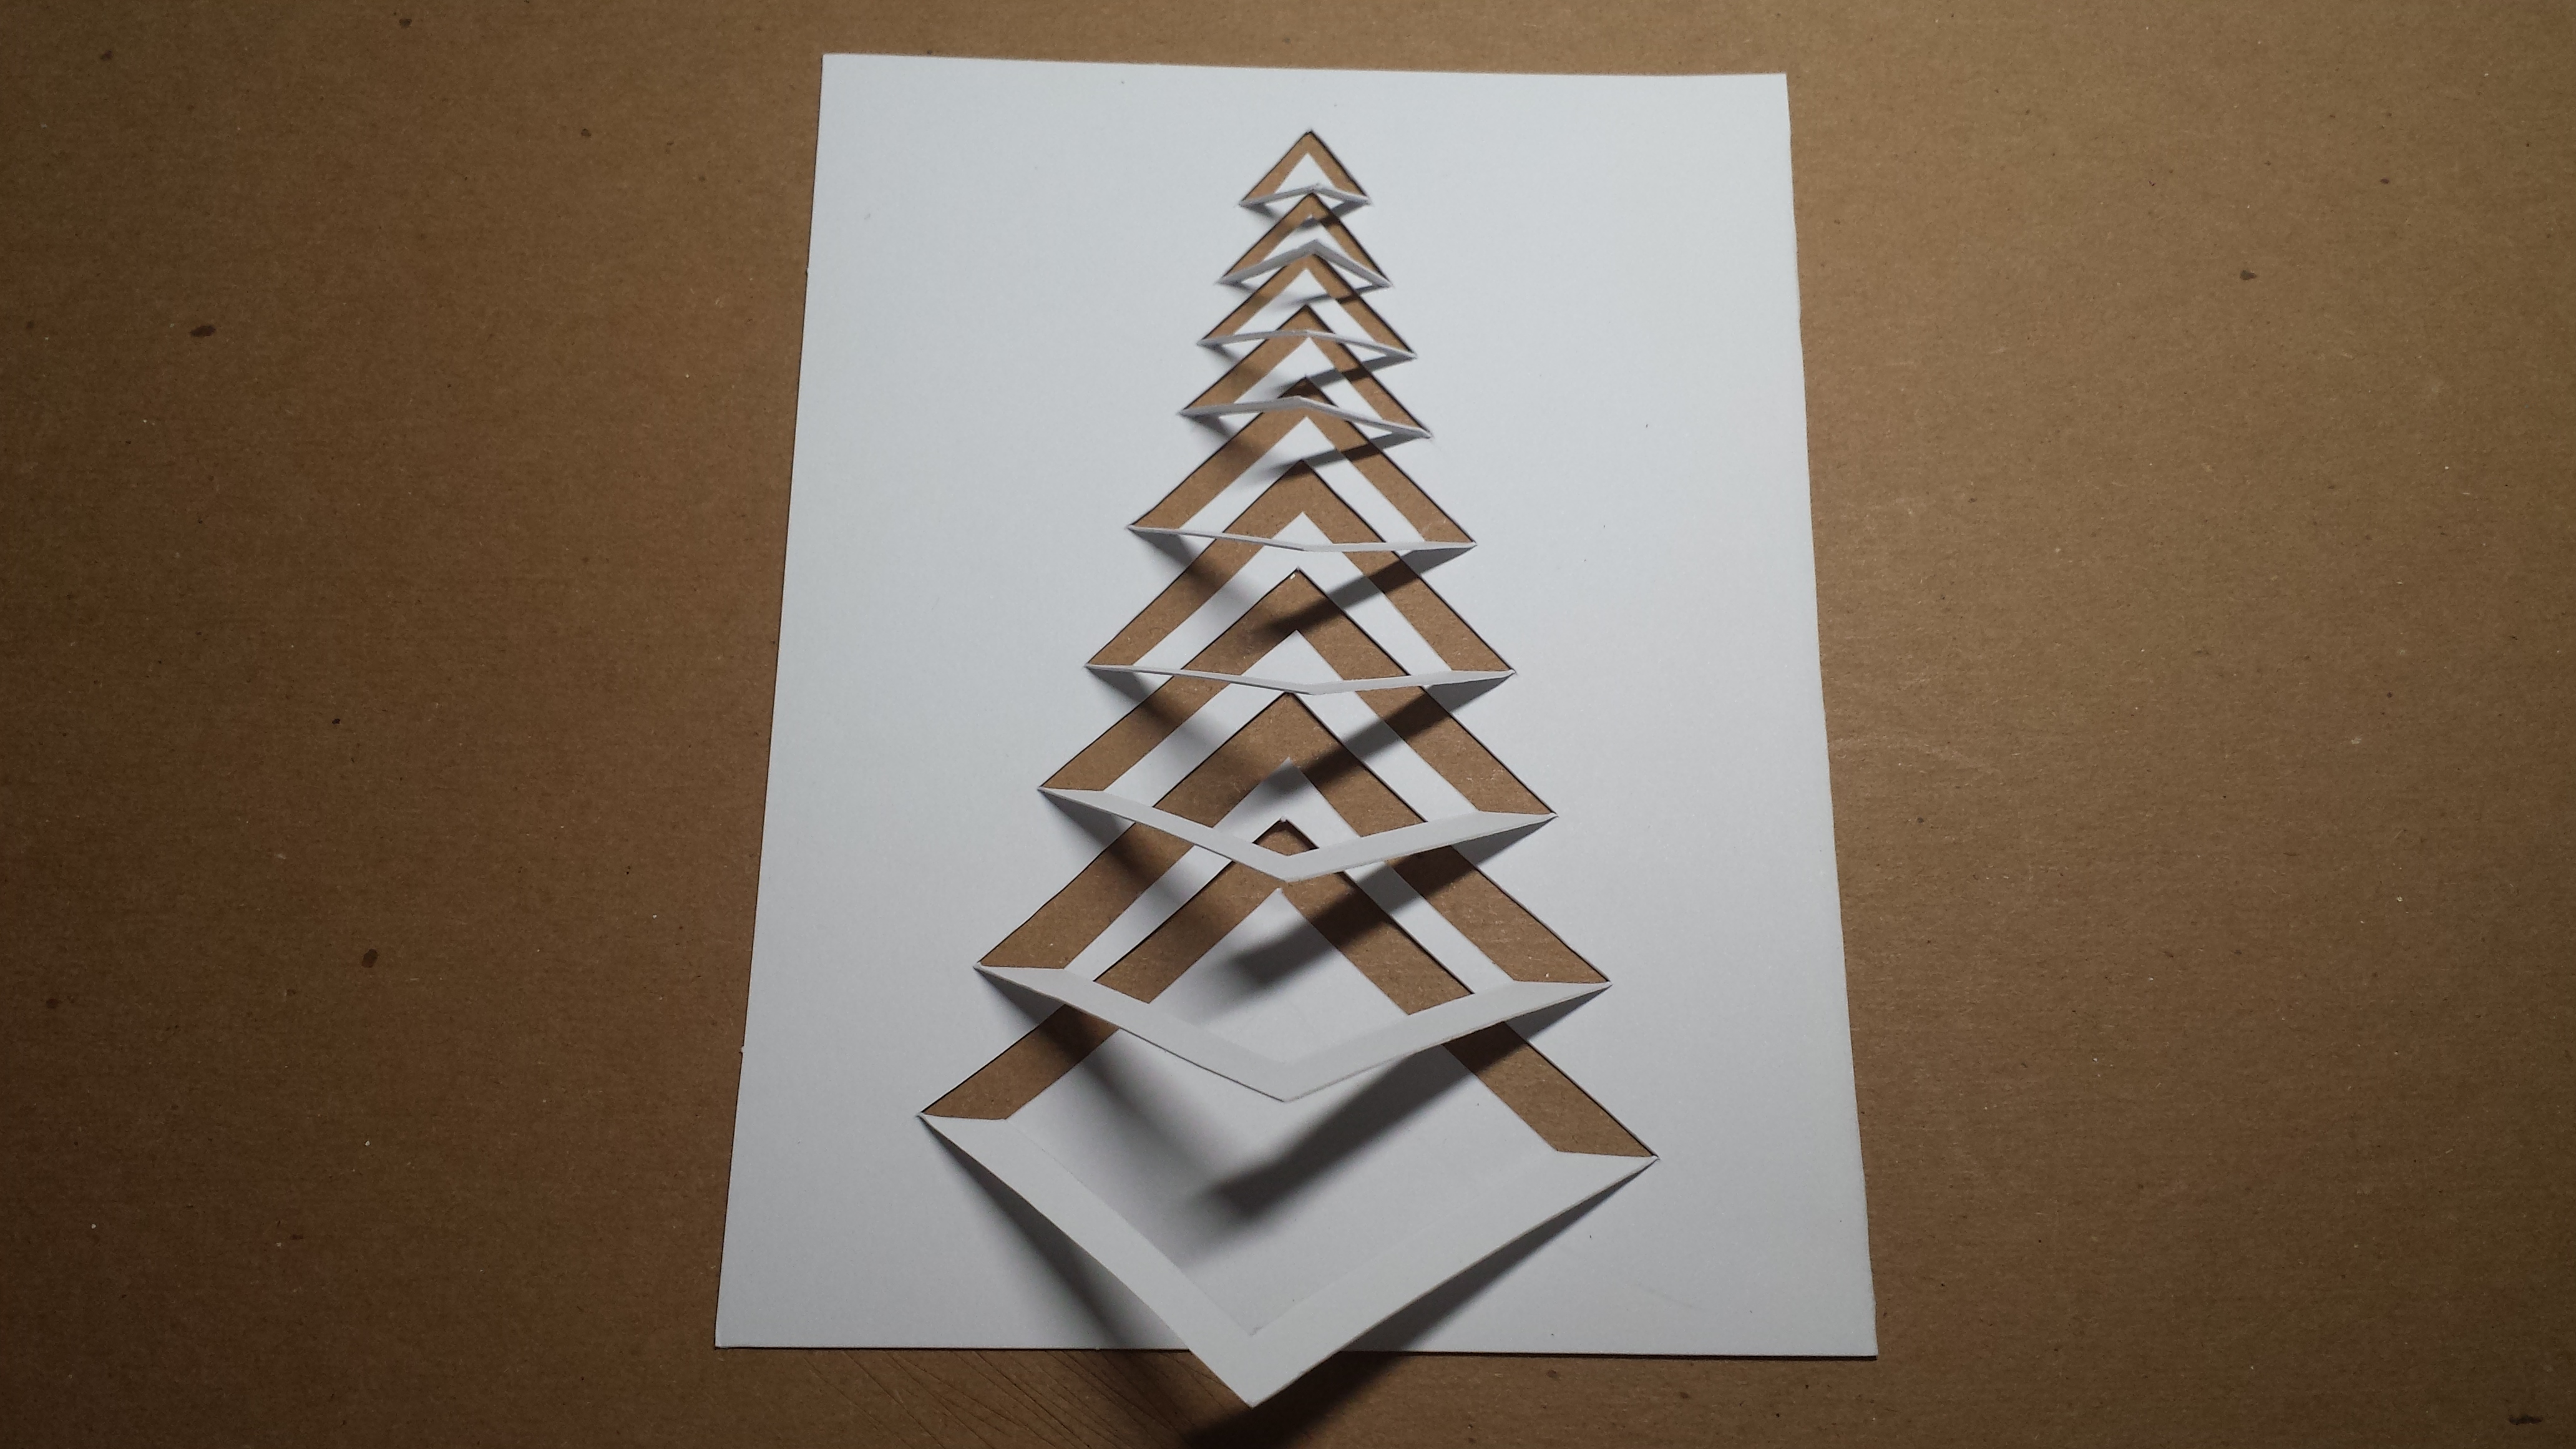
5. Glue your tree onto the piece of green construction paper. You can choose whether or not to glue down the individual triangles. If you don’t, it makes the tree look 3D and if you do, it makes the tree look like it’s covered in fresh snow. Then you can add a red or gold star to the top of the tree with a marker if you’d like to make it a Christmas tree.

CARD 2
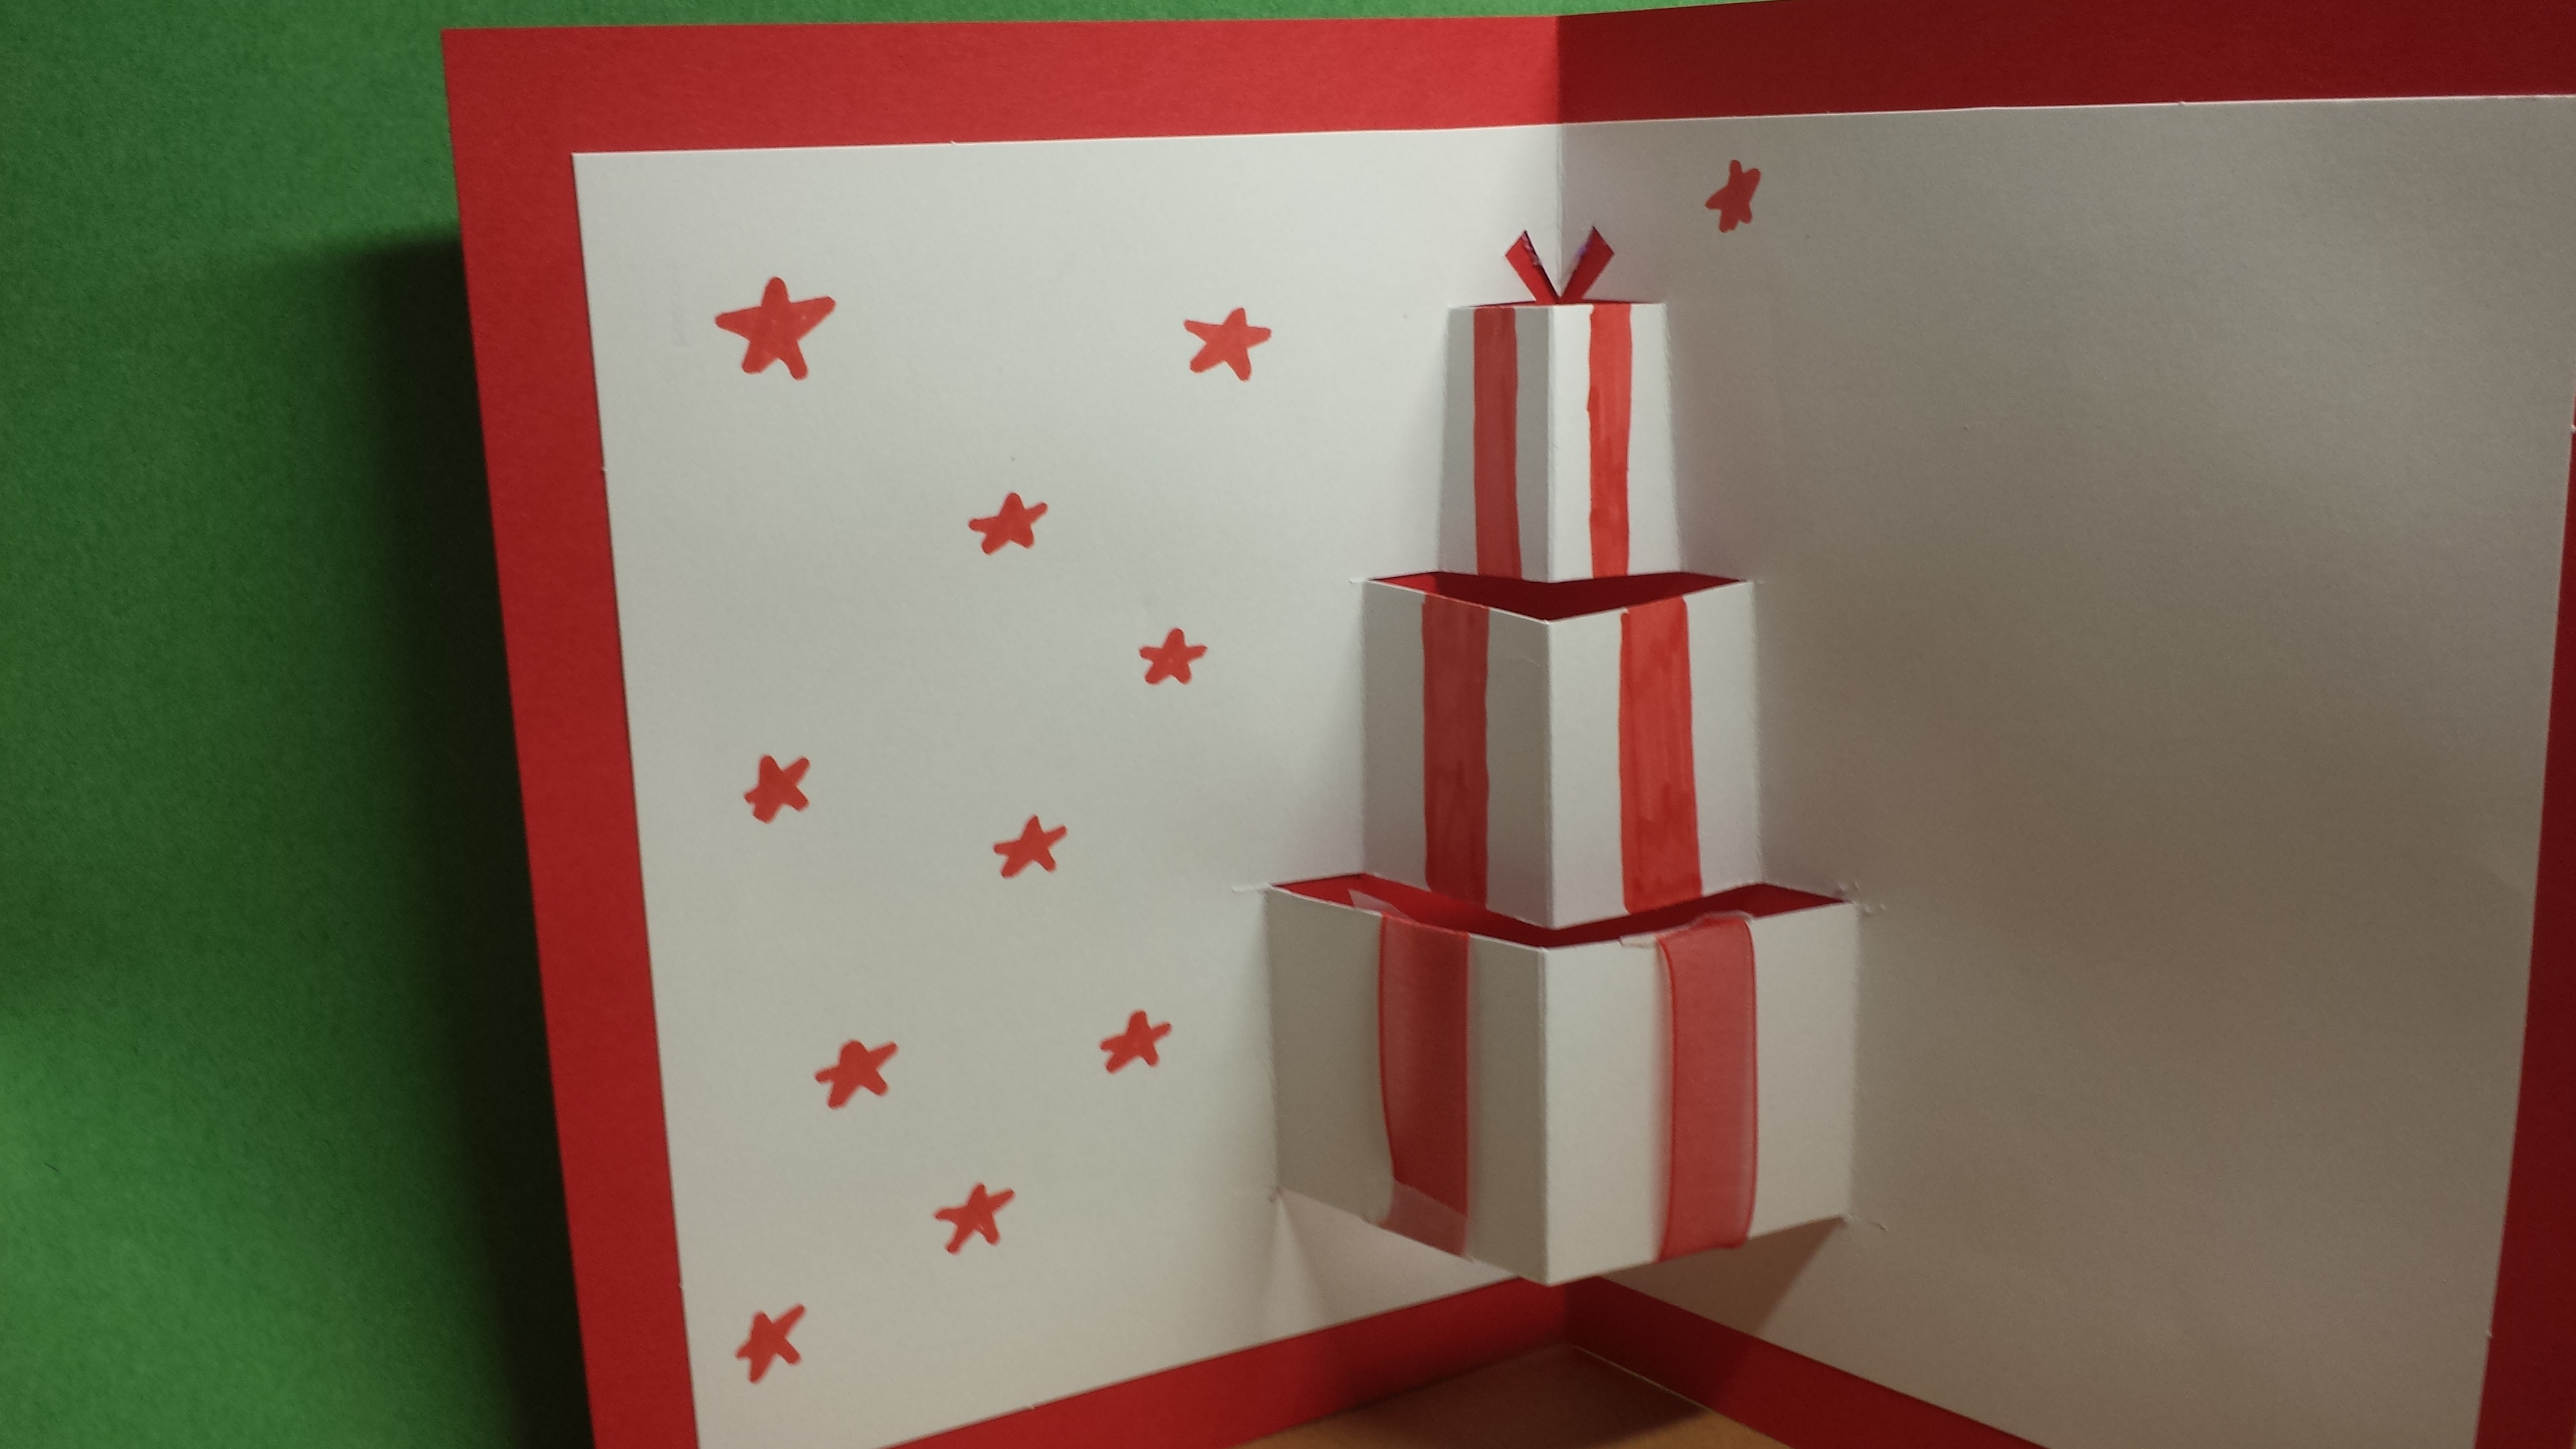
Supplies needed: red construction paper, white cardstock paper, red marker/ribbon, scissors, pencil, glue
- Make sure your white cardstock paper is smaller than your red construction paper when both are folded in half. If it isn’t, cut it so it’s small enough to fit inside the red construction paper.

2. Then draw this design (in the photo below) on your piece of folded white construction paper on the crease side.

3. Cut along the lines that you drew, and then open your card up. It should look something like the image below.
4. Press the back of the first box inward, and fold over one side of your card in order to fold the paper into a box as seen below.
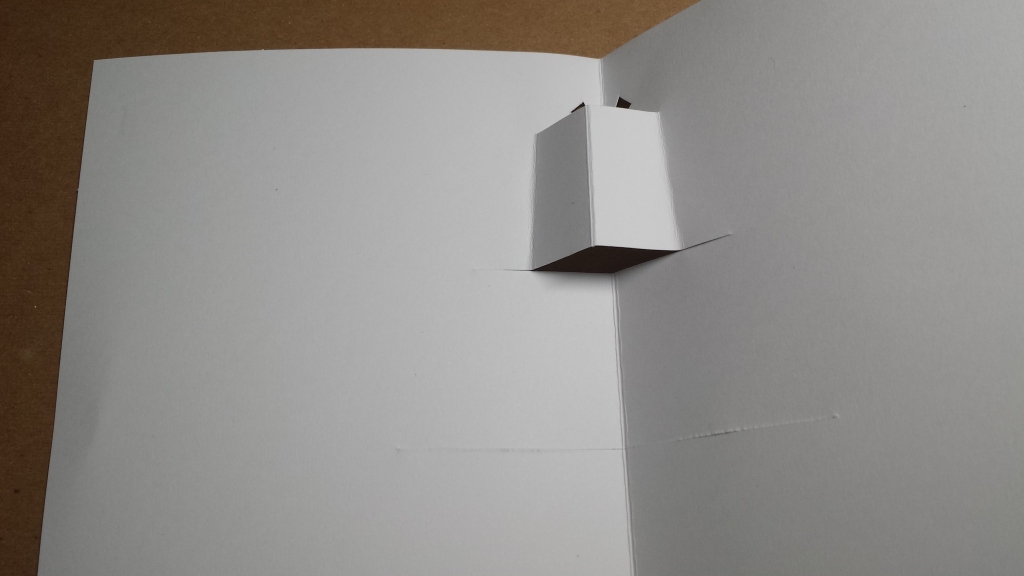
5. Repeat this process two more times for the remaining presents
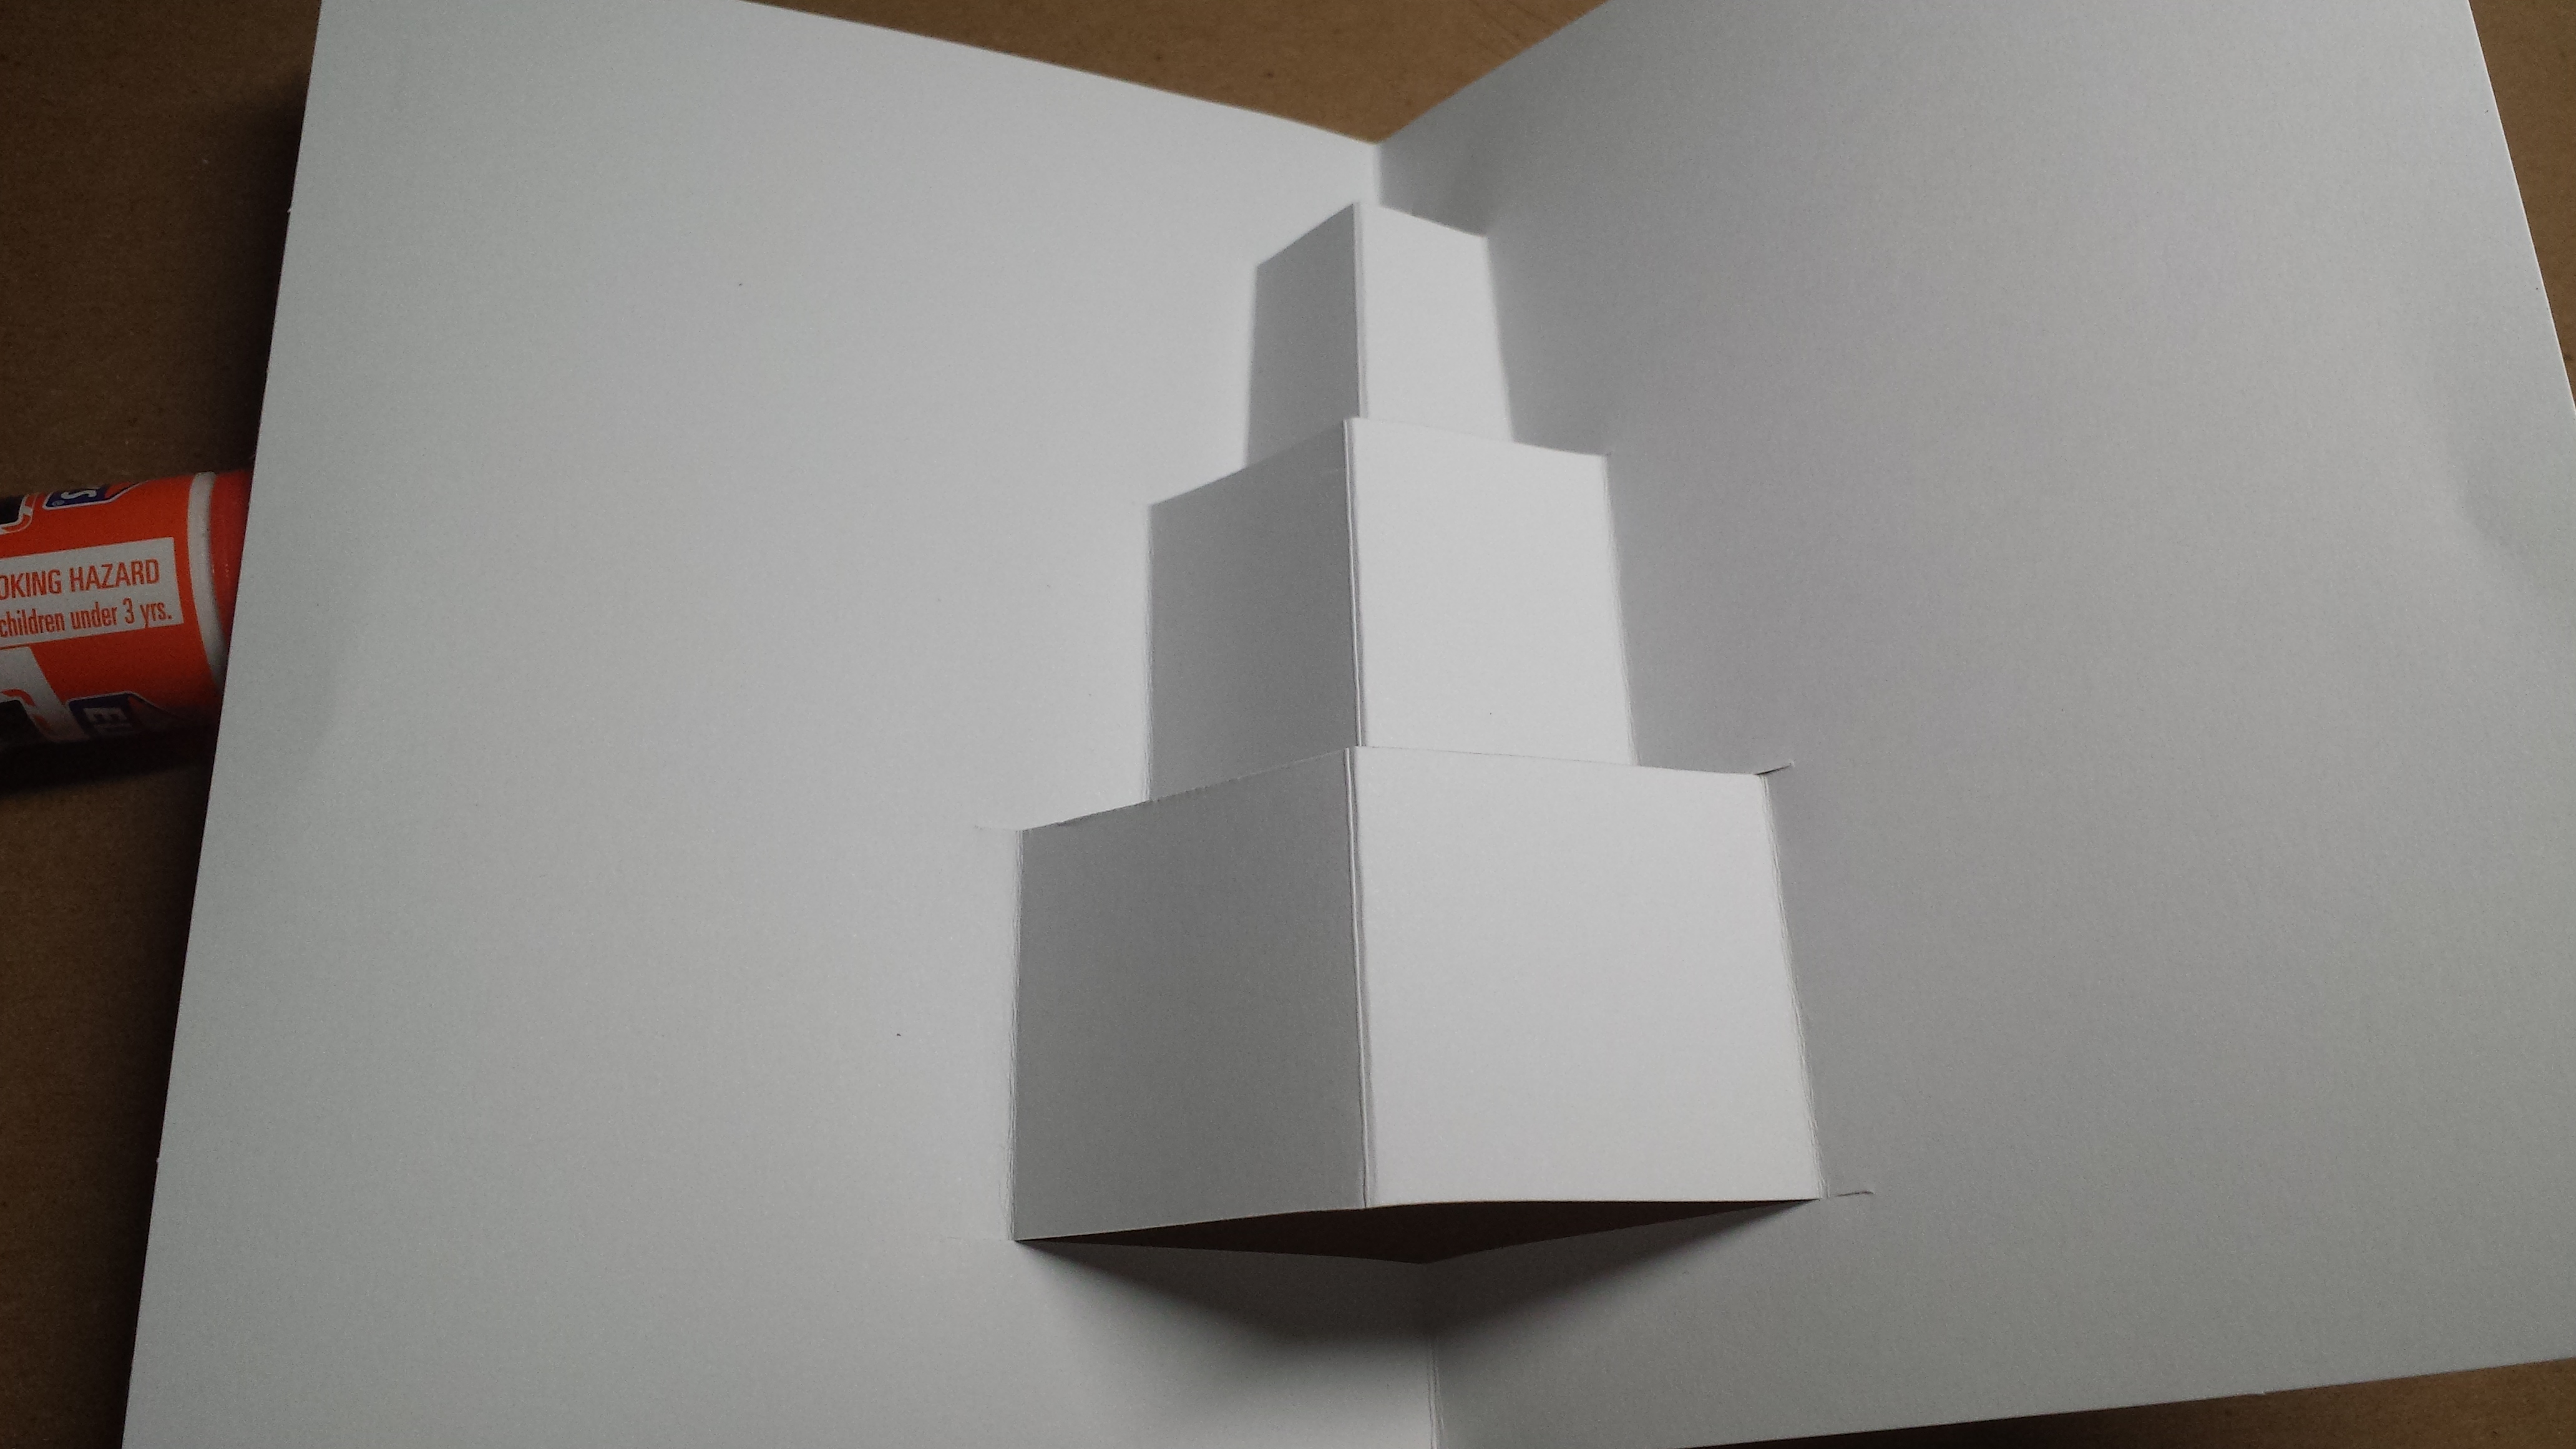
6. You can now decorate your presents either with red ribbon or with a red marker. I’ve done both below for you to see both examples.
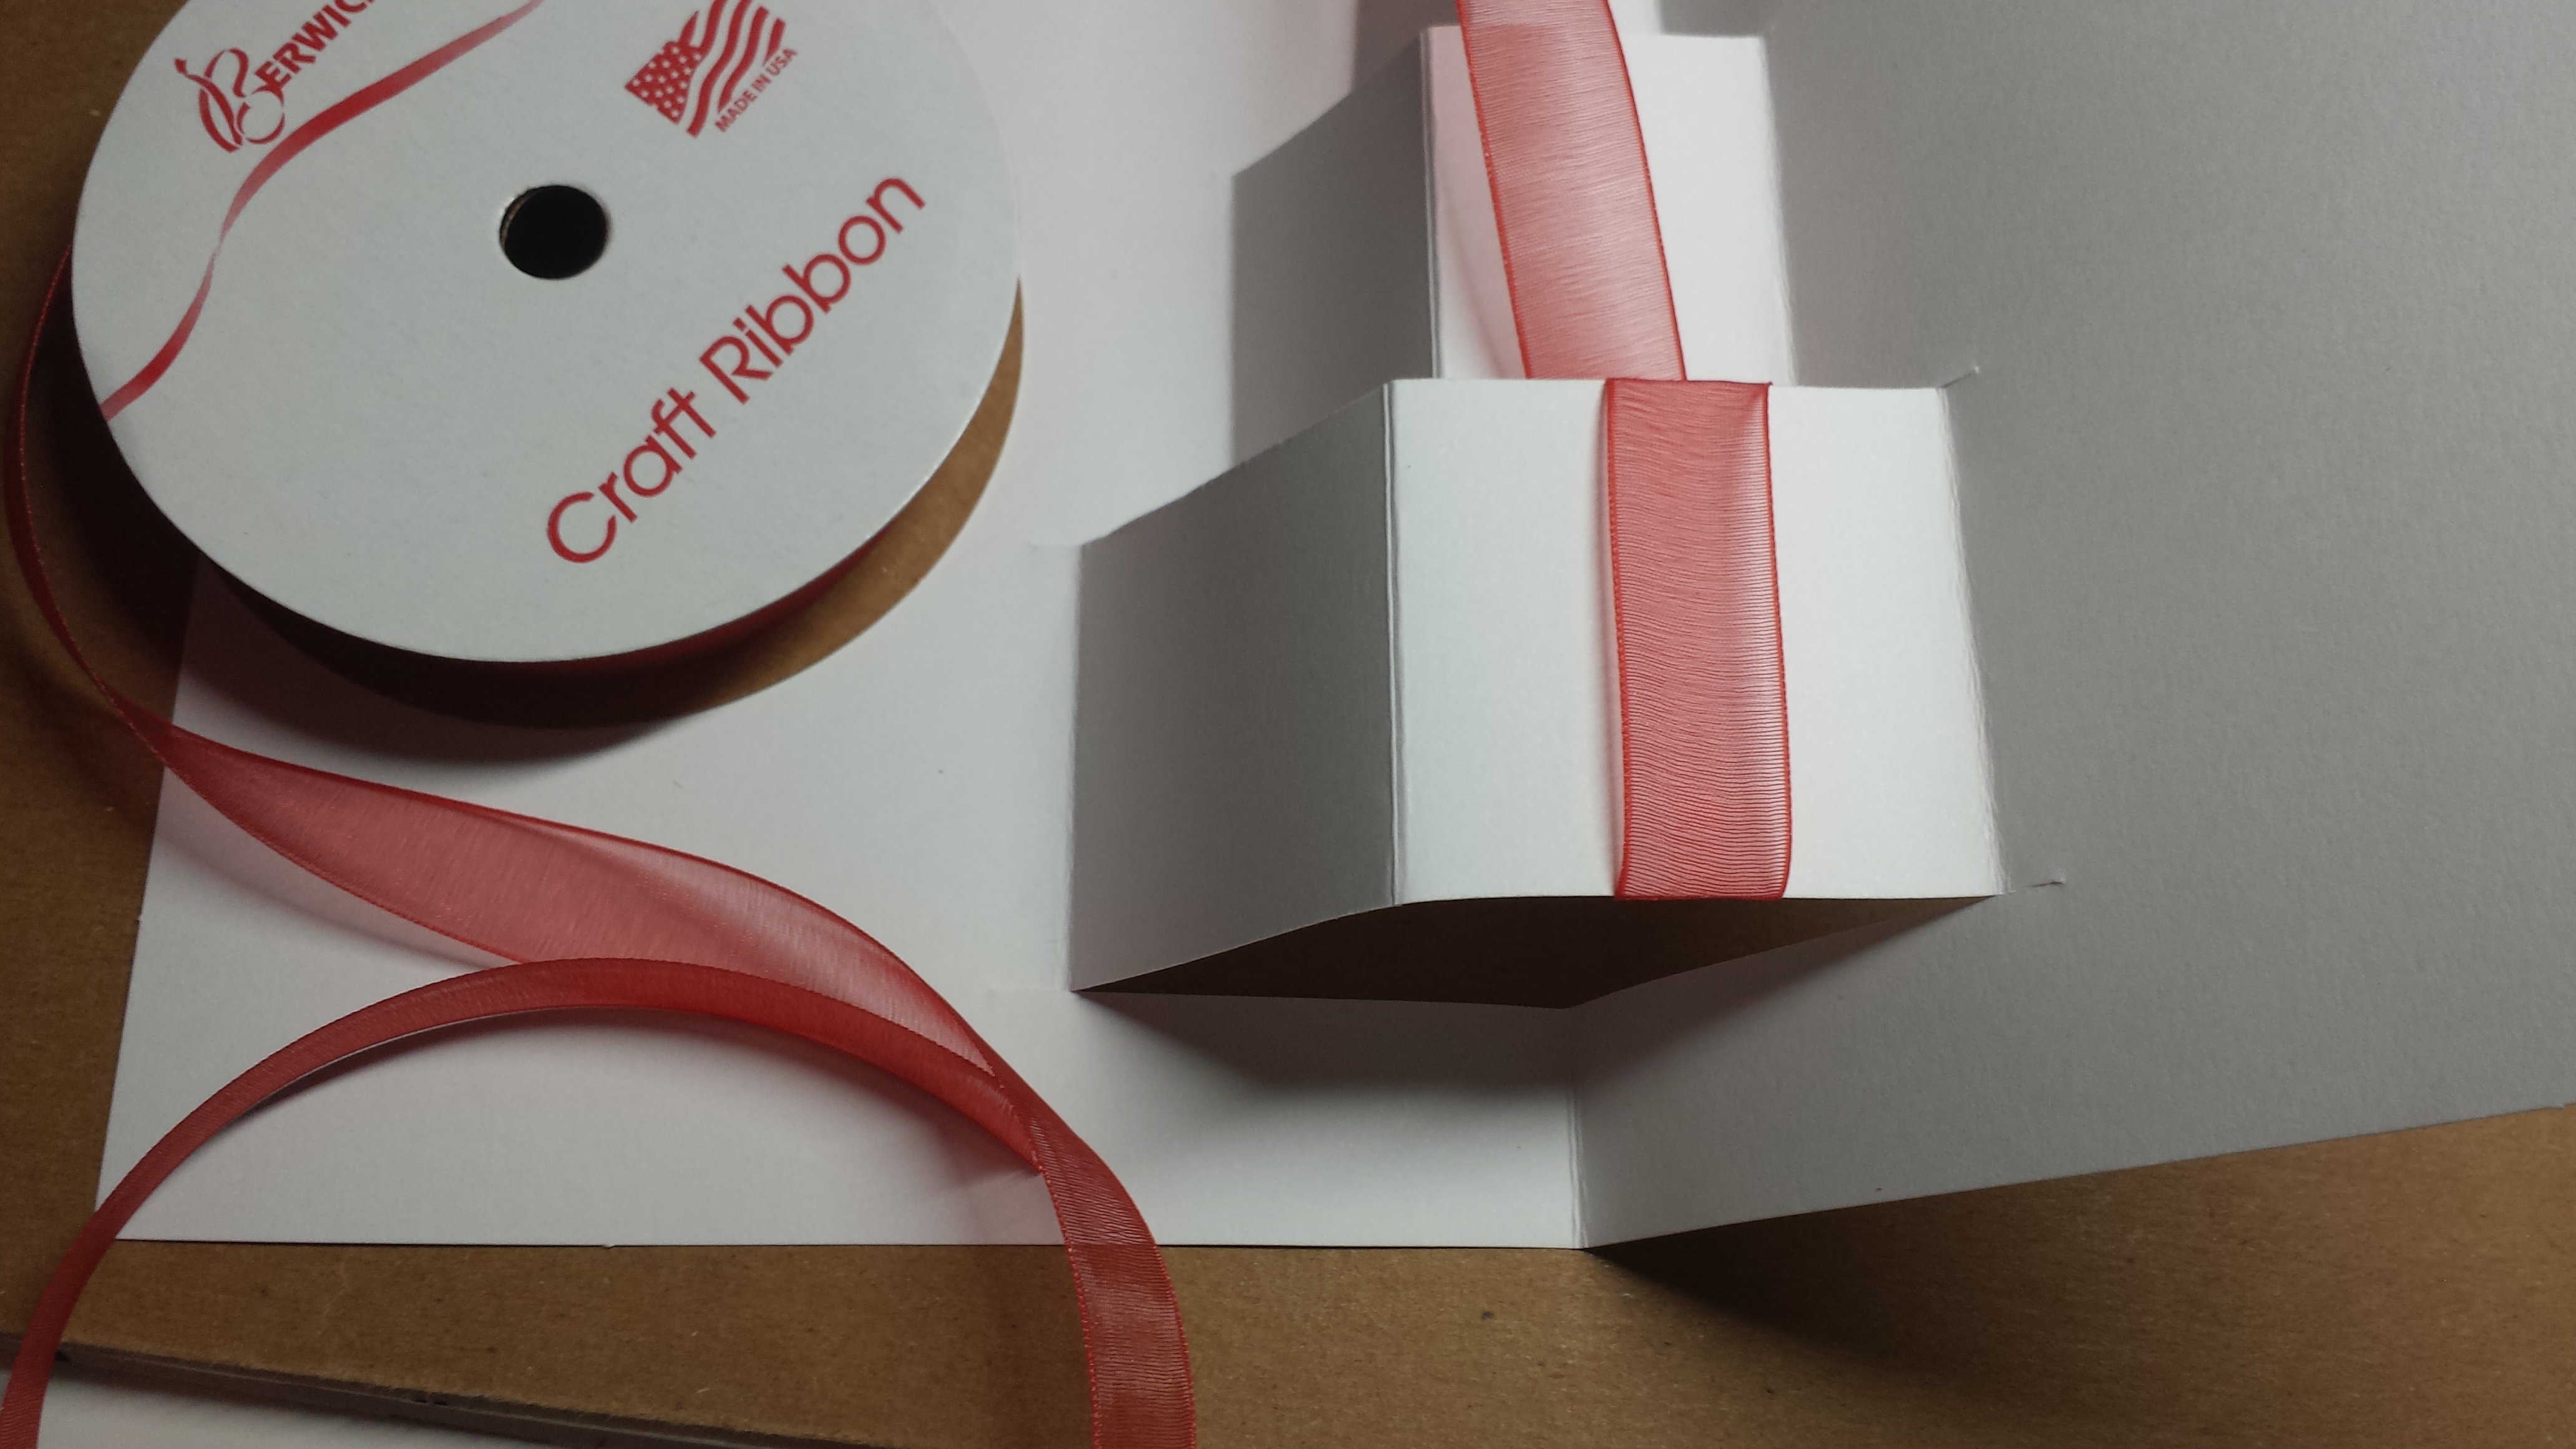
7. Glue the flat sides of the card around the presents onto the inside of the red construction paper card and decorate as you please. Don’t glue down the present cutouts because we want them to maintain that 3D look.

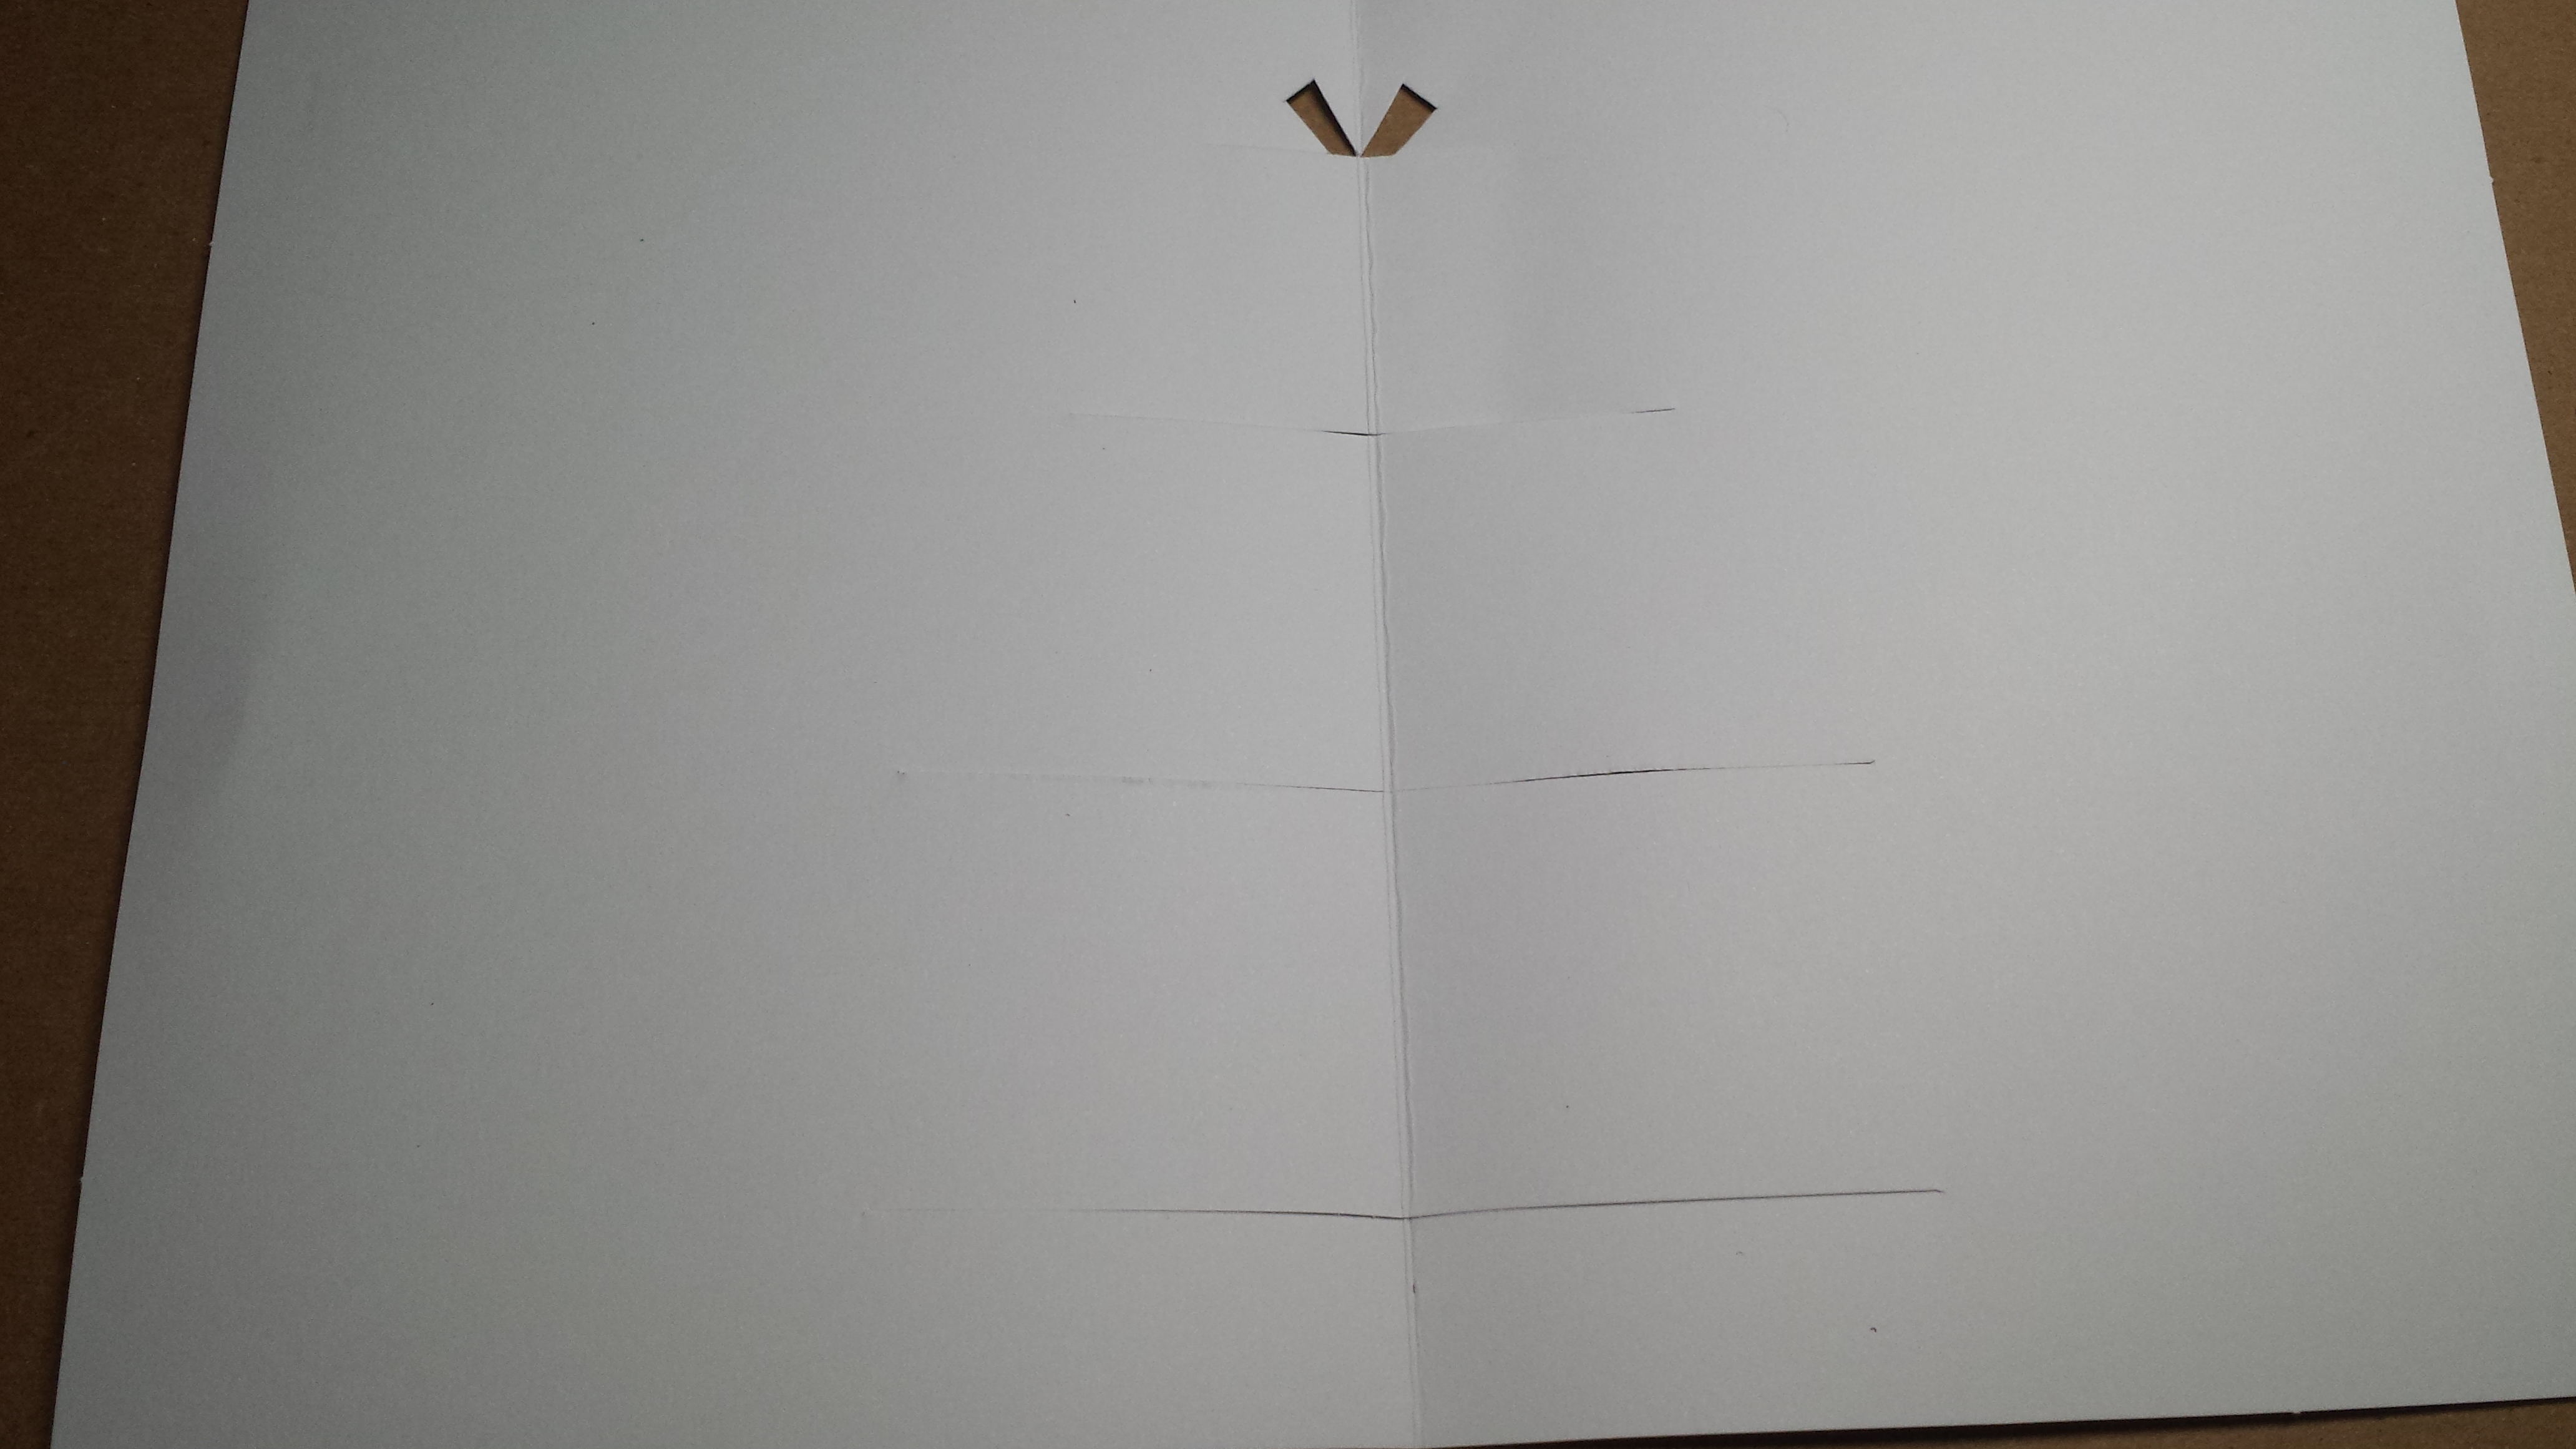
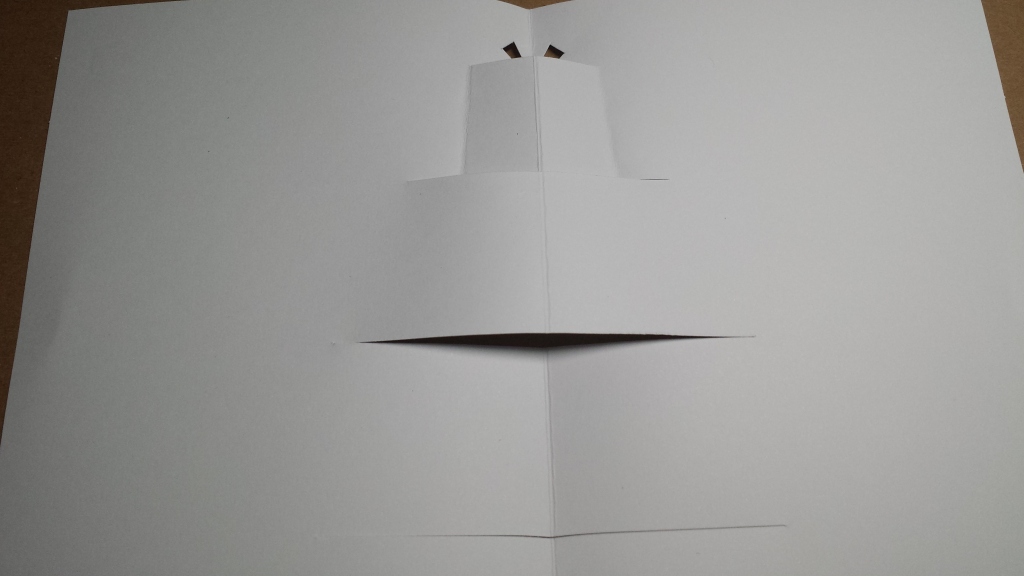
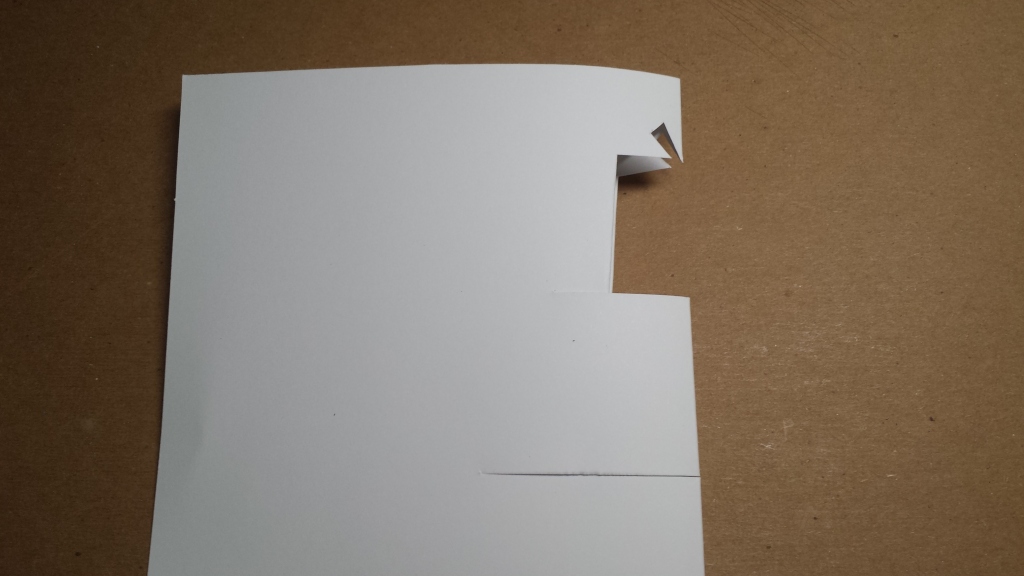
CARD 3
Supplies needed: scissors, pencil, white cardstock paper, green construction paper, glue
- Make sure your white cardstock paper can fit inside the green construction paper when both are folded in half. Cut if necessary
2. Take your white cardstock paper folded in half and draw on the design seen in the photo below.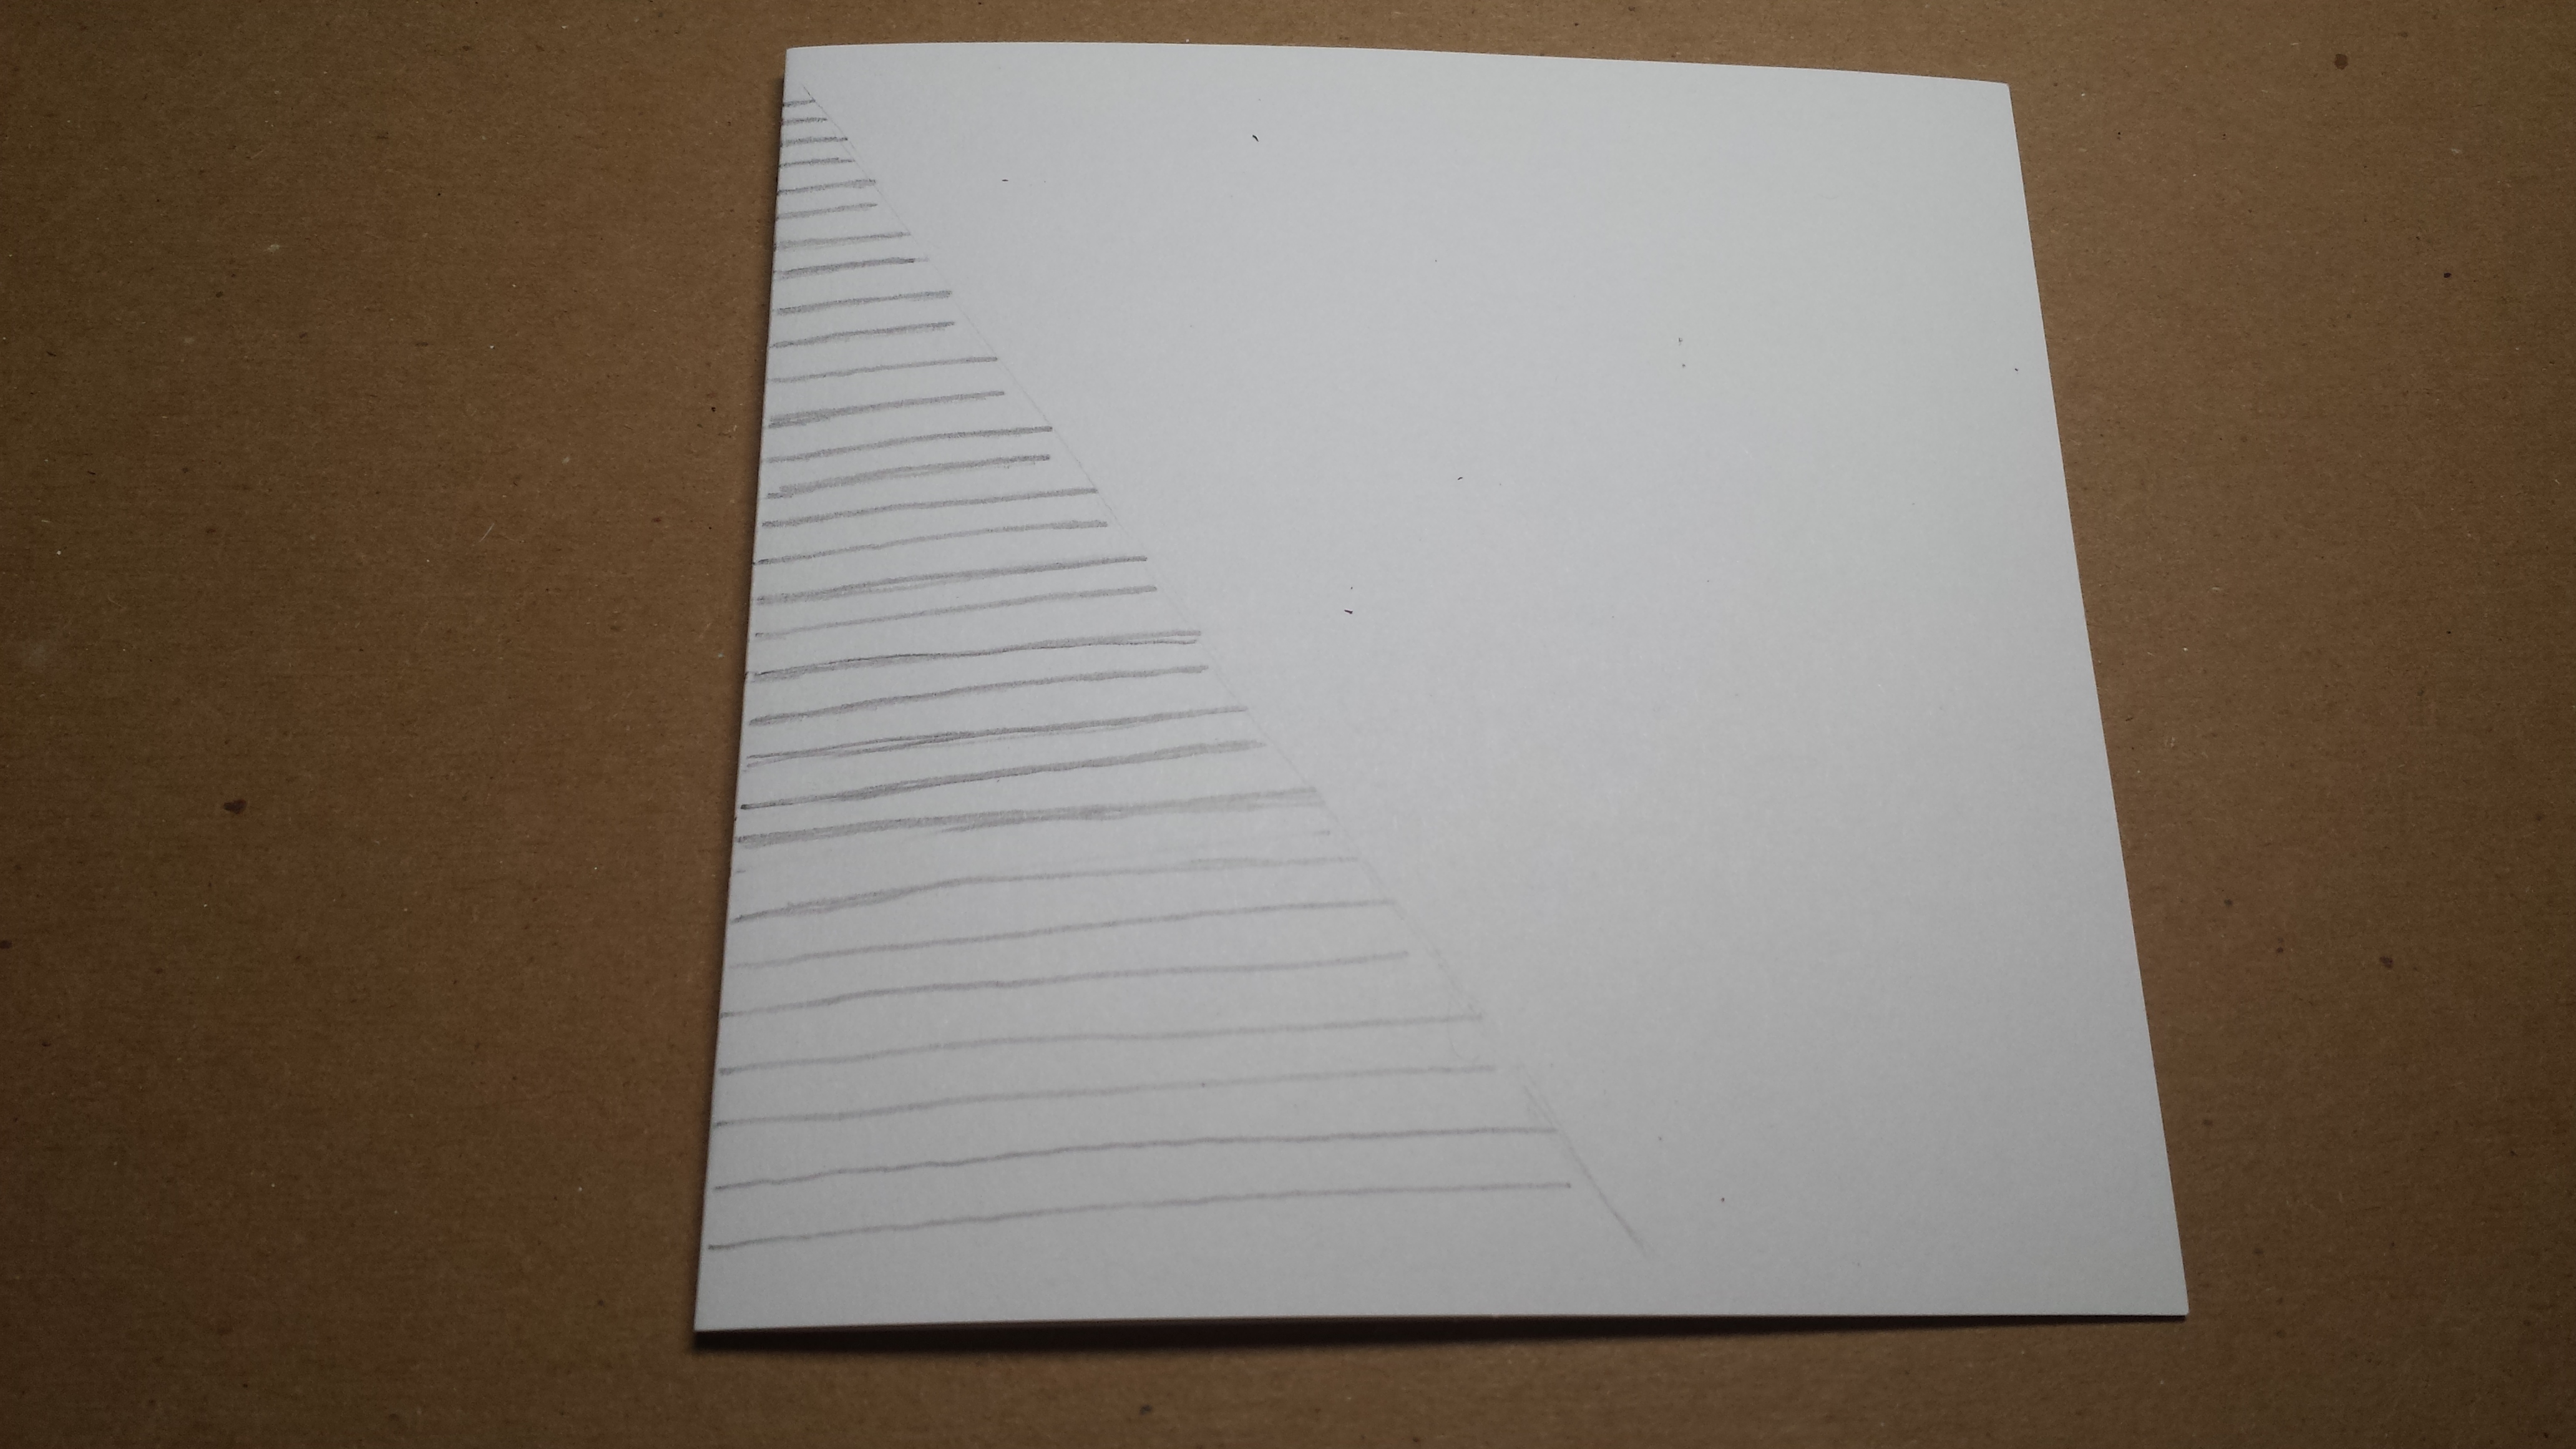
TIP: draw a half of triangle first (a diagonal line to form a right angle triangle) and draw your first line in the pair to the line, and make the second line as long as the first one so the ends you fold will be squared off (see image below).
3. Cut along the horizontal lines you drew. It’s important that they be as straight as possible!

4. Open the card up, and using a pencil, lift every other paper slit up and fold the card to the side to make them stand up. Fold each one individually at the ends if needed.
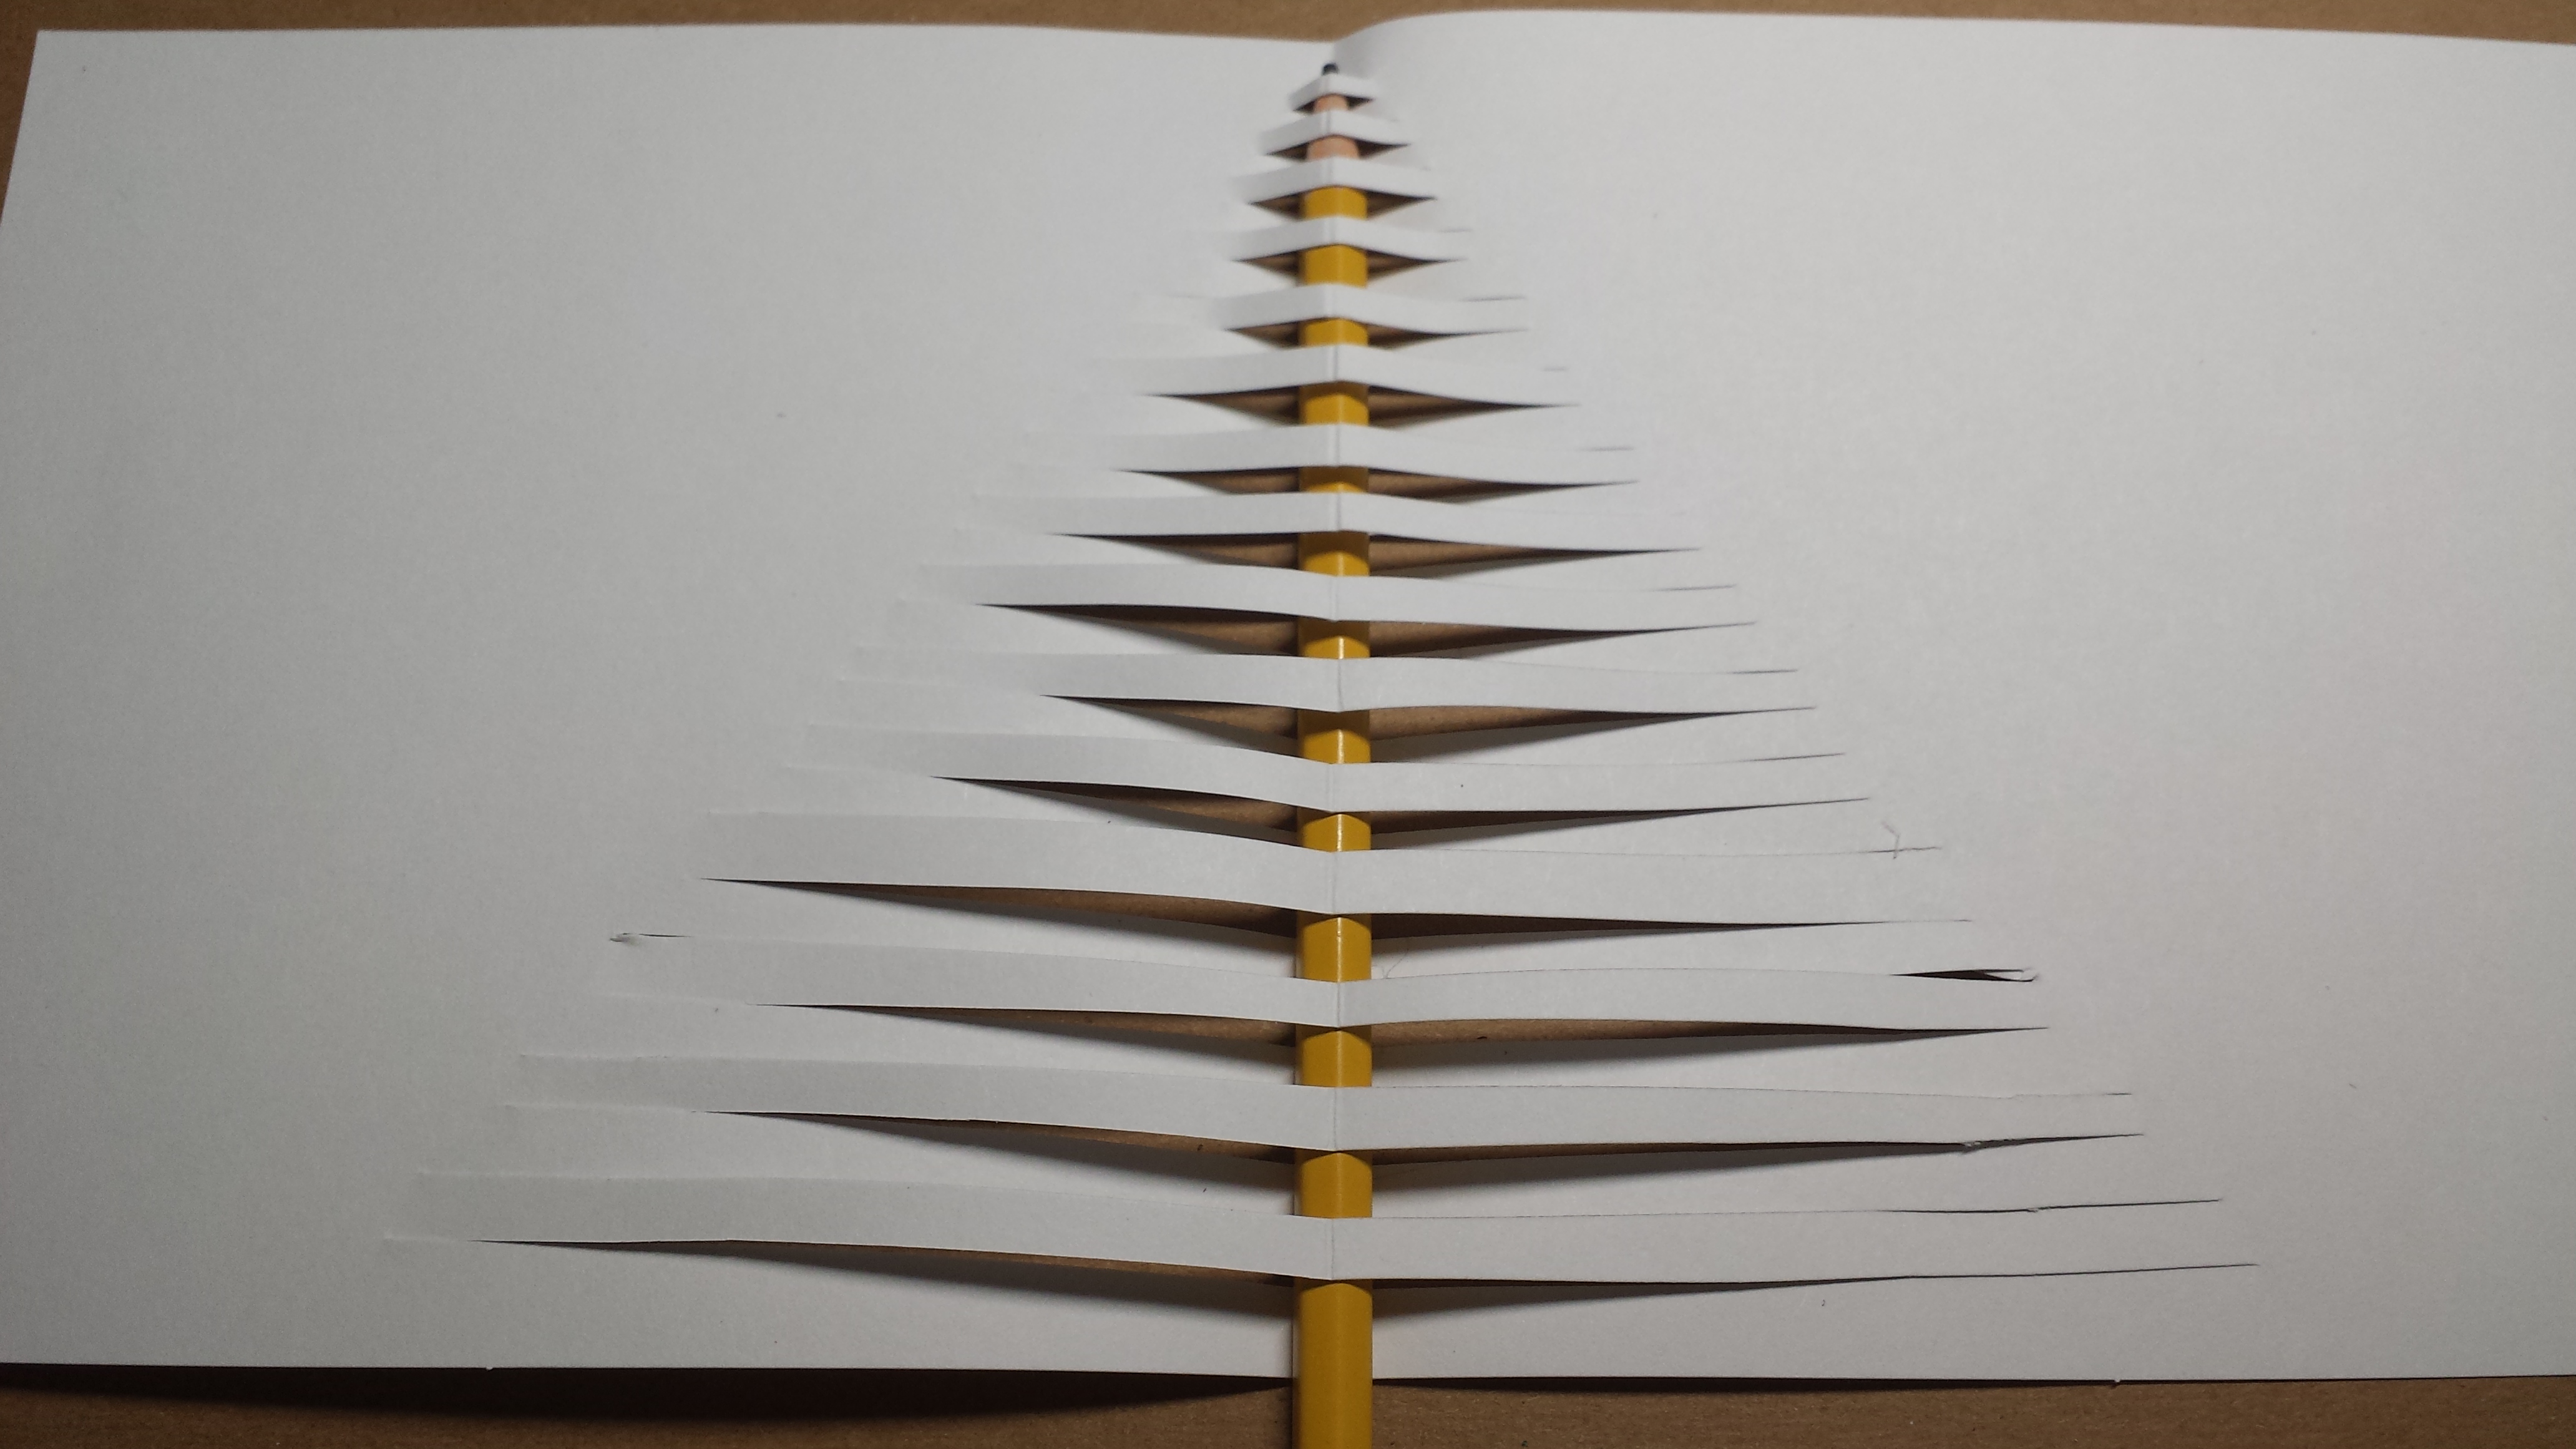

5. Glue the flat sides of your card (around the white cardstock tree) to the inside of the green construction paper folded in half.
CARD 4
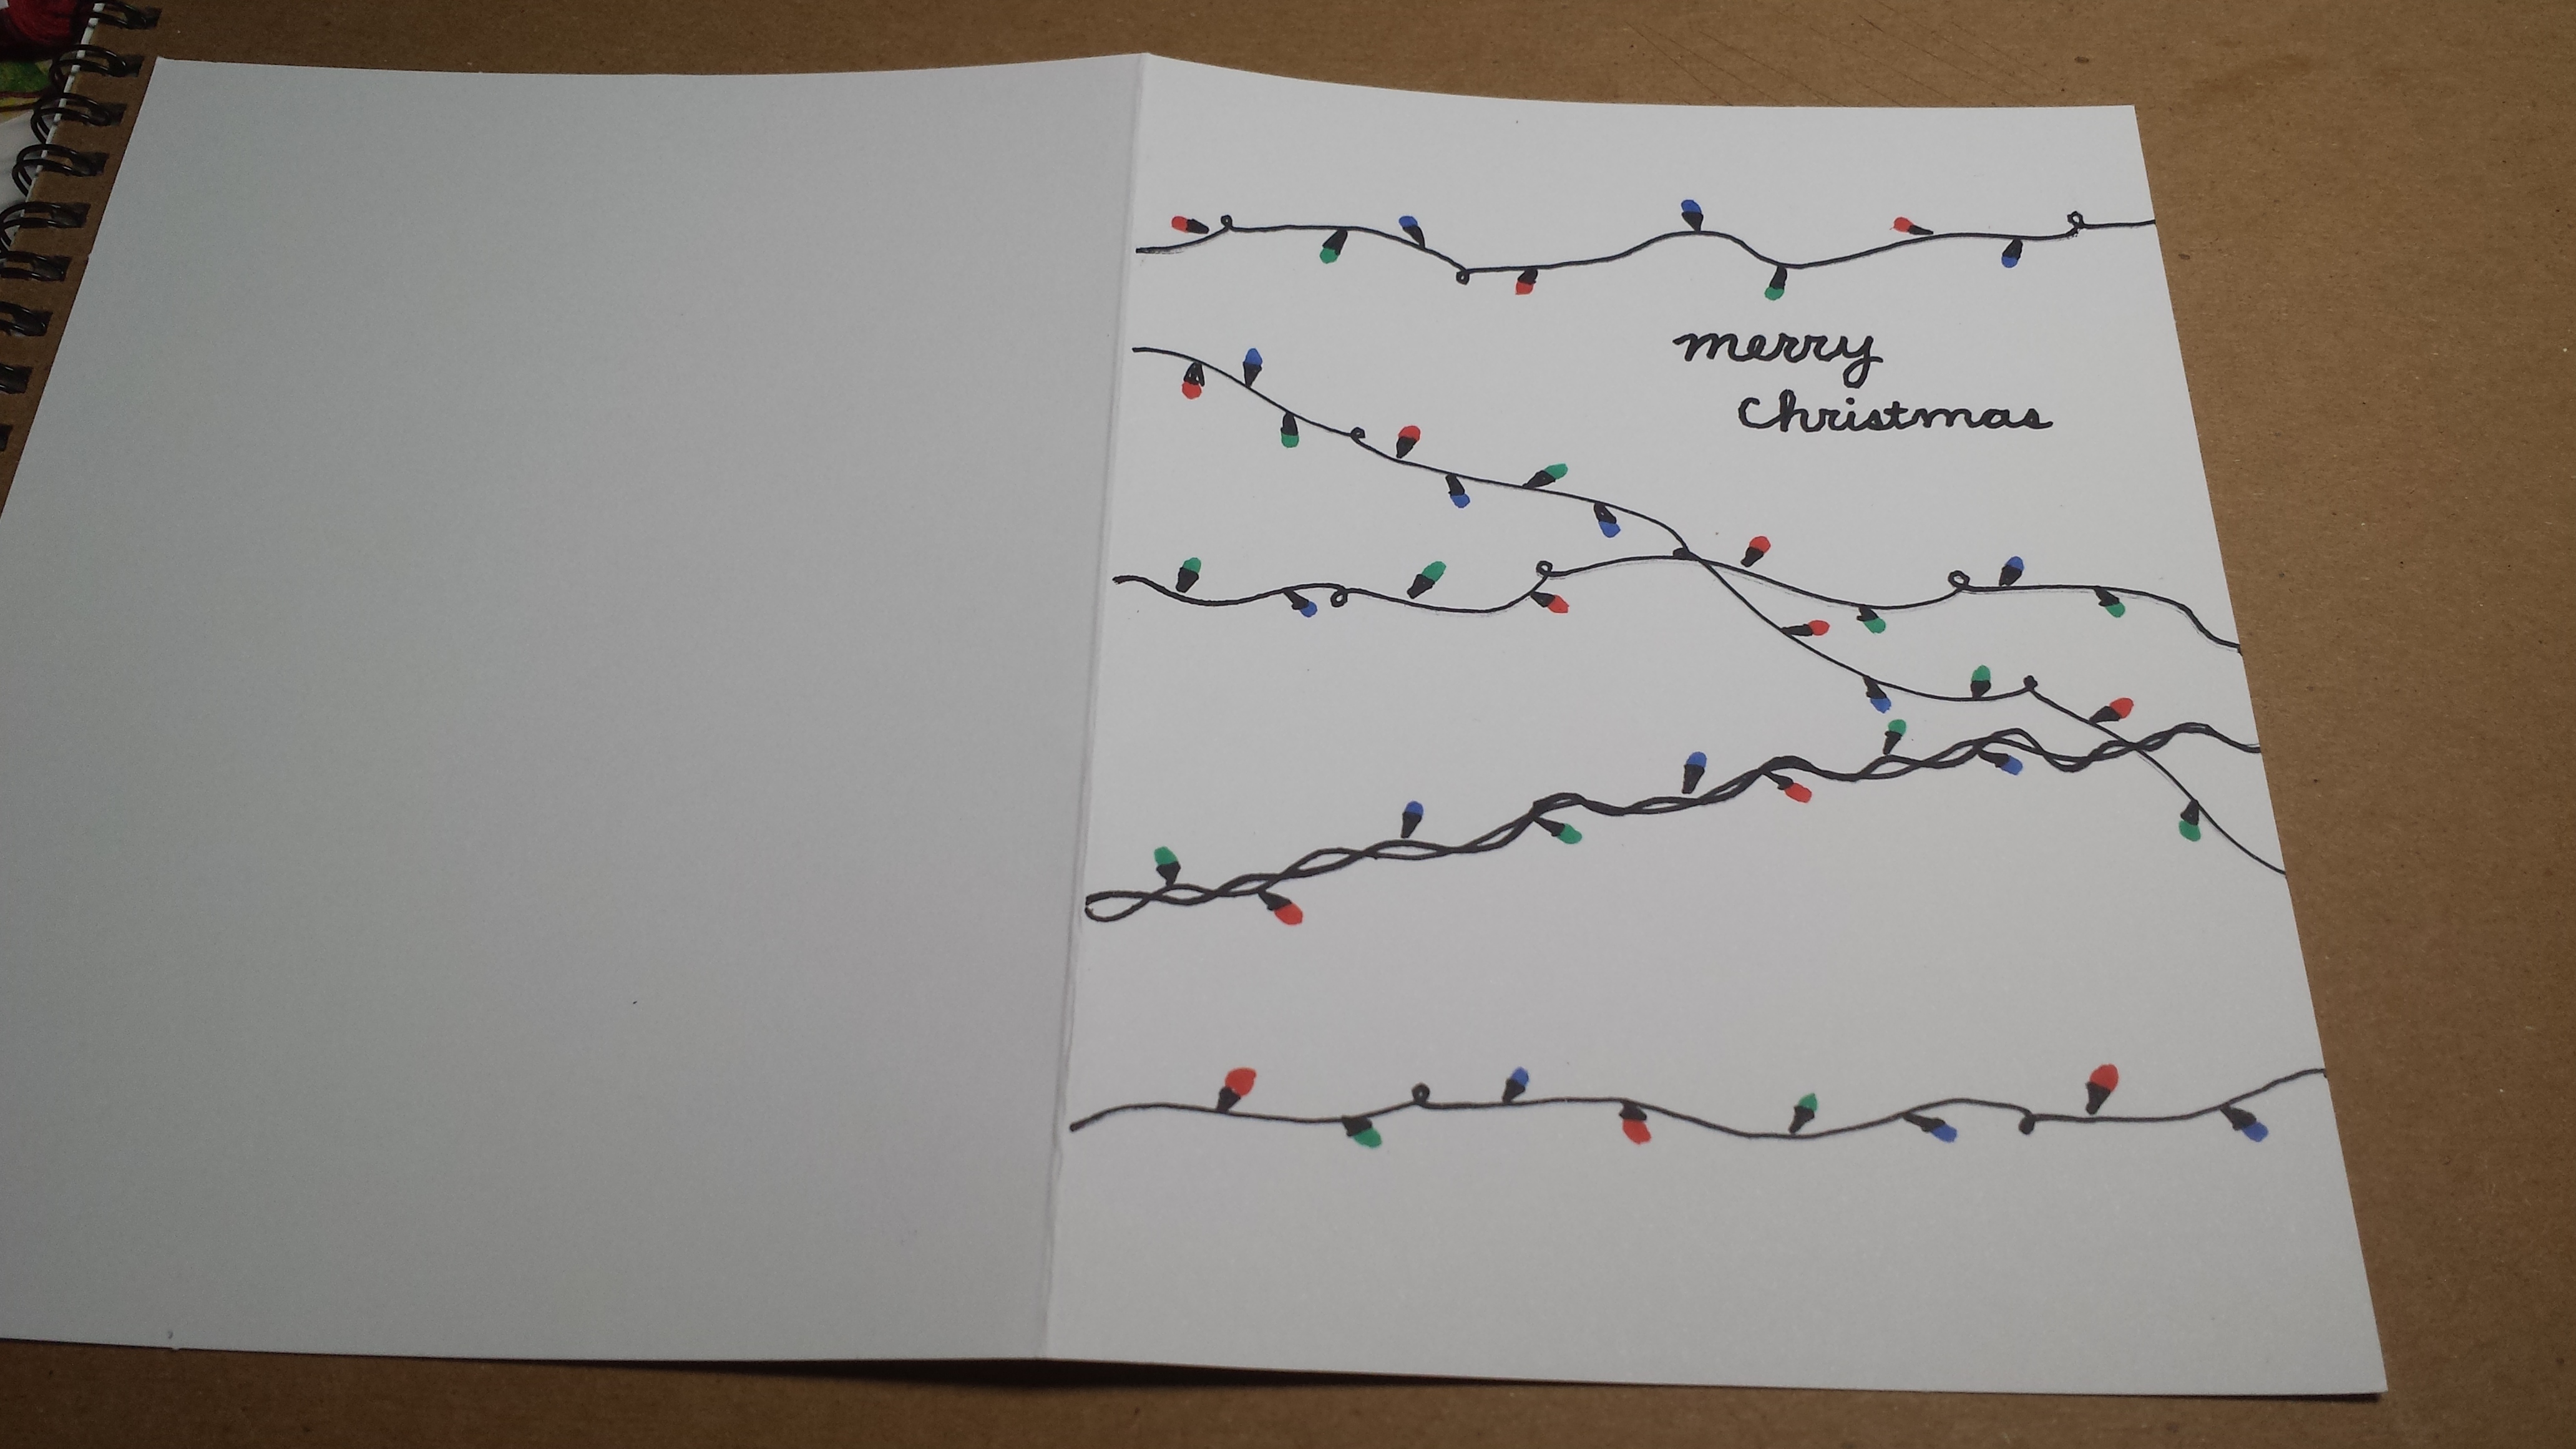
Supplies needed: white cardstock paper, sharpie, colored markers
- Fold your white cardstock paper in half
2. Draw squiggly lines along the paper to create the wire for your lights
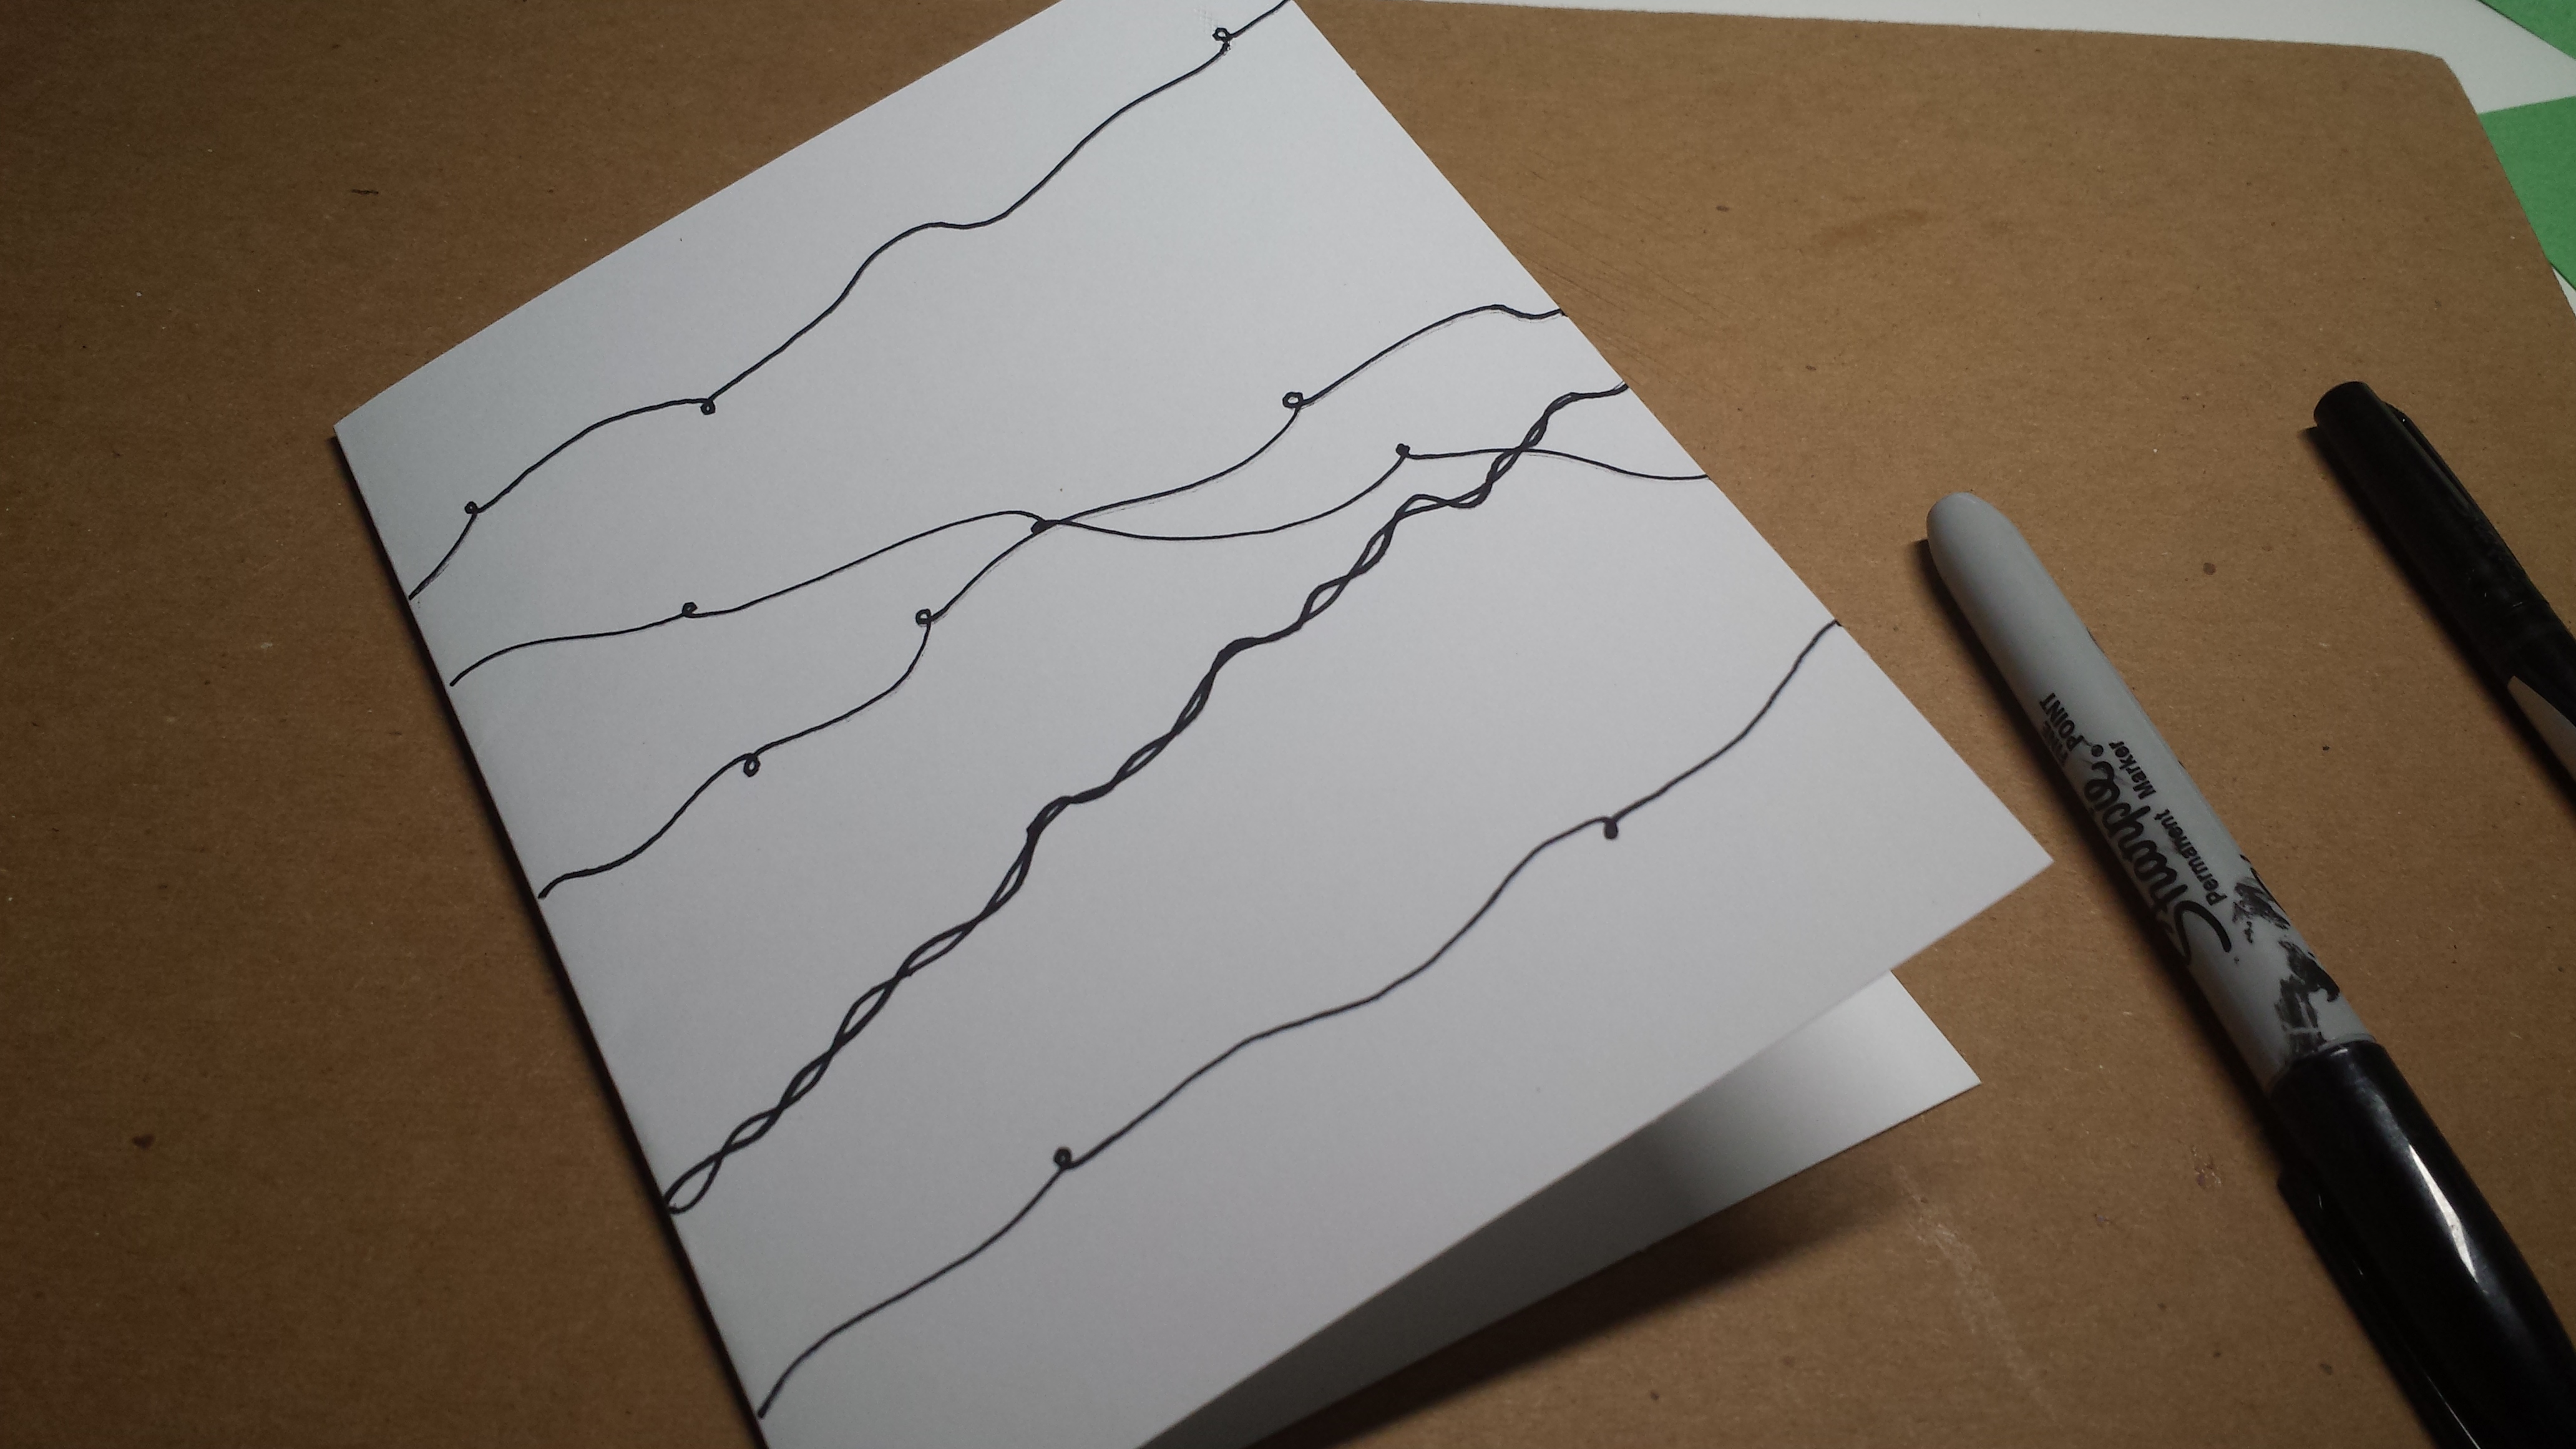
3. Draw tiny triangles along the wire
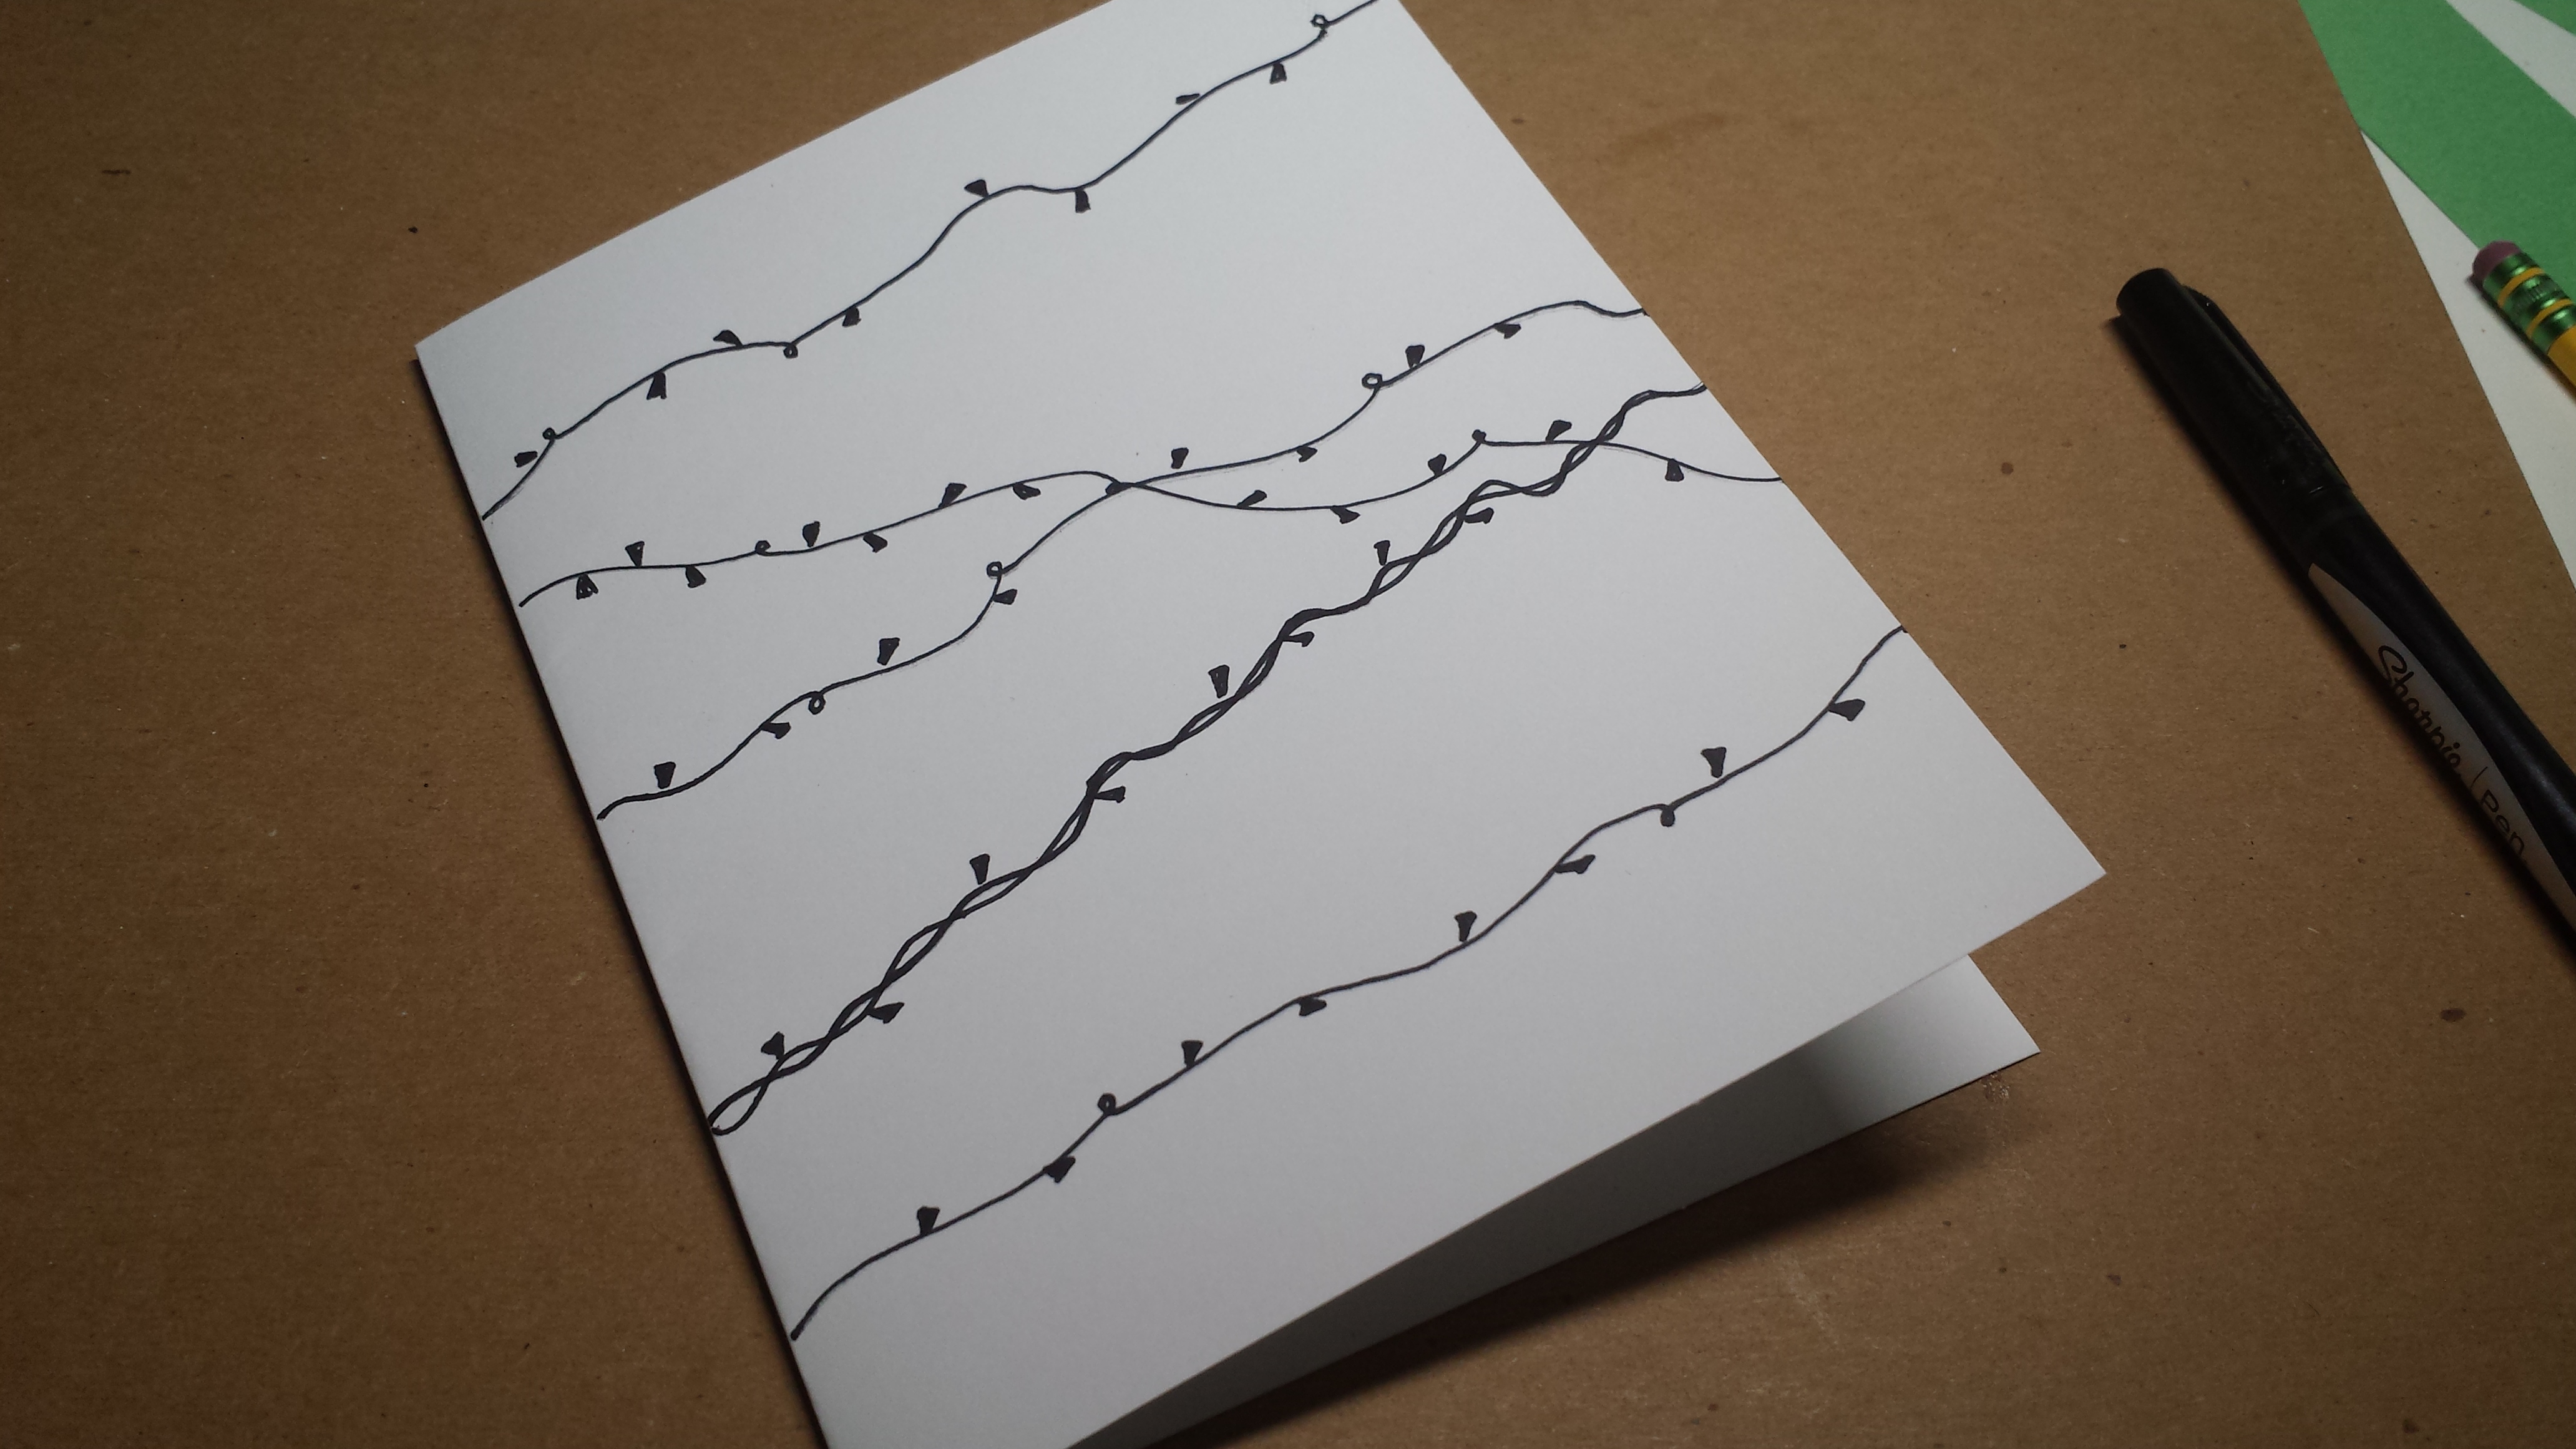
4. Add colors to the ends of the triangles in an oval shape to create the lights
CARD 5
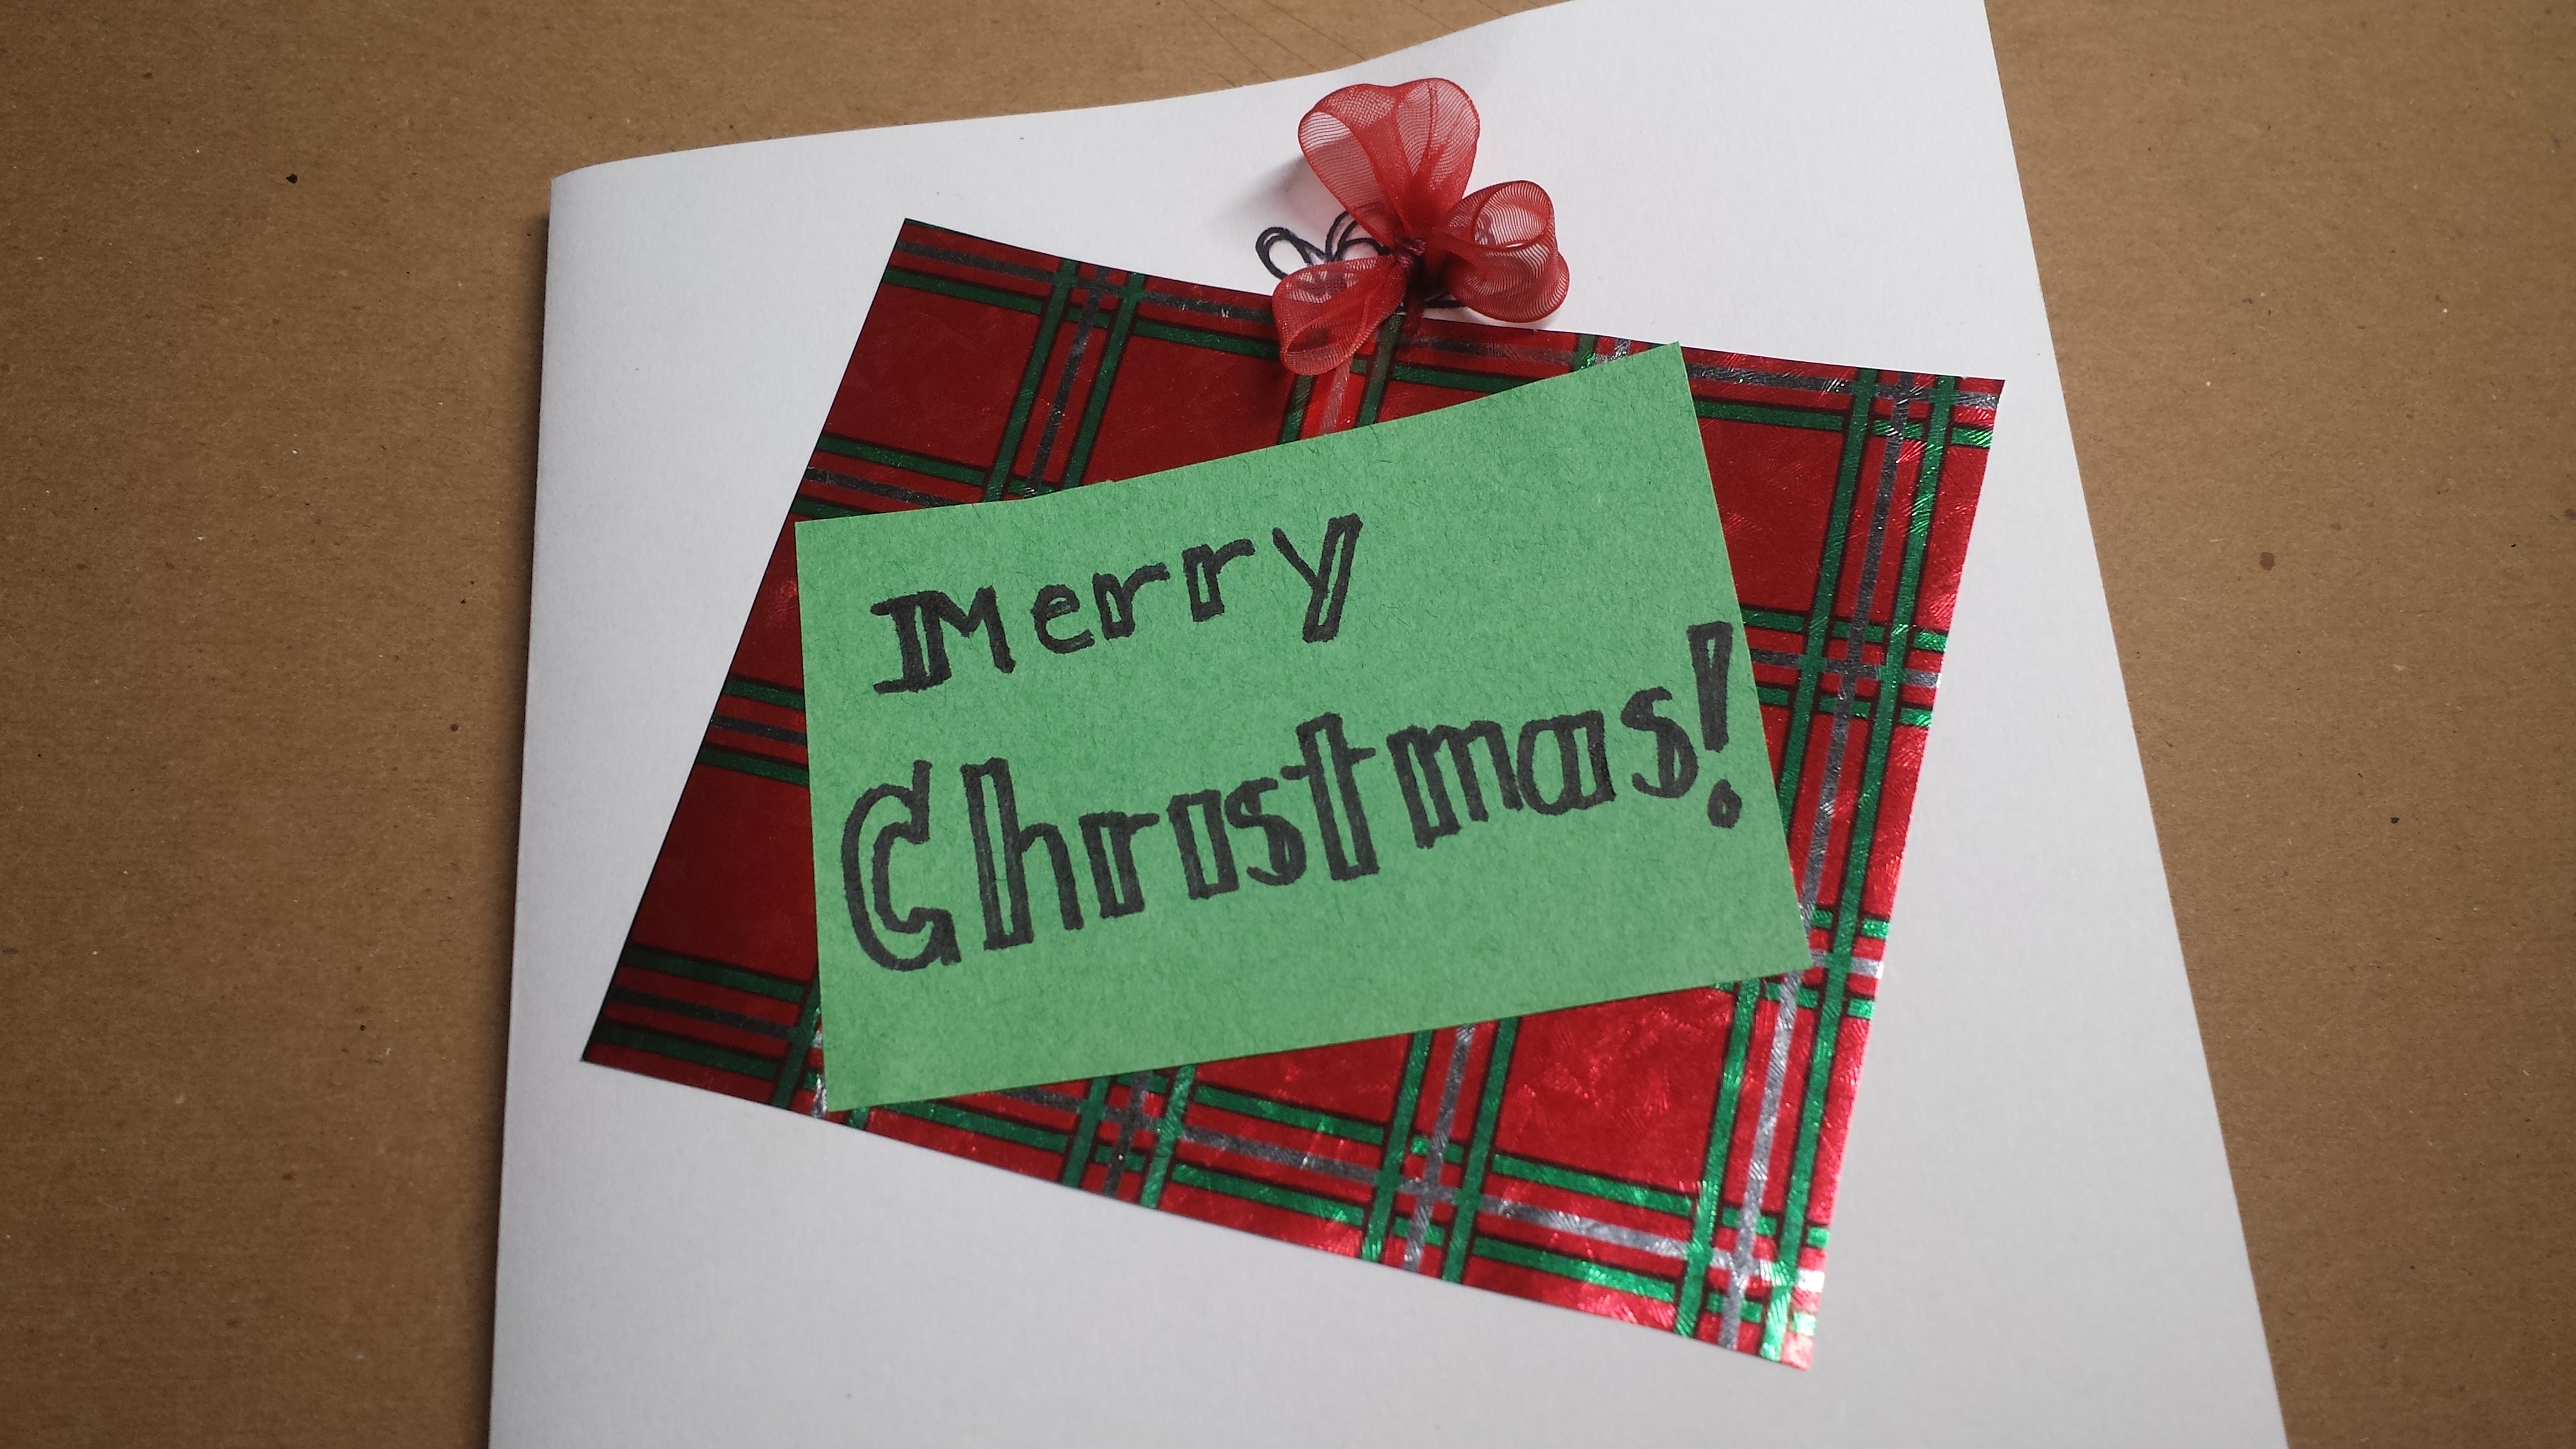
Supplies needed: scraps of ribbon and wrapping paper, matching construction paper scraps, scissors, glue, white cardstock paper
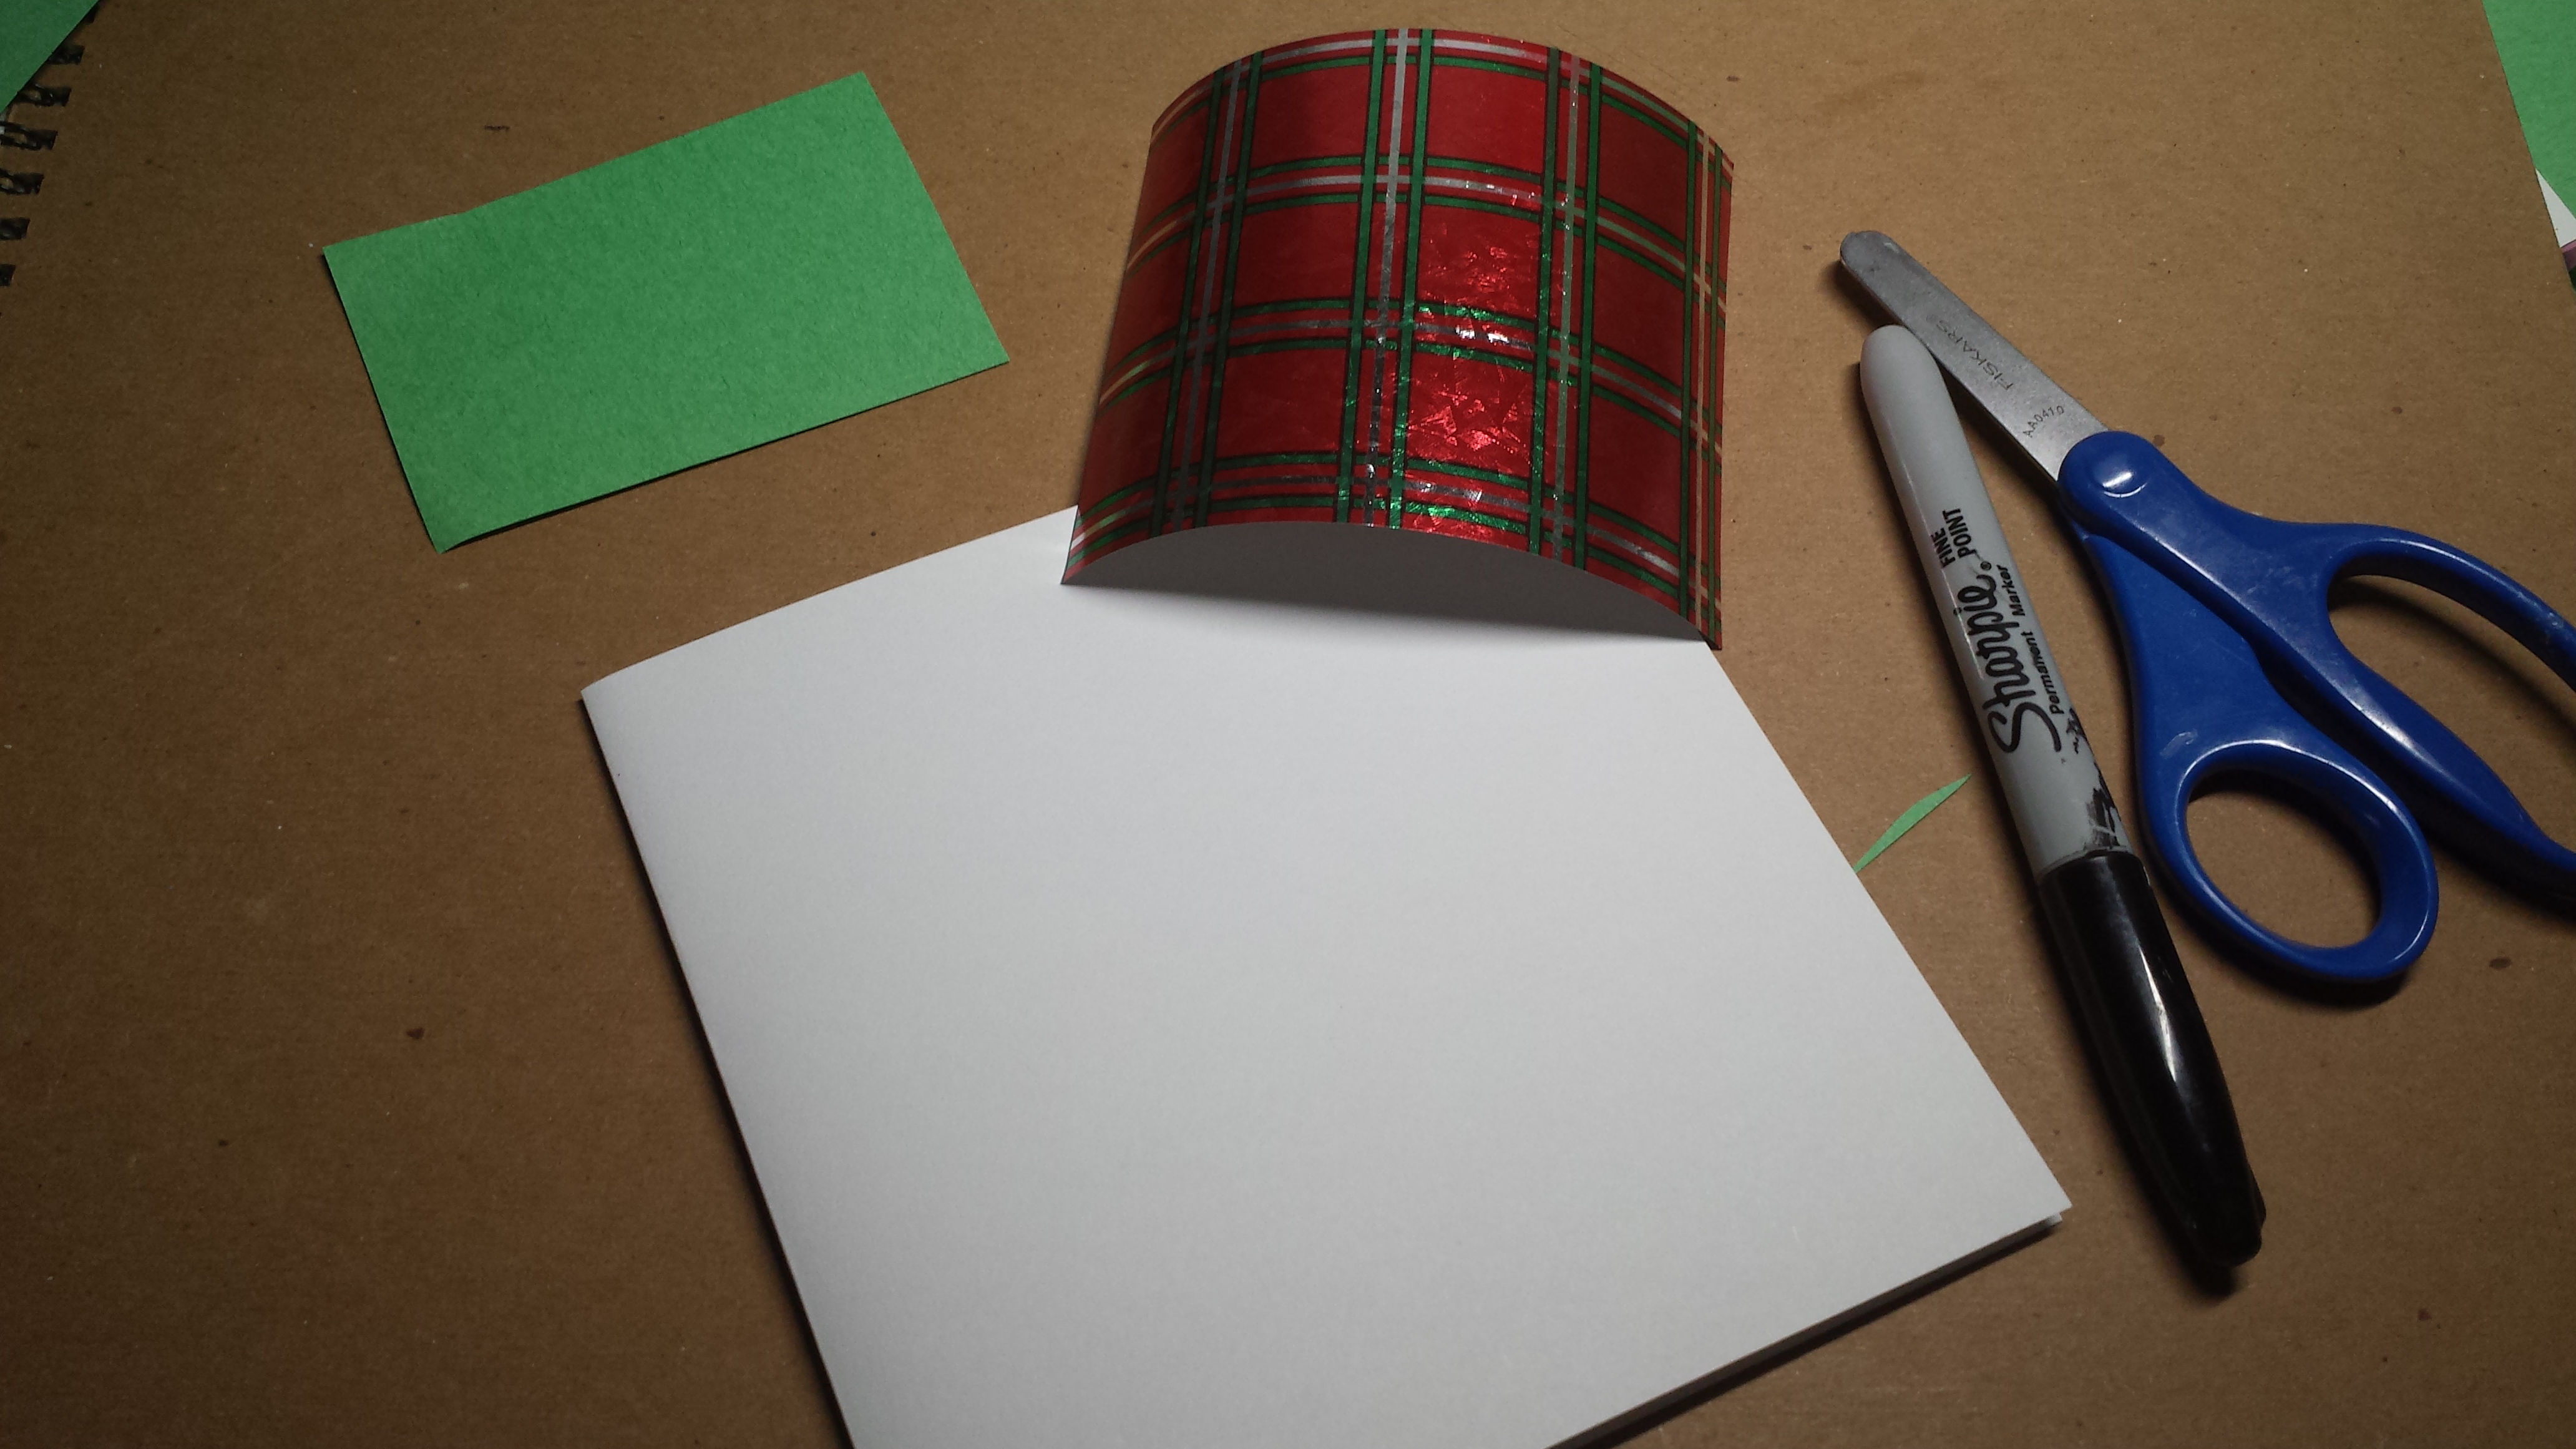
- Cut a rectangle from your scraps of wrapping paper and glue it onto the cardstock paper
- Cut a rectangle from the scraps of construction paper you are going to use.
- Glue the construction paper on top of the wrapping paper on the card
- Decorate the present with ribbon scraps or markers
- Write a message on the construction paper
CARD 6
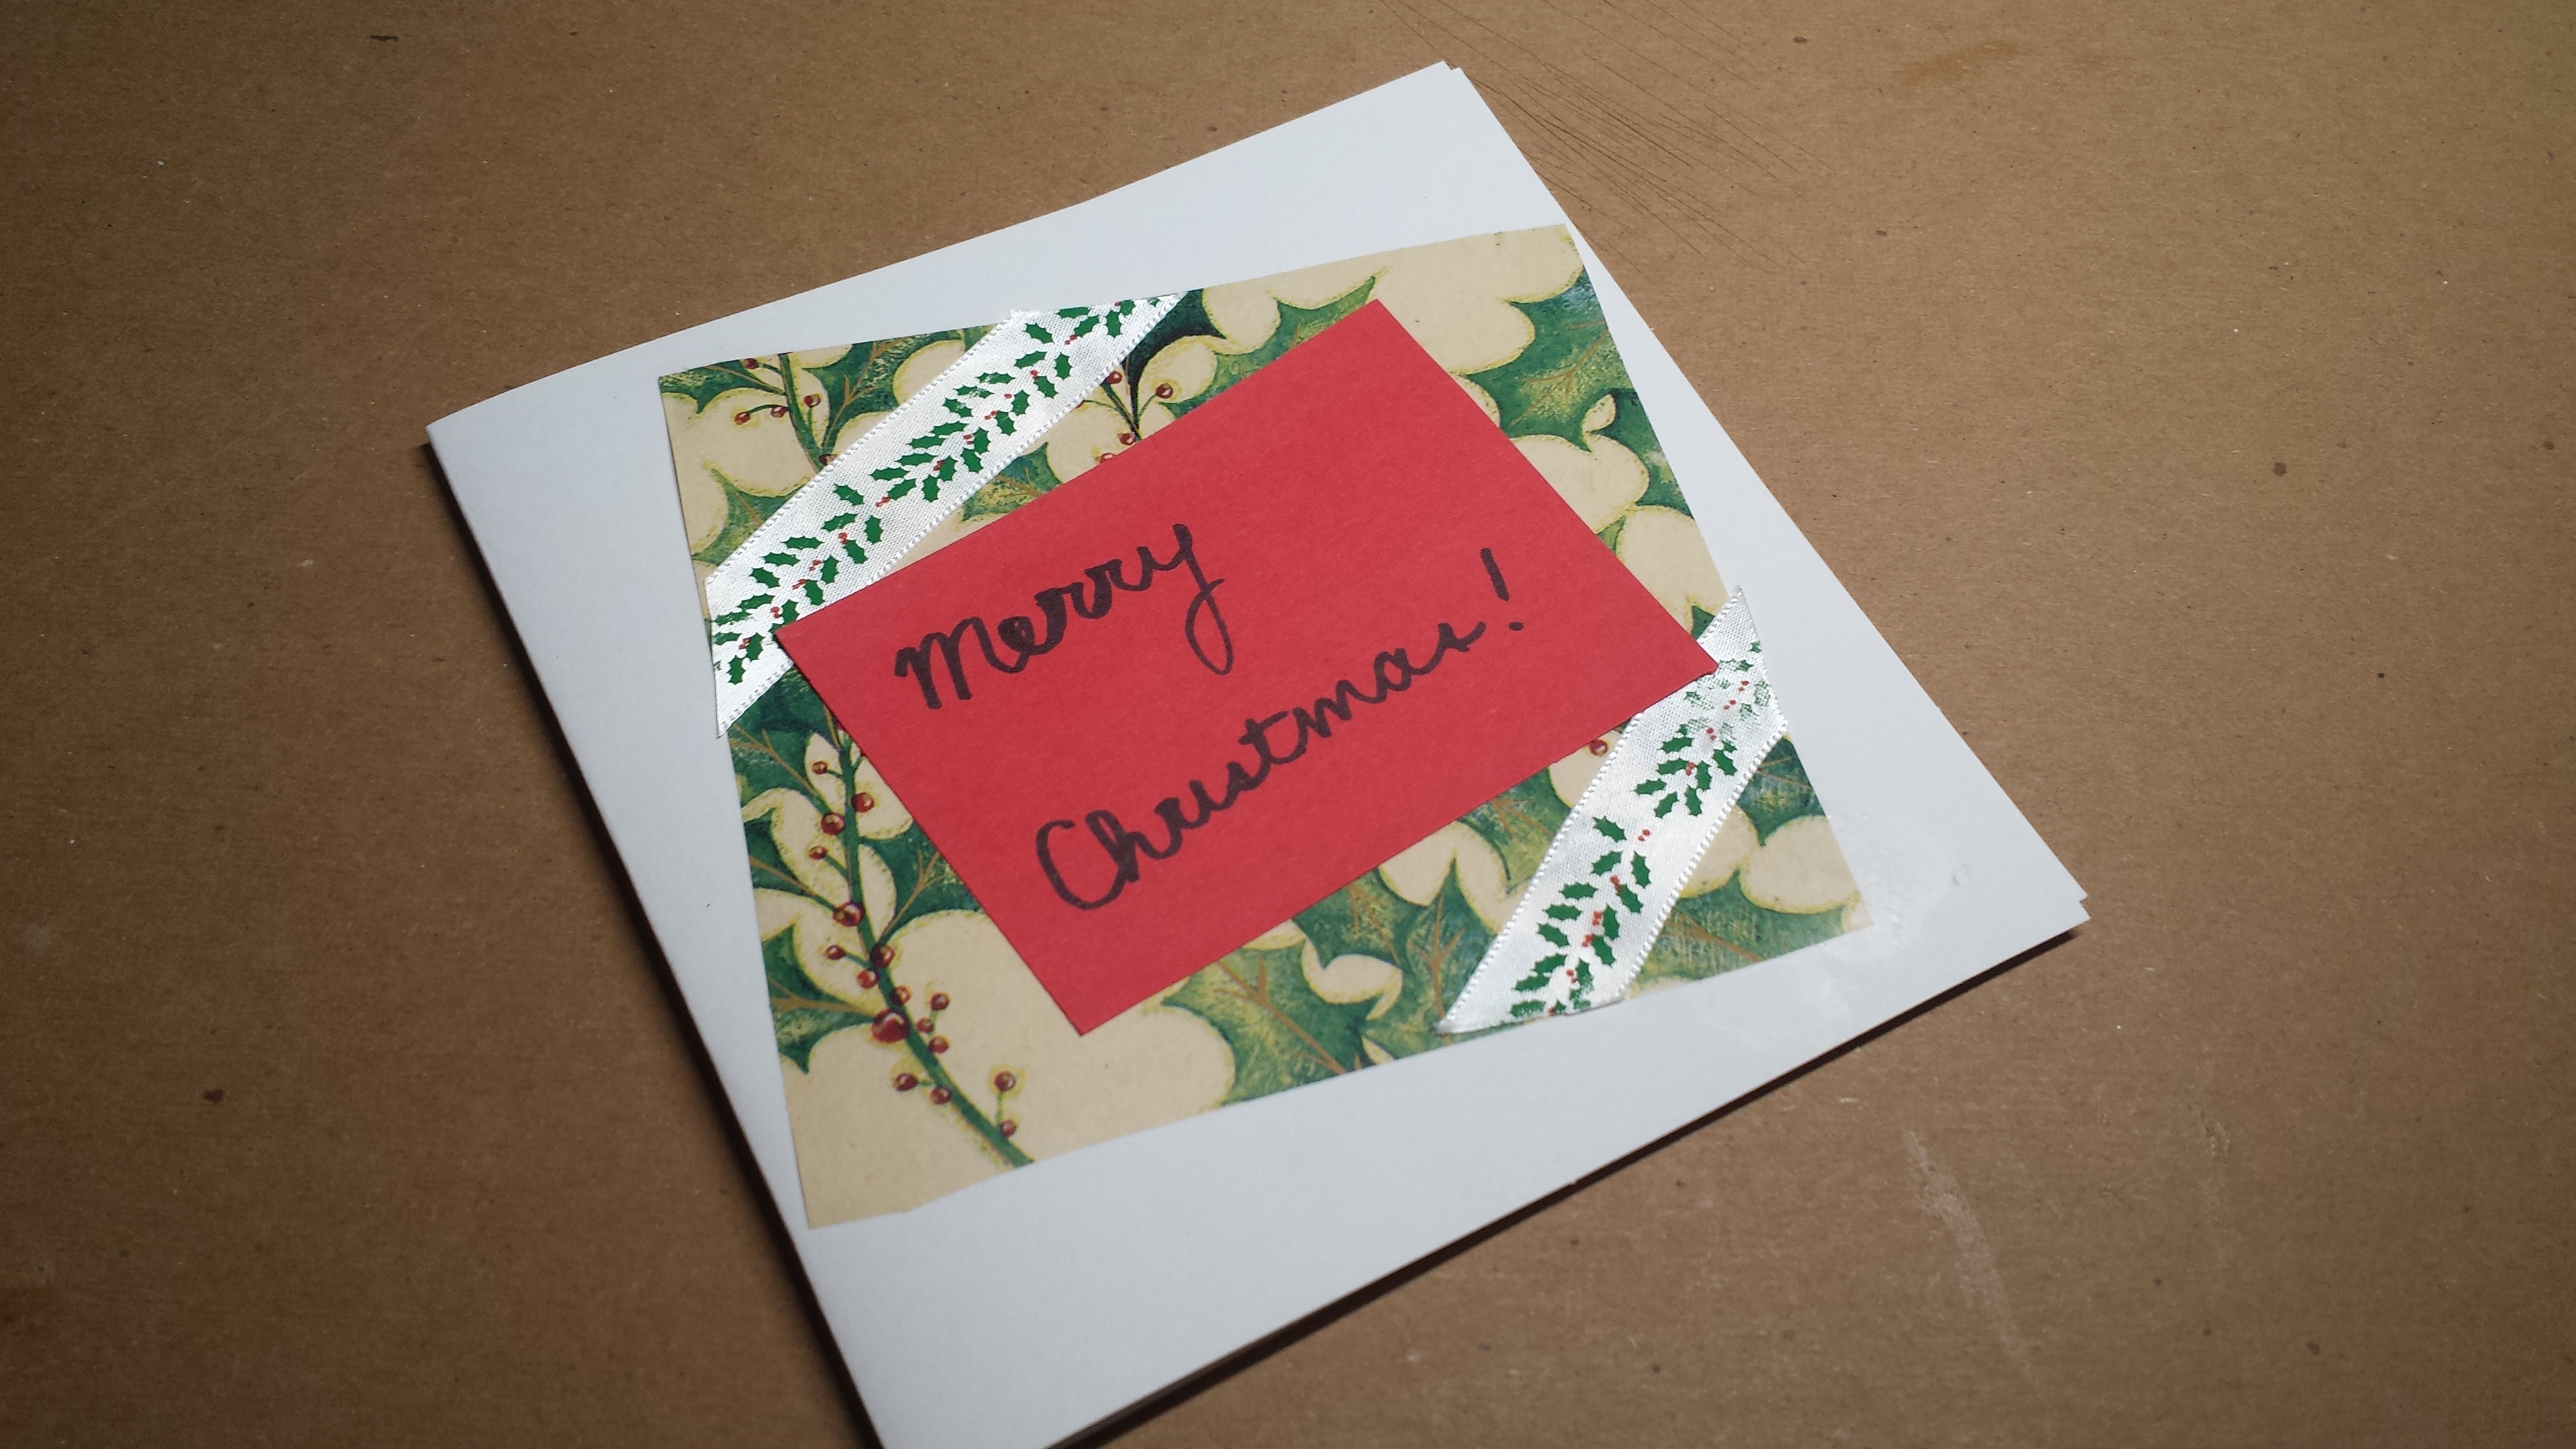
Supplies needed: scraps of ribbon and wrapping paper, matching construction paper scraps, scissors, glue, white cardstock paper
- Cut a rectangle from your scraps of wrapping paper and glue it onto the cardstock paper
- Cut a rectangle from the scraps of construction paper you are going to use. TIP: If it matches the wrapping paper, your card will turn out looking better.
- Glue the construction paper on top of the wrapping paper on the card
- Decorate the present with ribbon scraps to make it look like a wrapped present
- Write a message on the construction paper

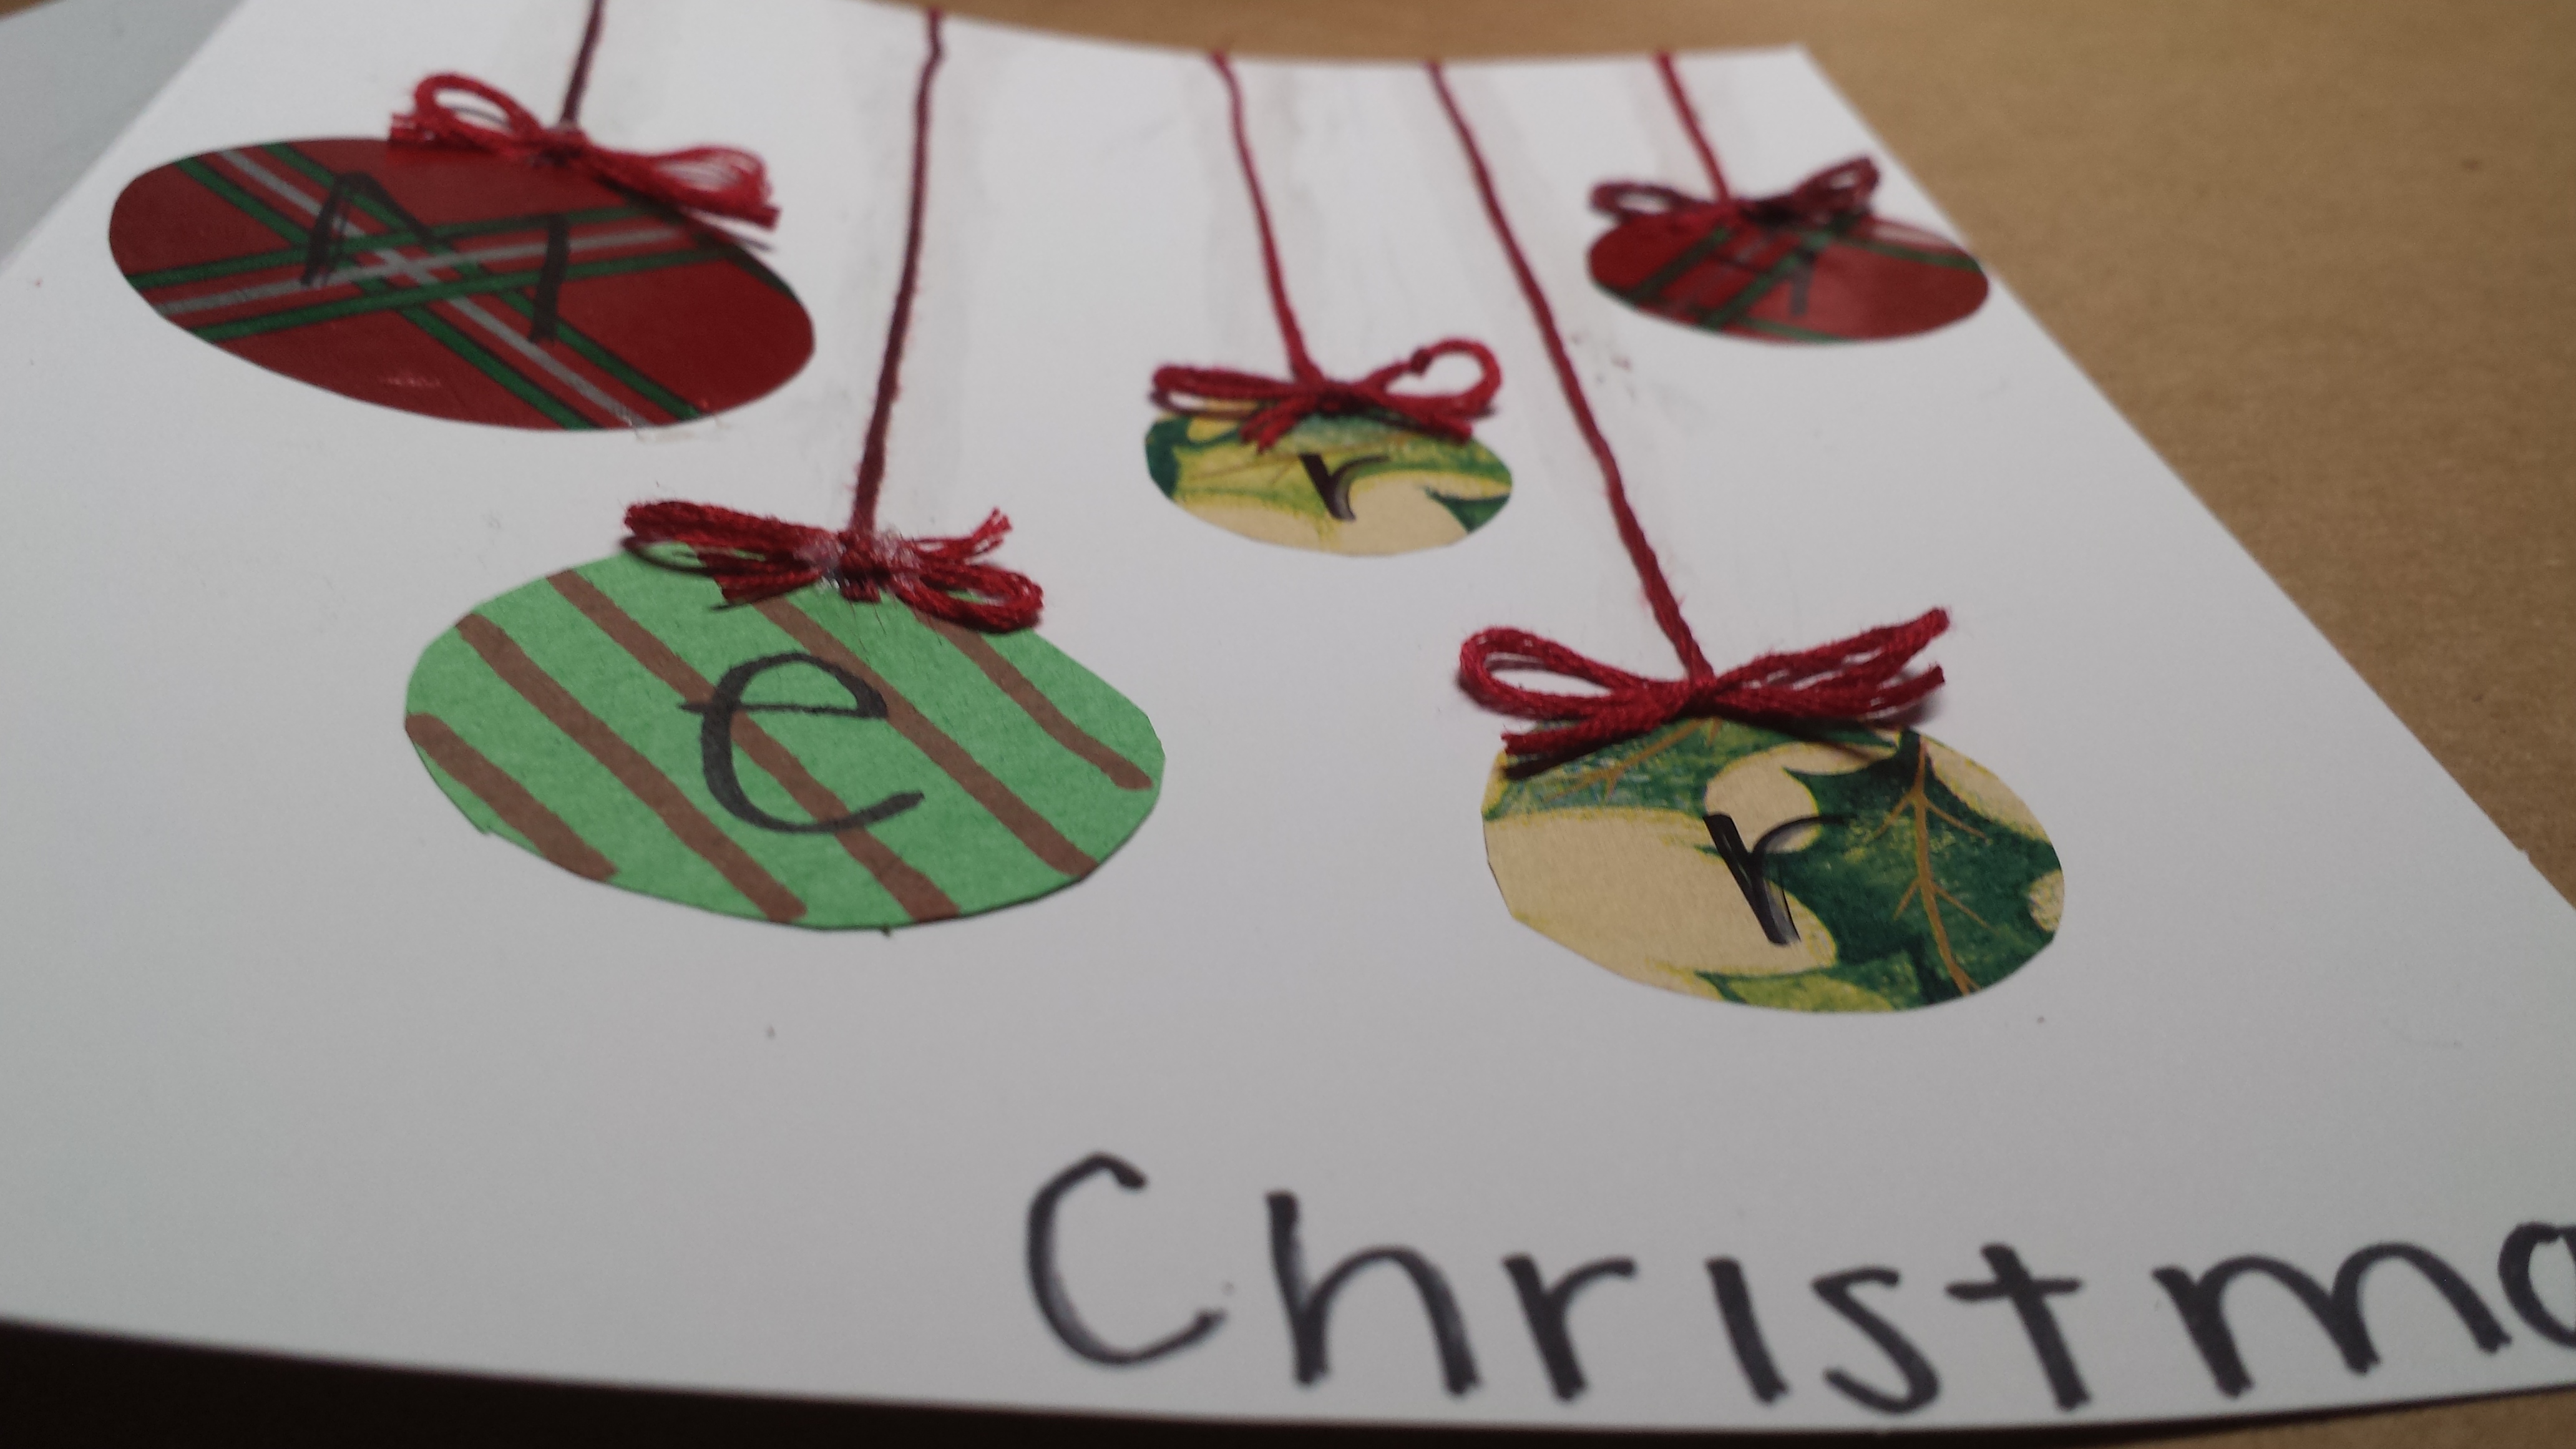
CARD 7
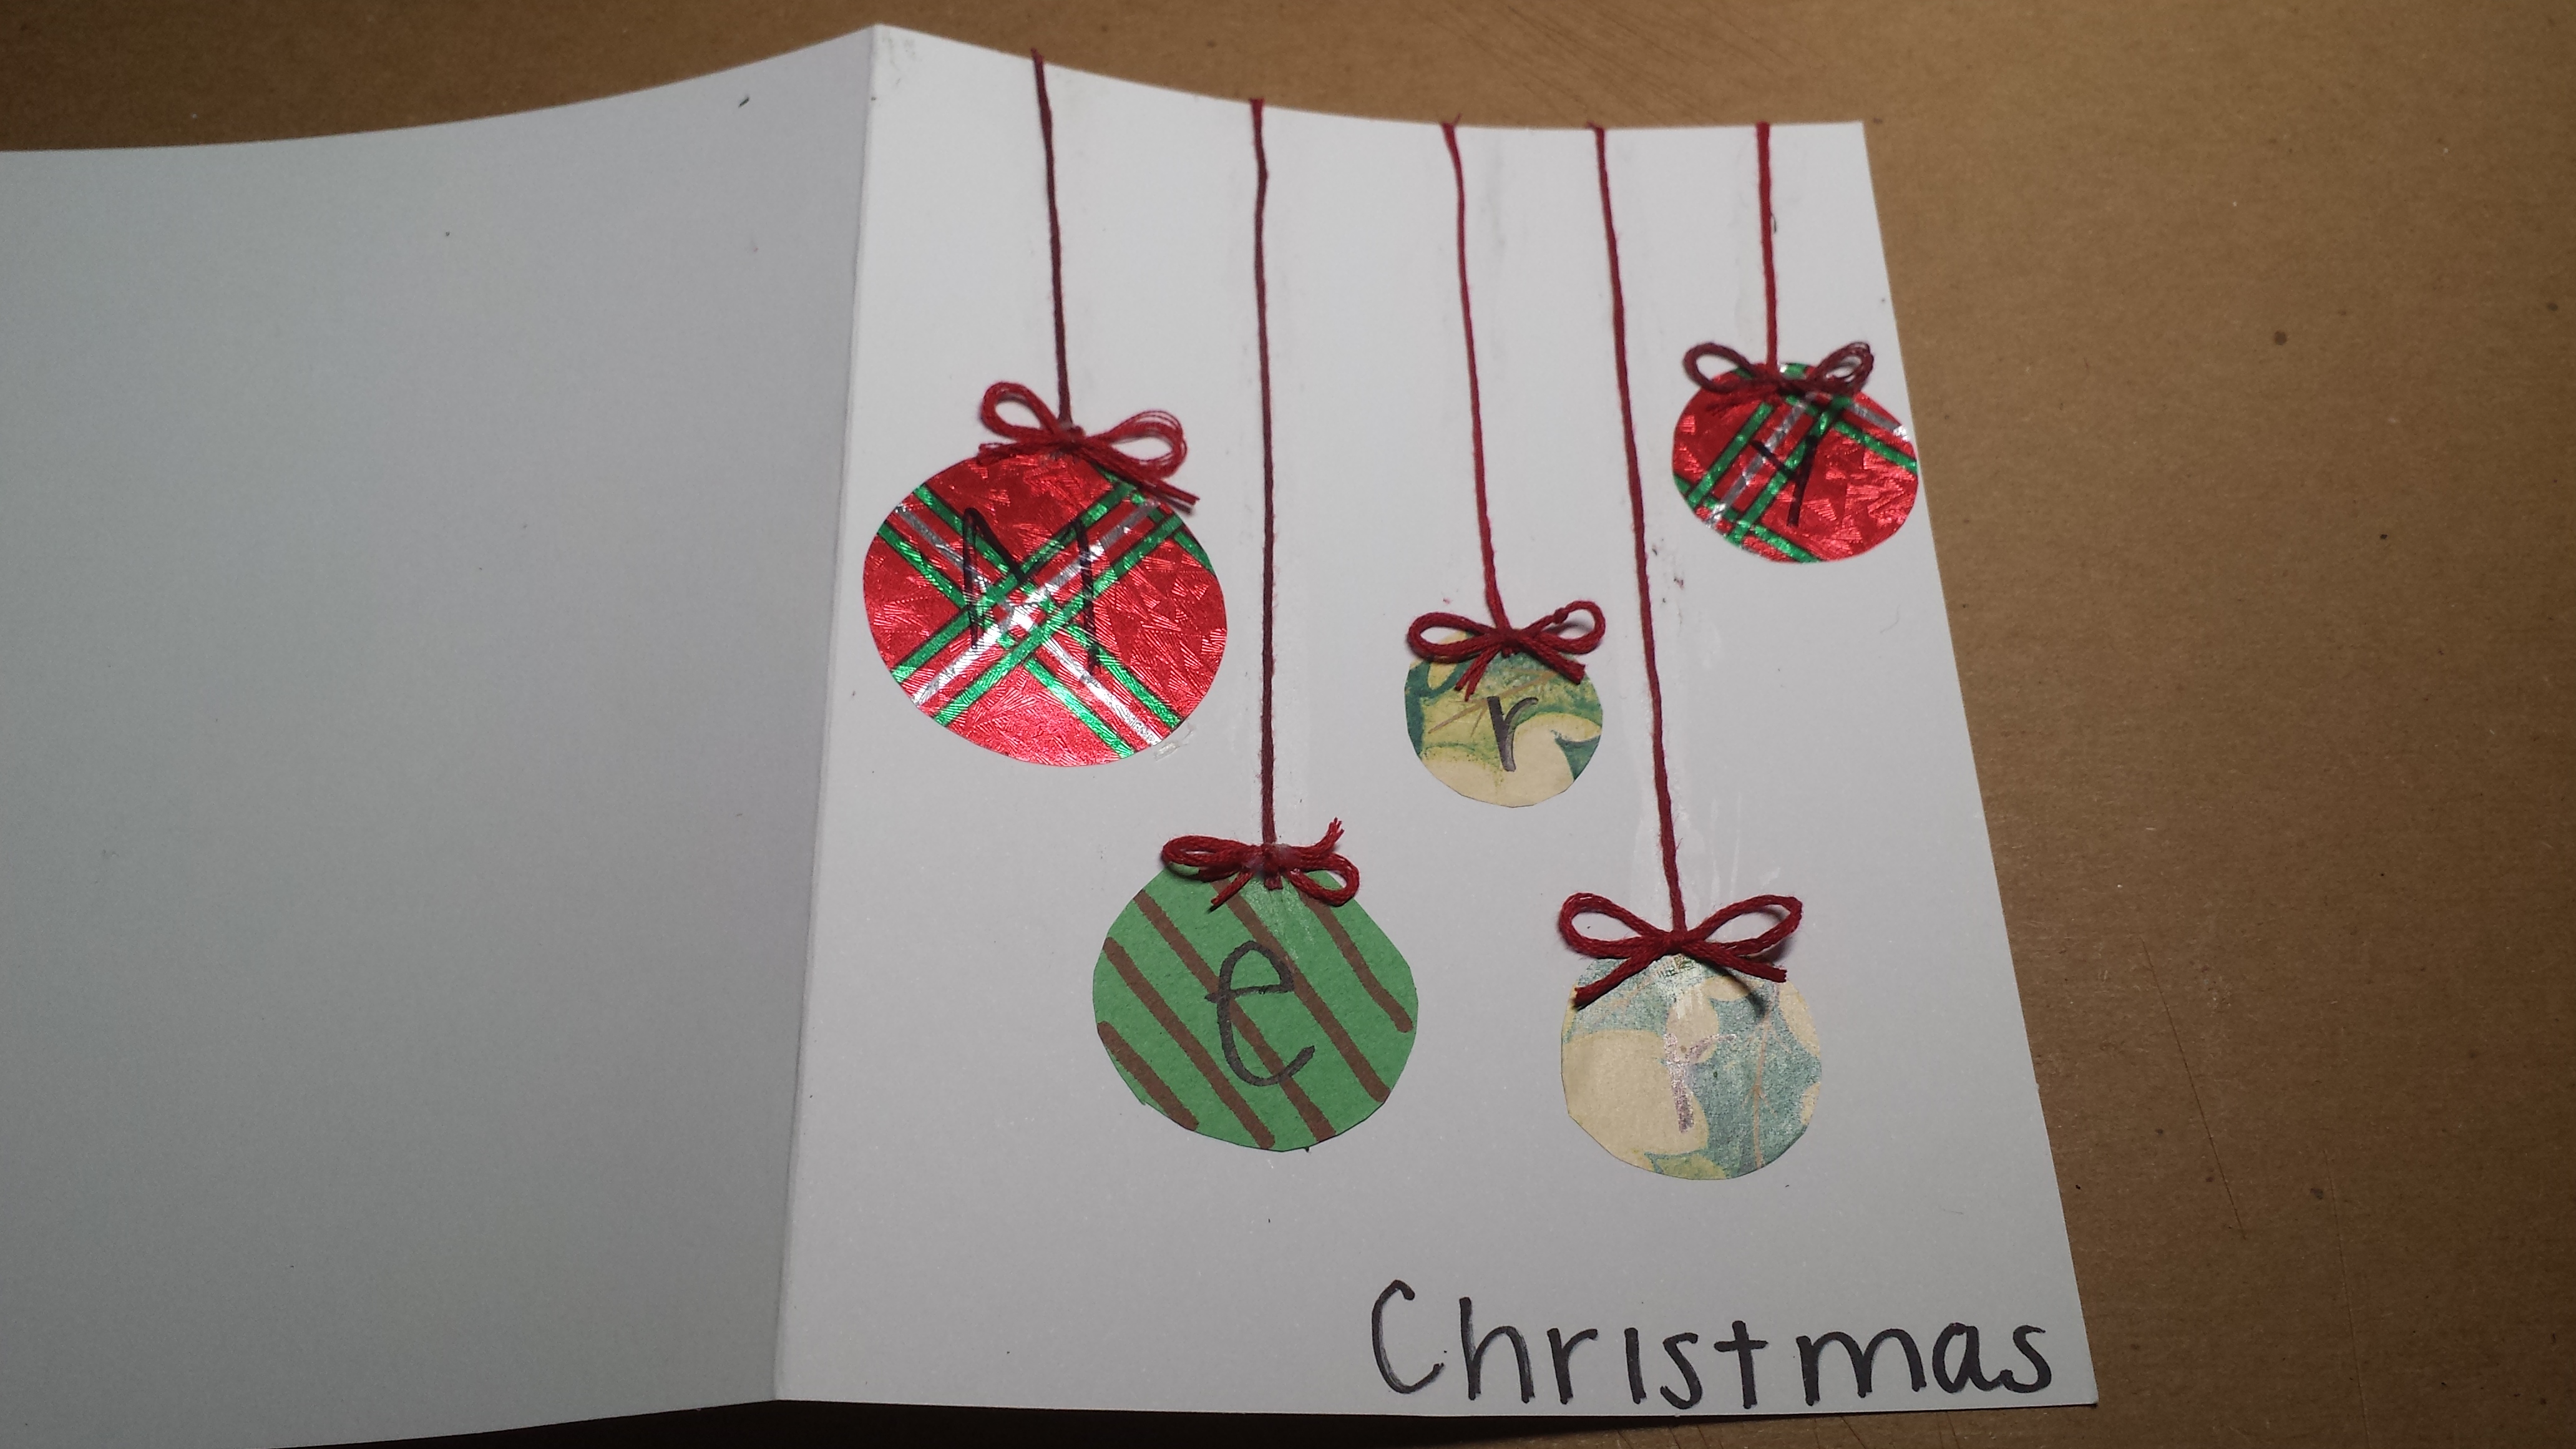
Supplies needed: scraps of wrapping paper or construction paper, ribbon scraps, sharpie, scissors, glue, white cardstock paper
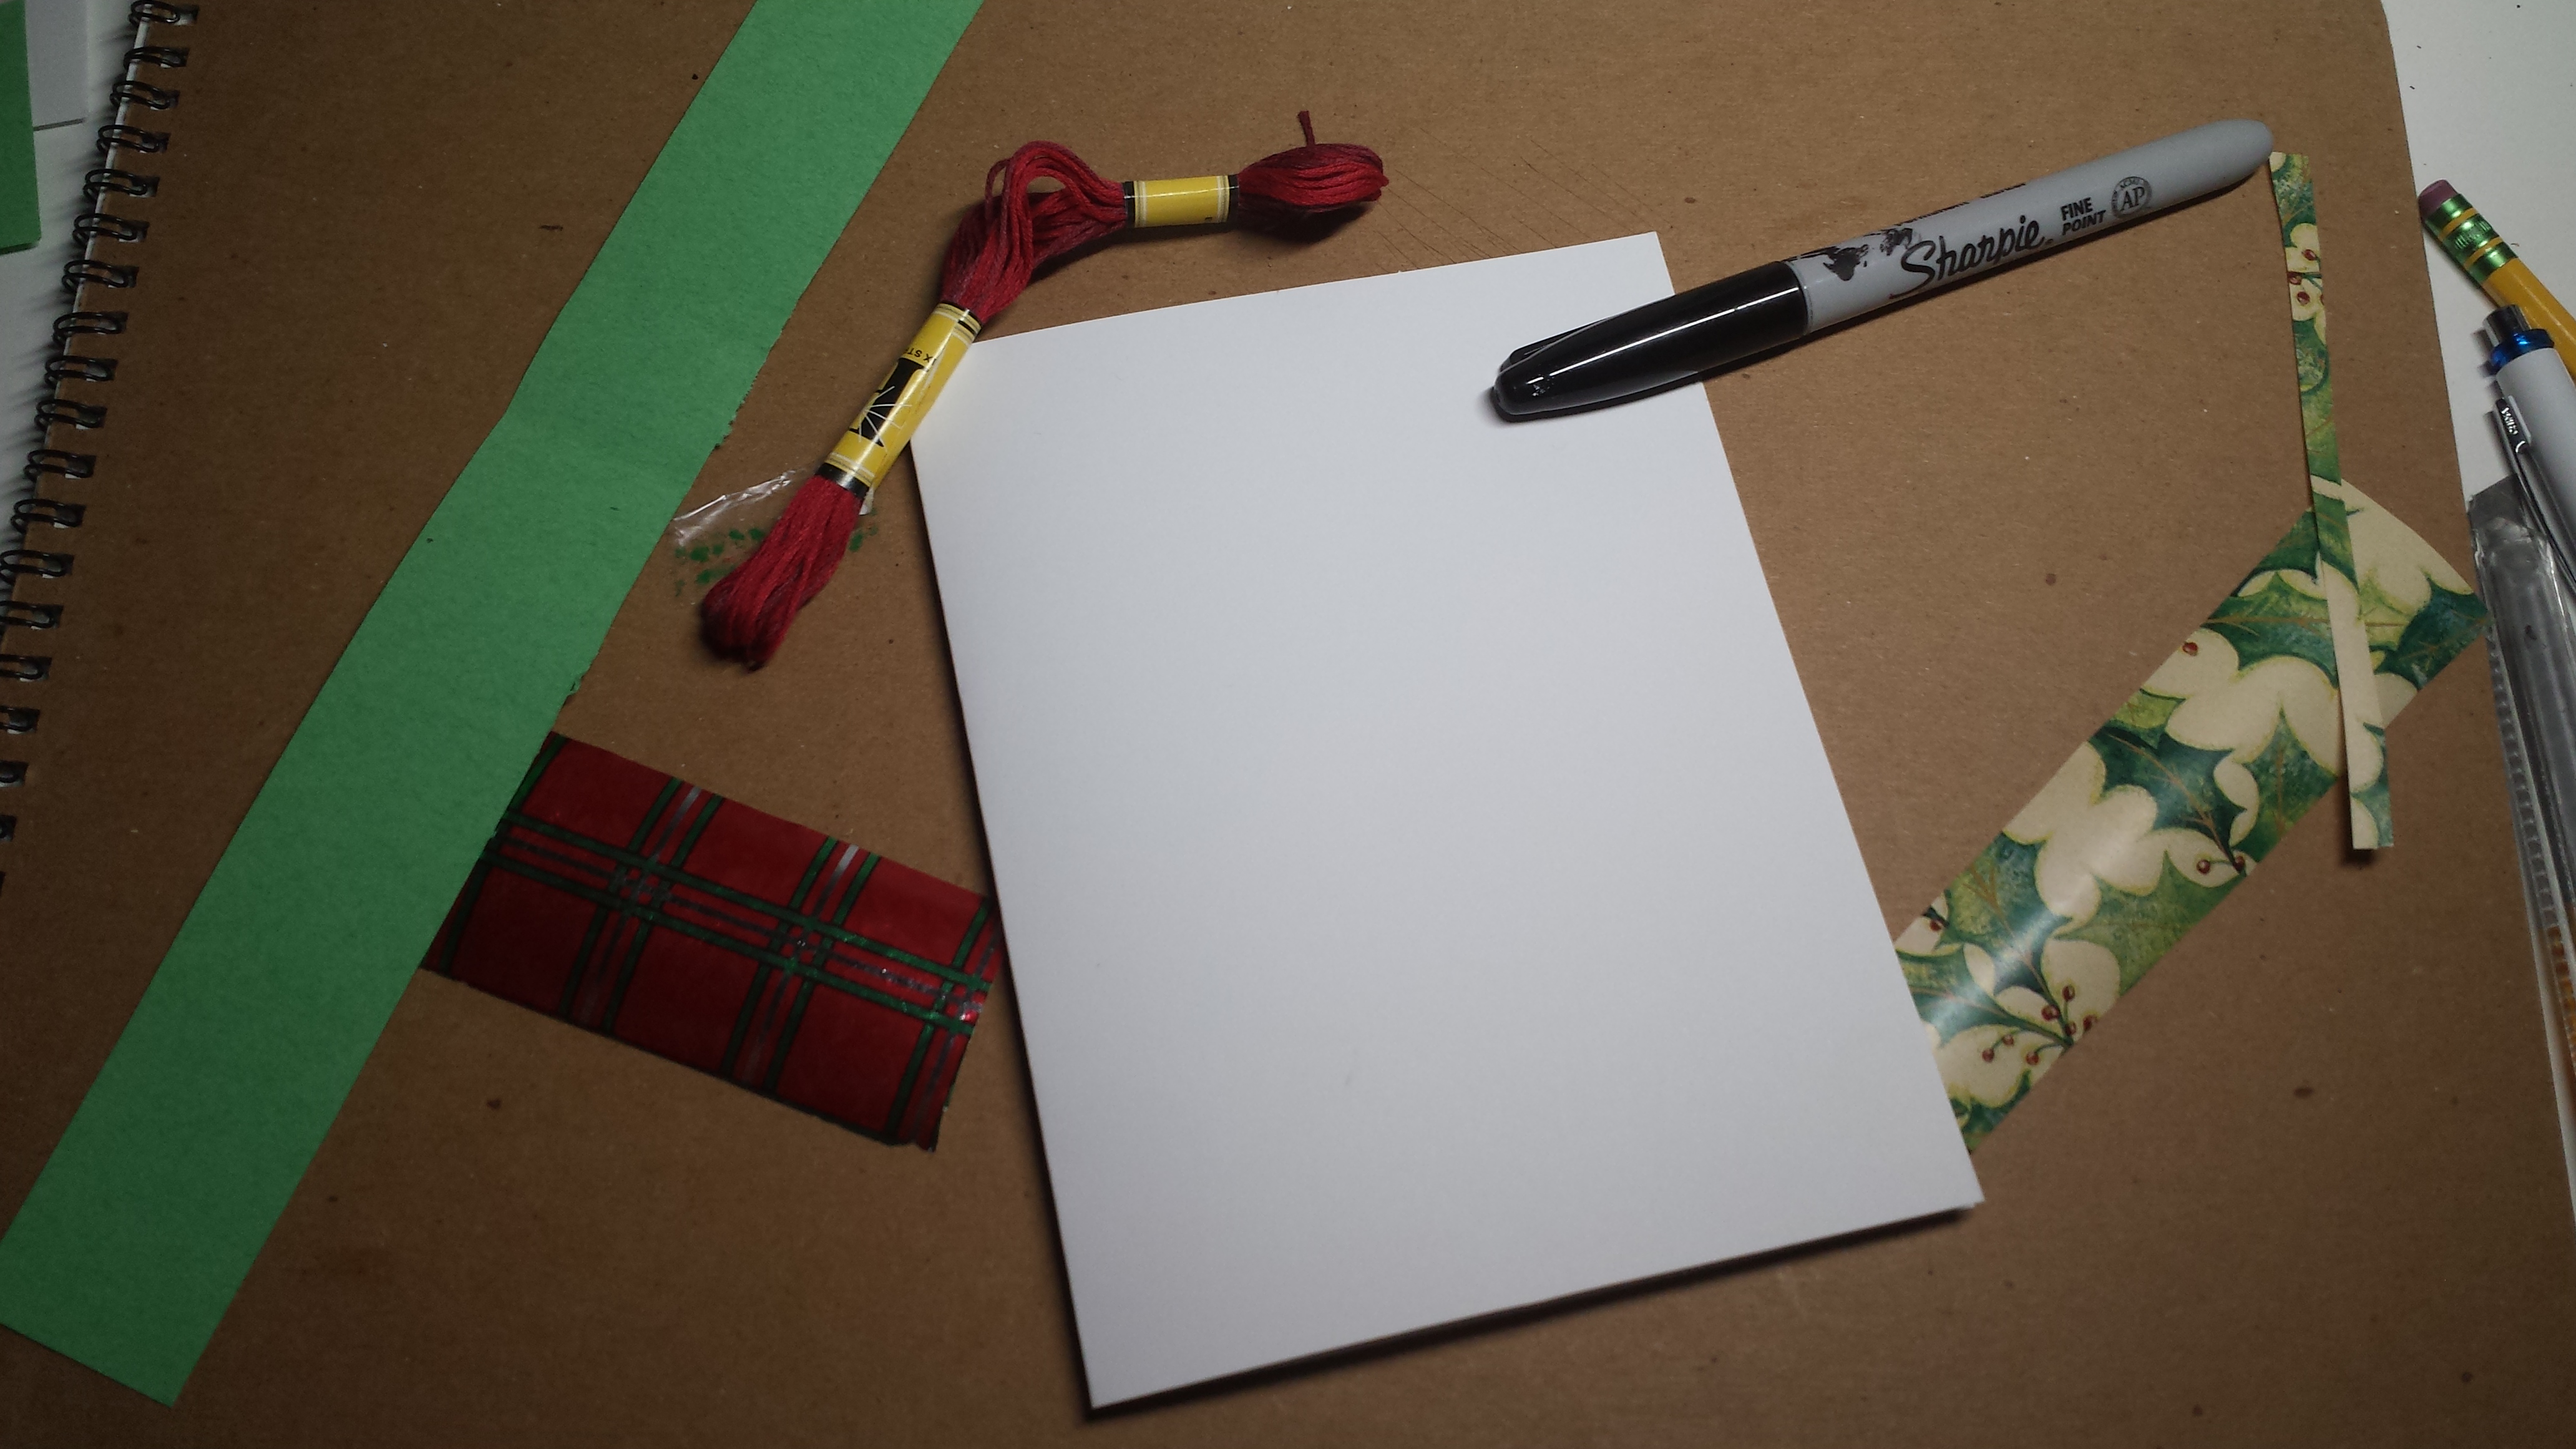
- Cut 5 different sized circles from the scraps of construction paper and wrapping paper
- Glue them at different heights in a line all over the white cardstock paper folded in half. (These are going to be different length ornaments)
- Cut pieces of ribbon to match the lengths of the top of the card to the circles and glue them to the card
- Make little bows from the ribbon and glue them to the spot where the string meets the circle for each circle
- Take the sharpie and write a letter on each circle spelling M-E-R-R-Y and then write “Christmas” at the bottom of the card
CARD 8
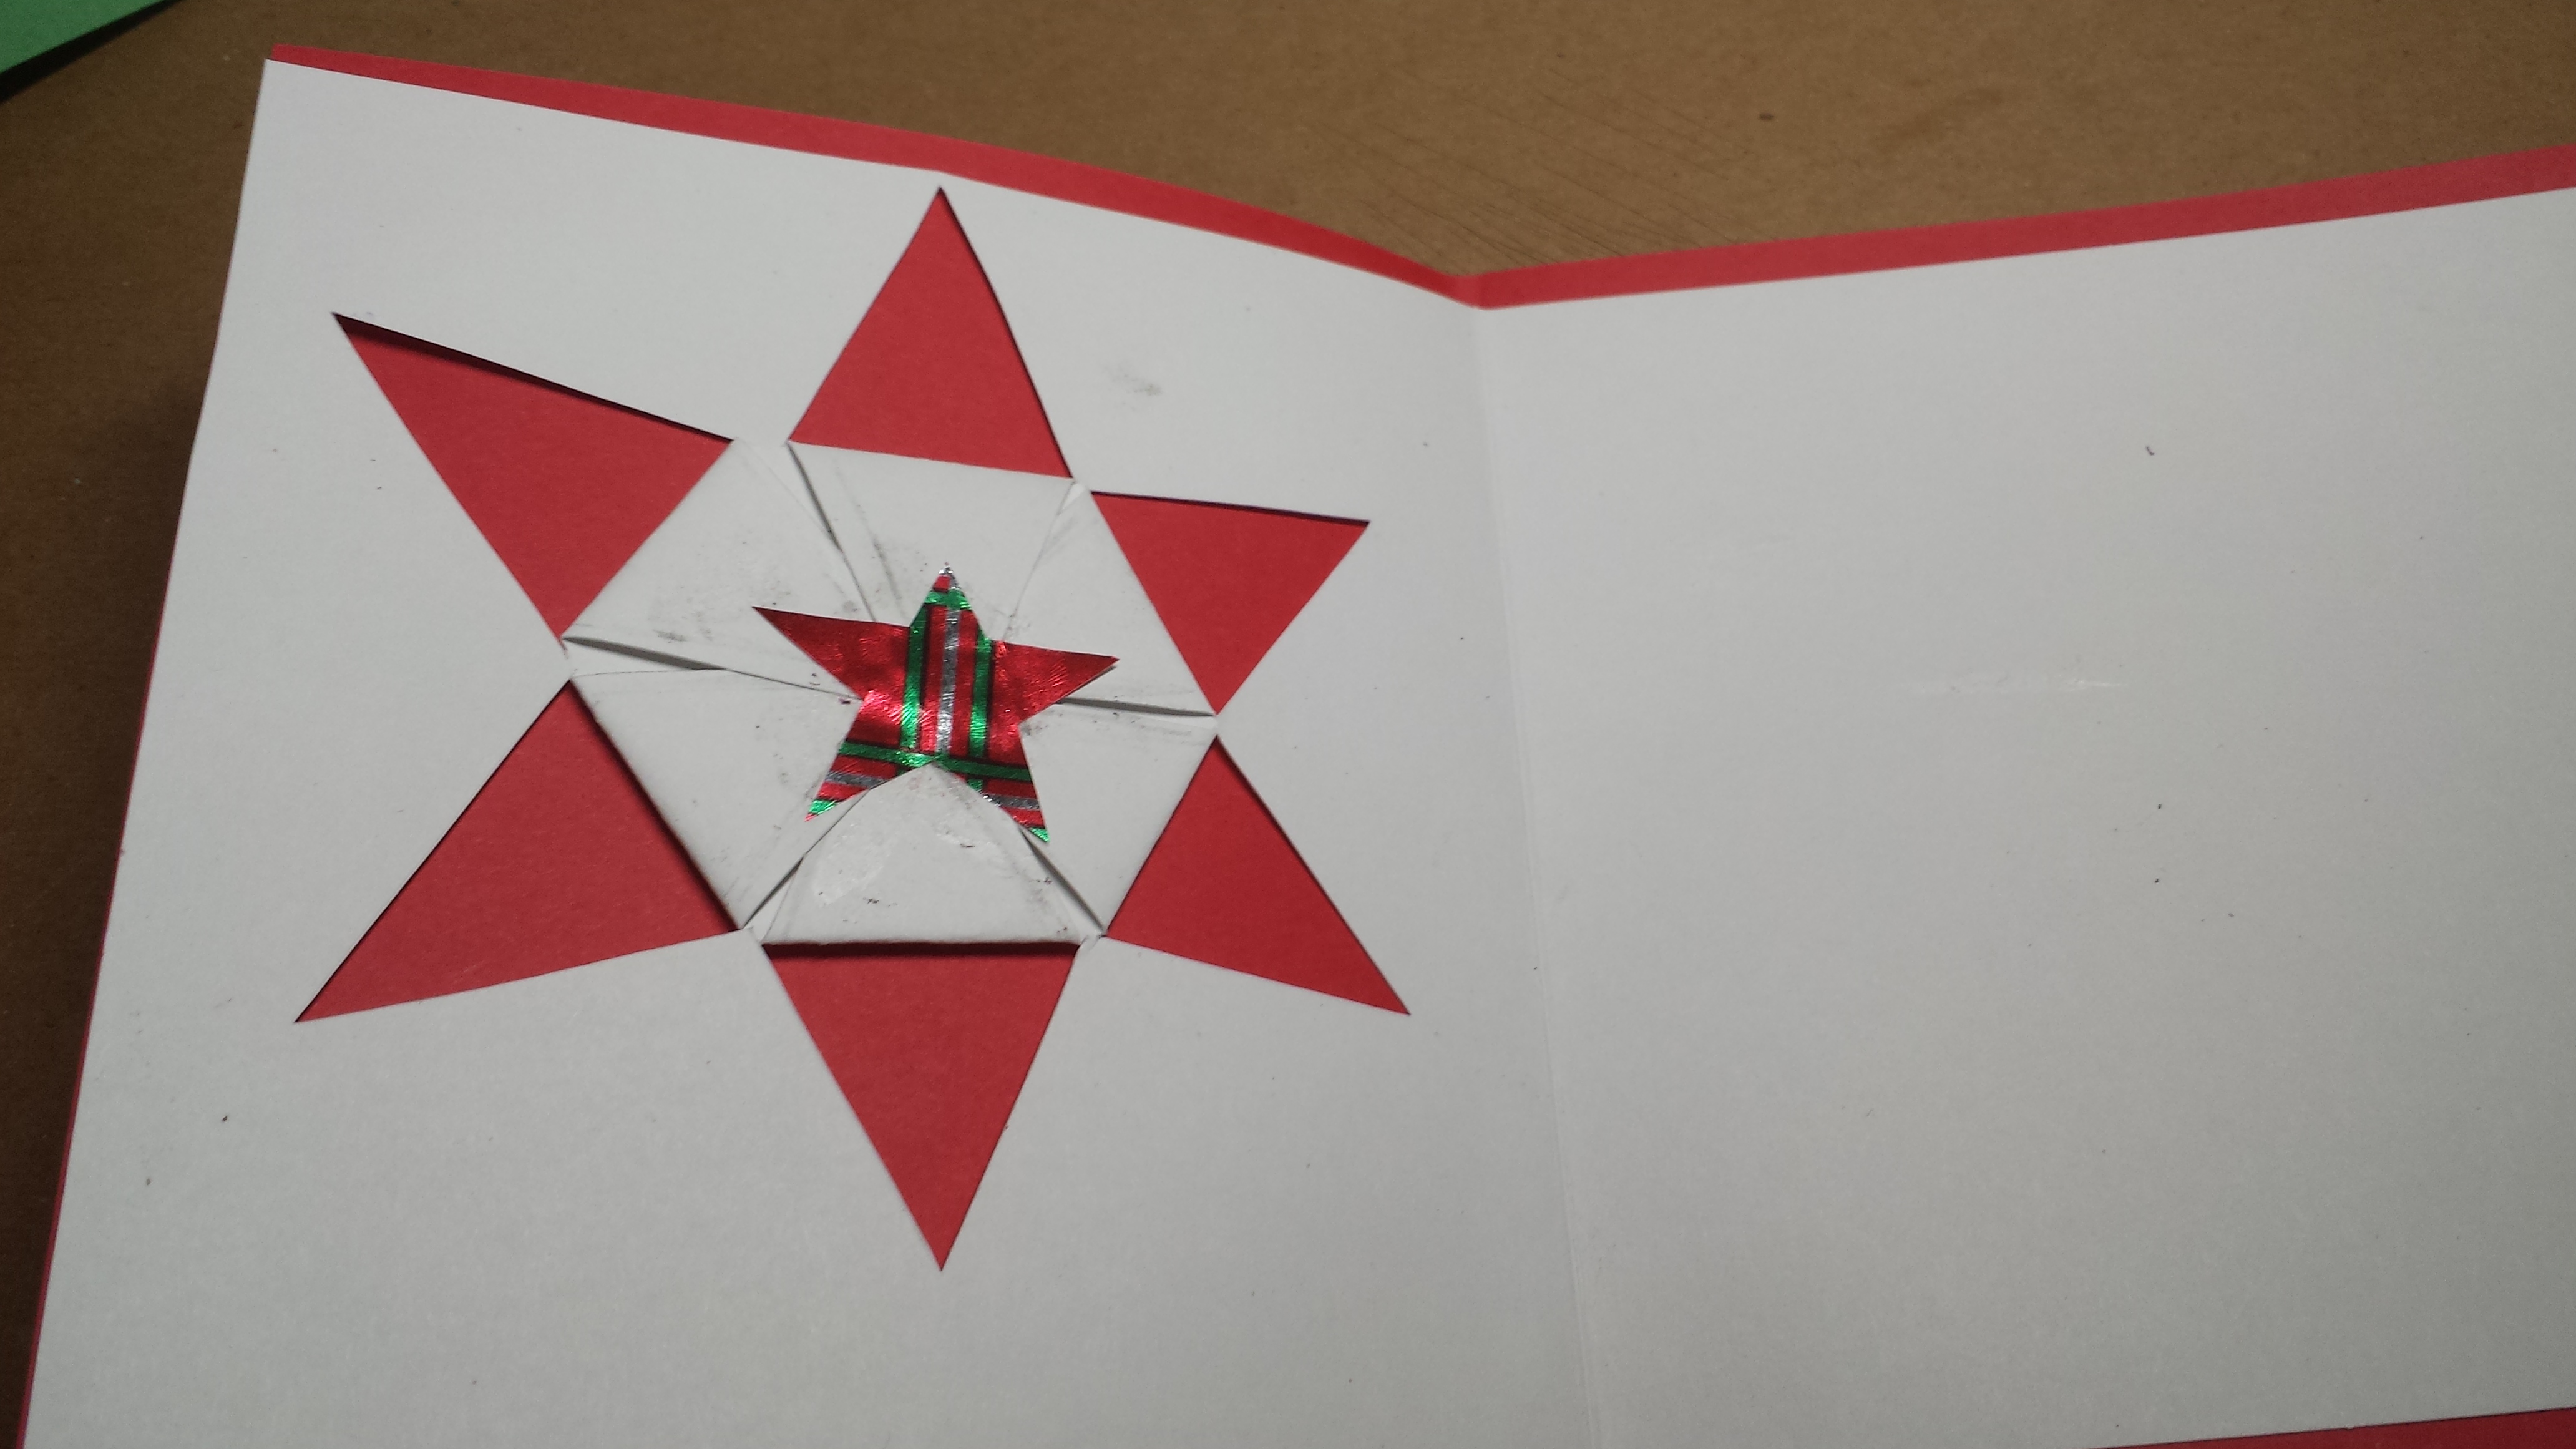
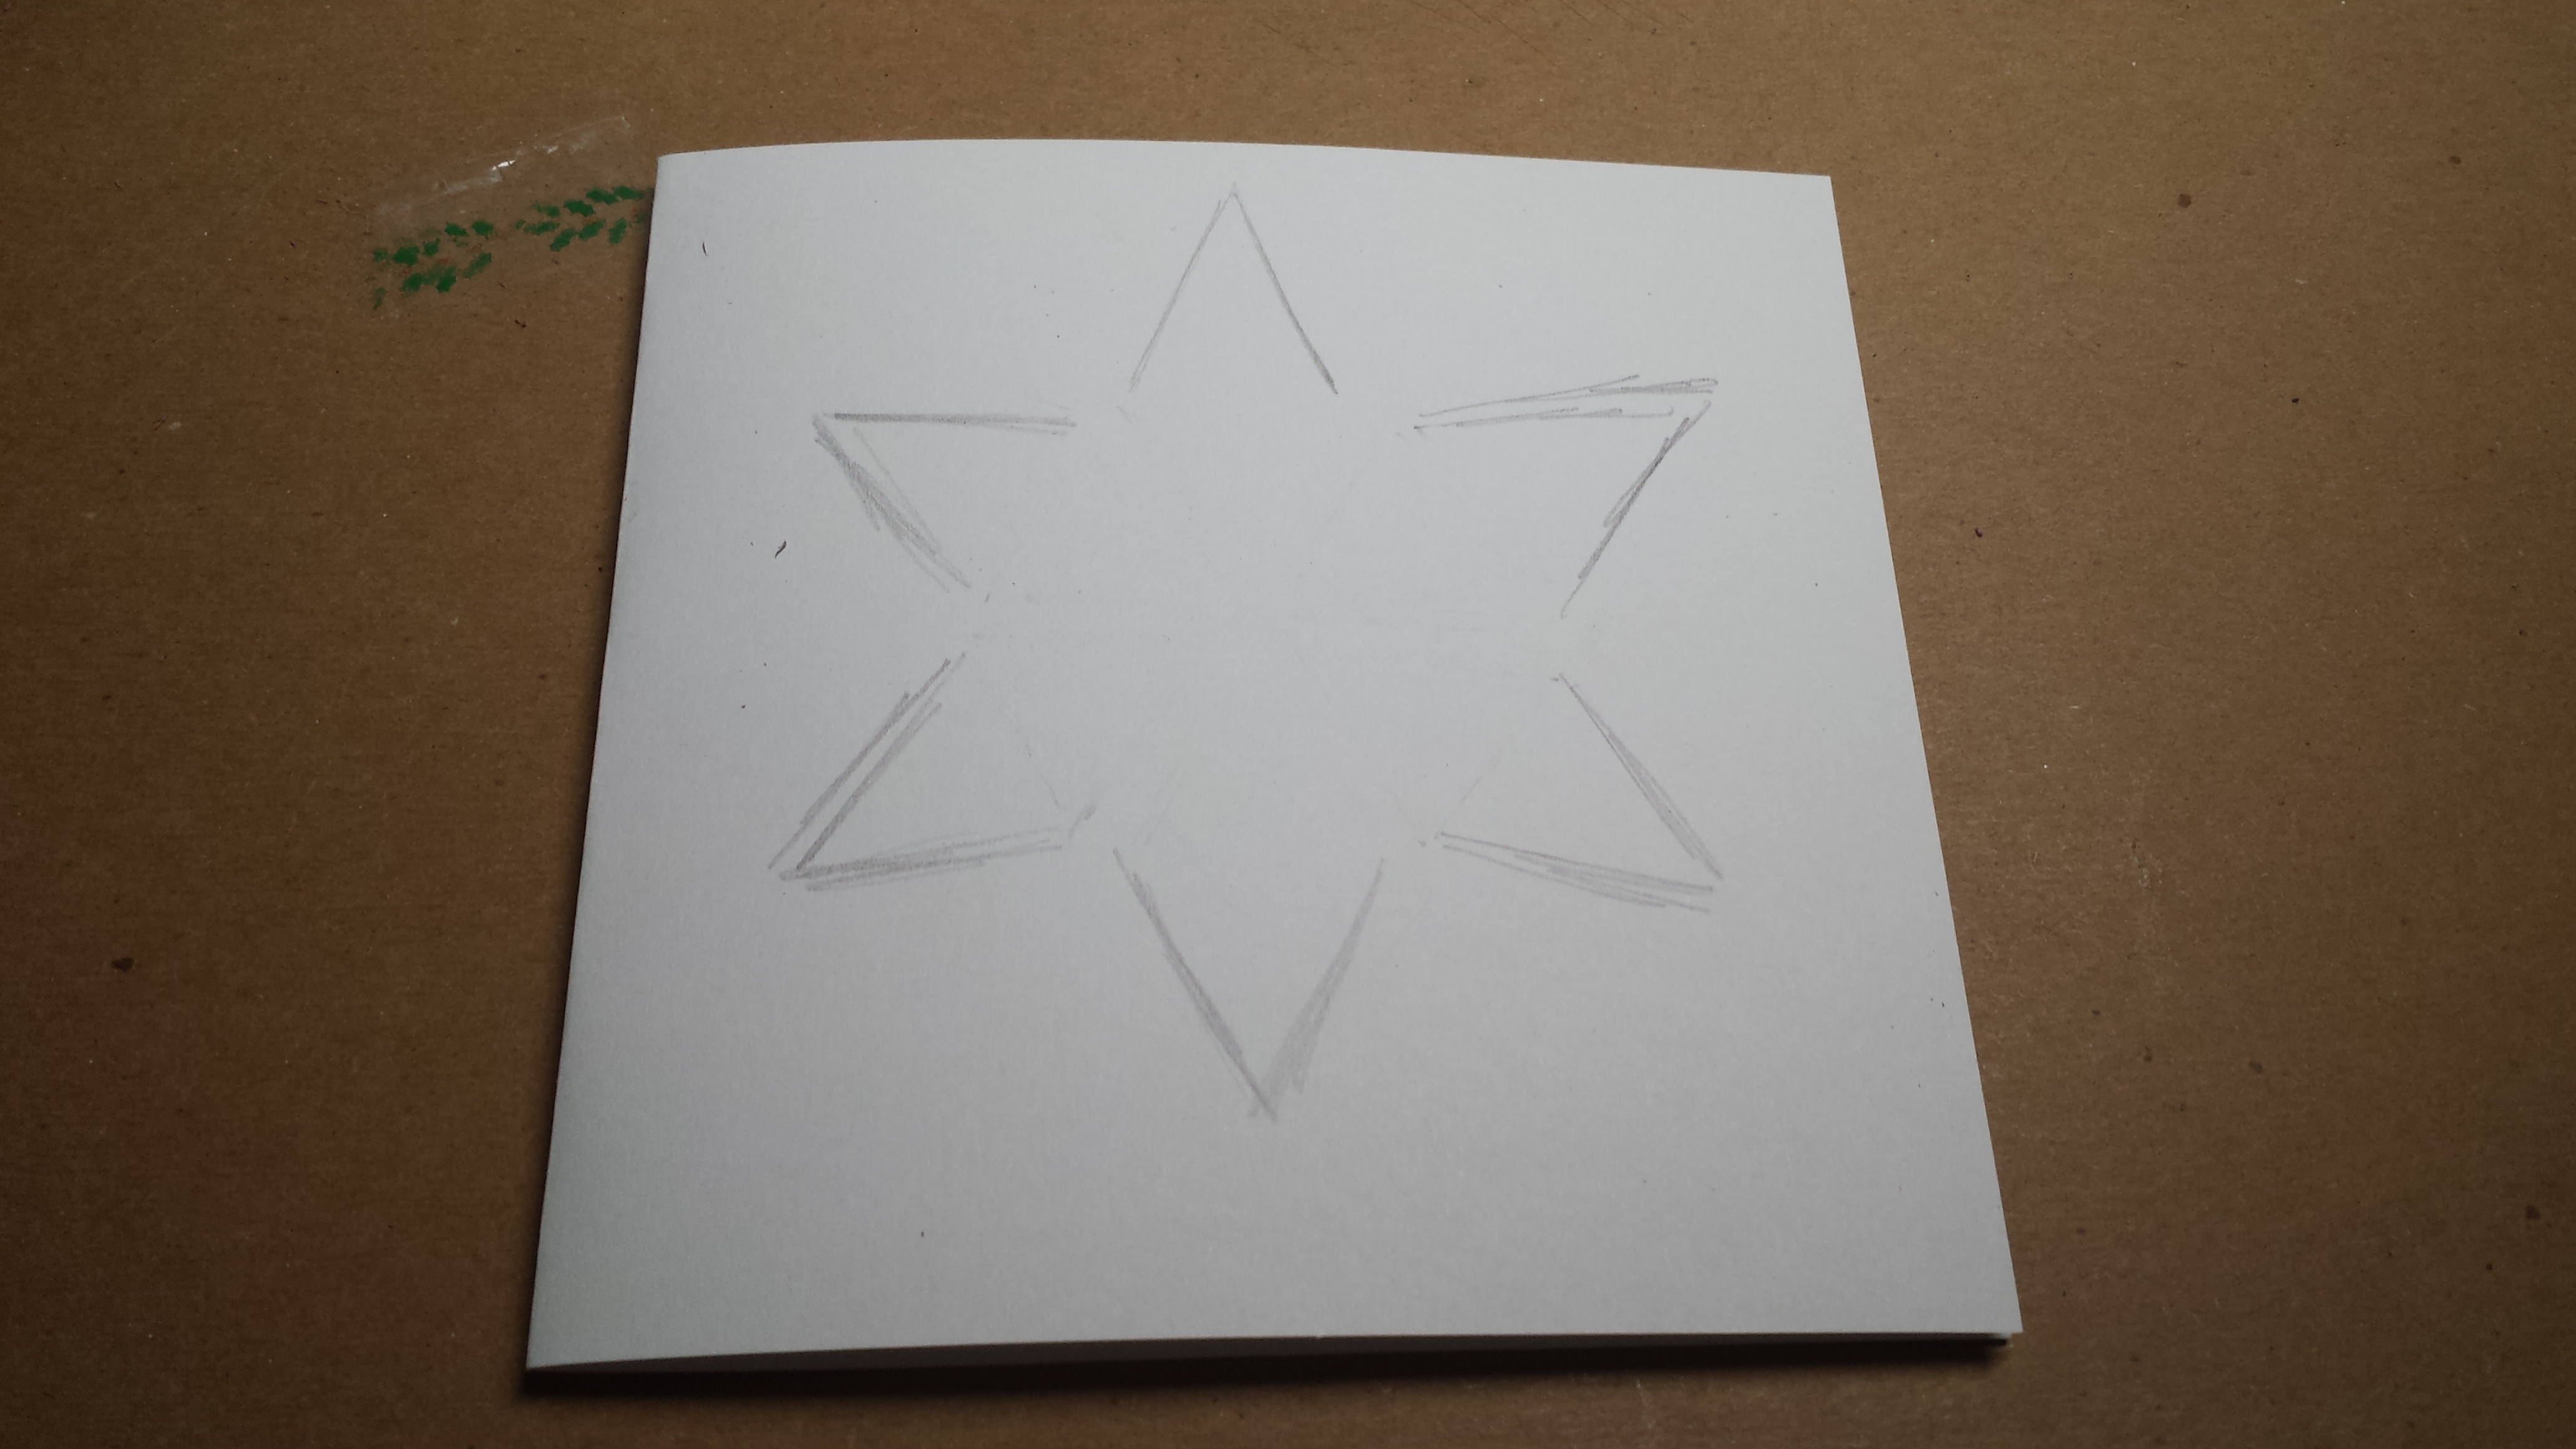
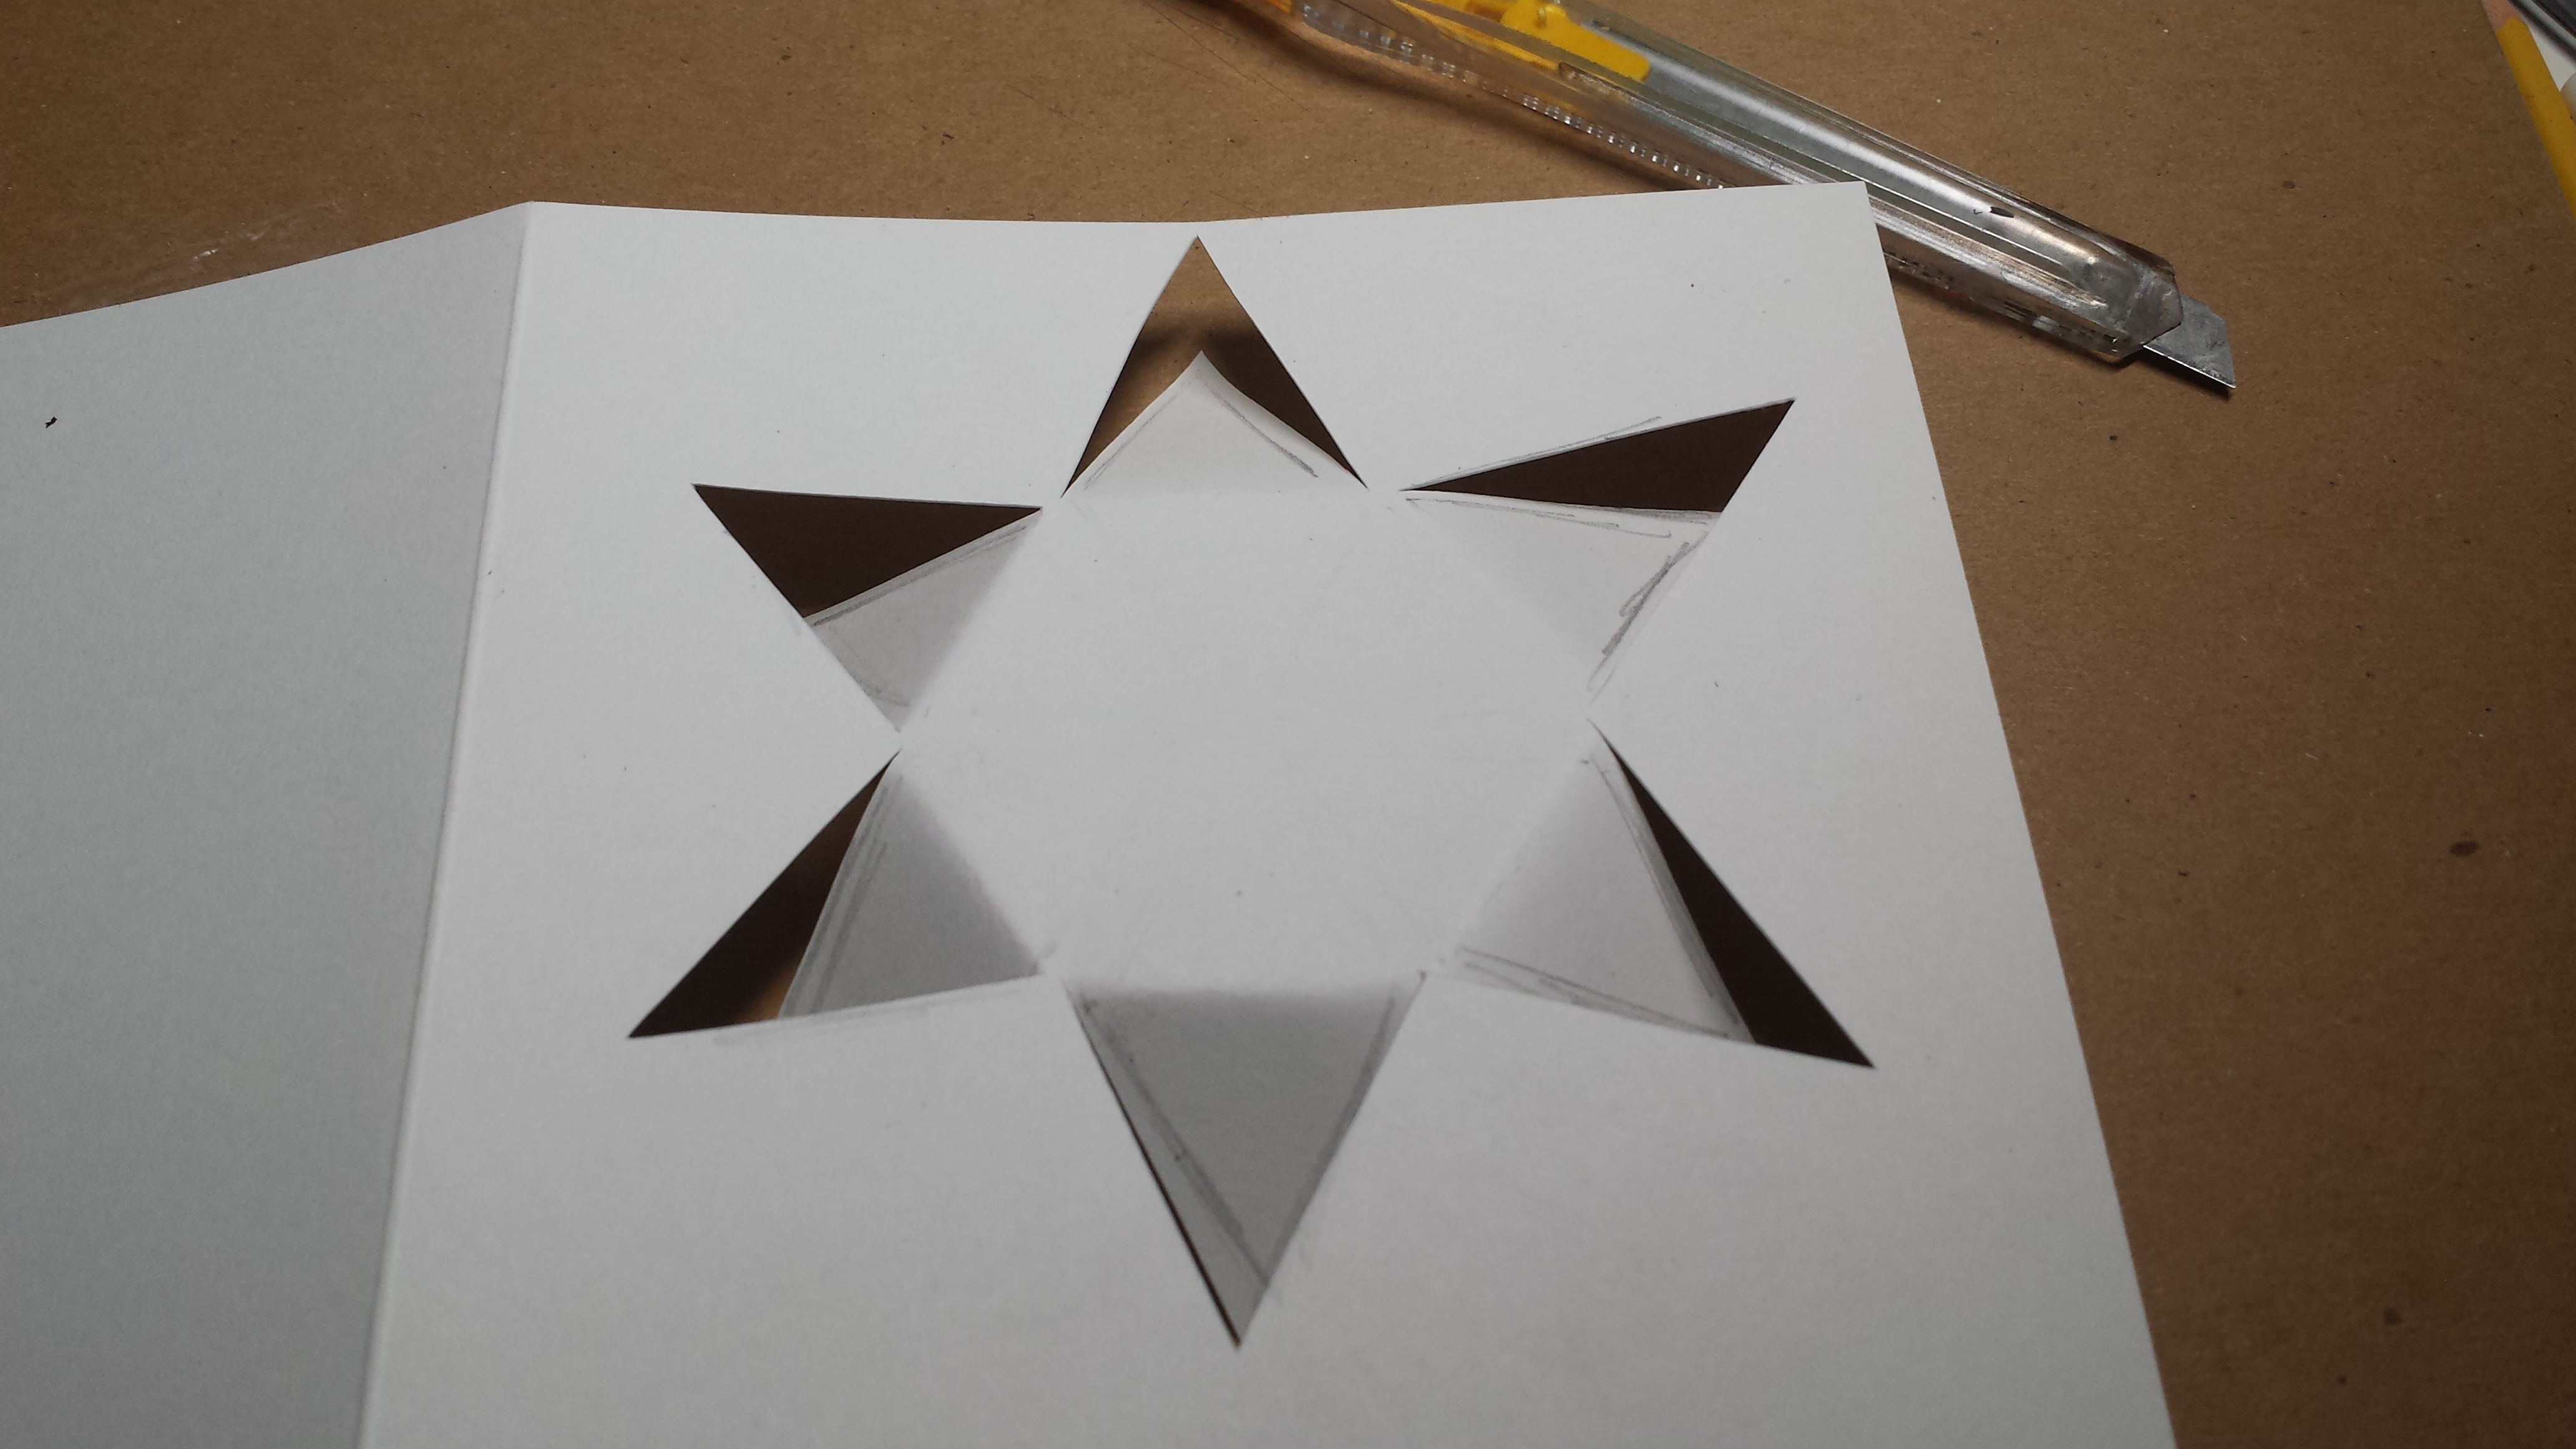
Supplies needed: red construction paper, white cardstock paper, scrap of wrapping paper, pencil, glue, exacto knife, scissors

- Make sure your white cardstock paper can fit inside your red construction paper when both are folded in half. Cut if needed
- Draw the design in the photo below on your piece of white cardstock paper folded in half. TIP: be sure to leave space between each incomplete triangle to make it easier when you’re folding and cutting
3. Take your exacto knife and cut along the lines you have drawn. Fold the triangles in towards the middle/inside of the card. Don’t finish off the bottoms of the triangle or you’ll just have holes in your card!
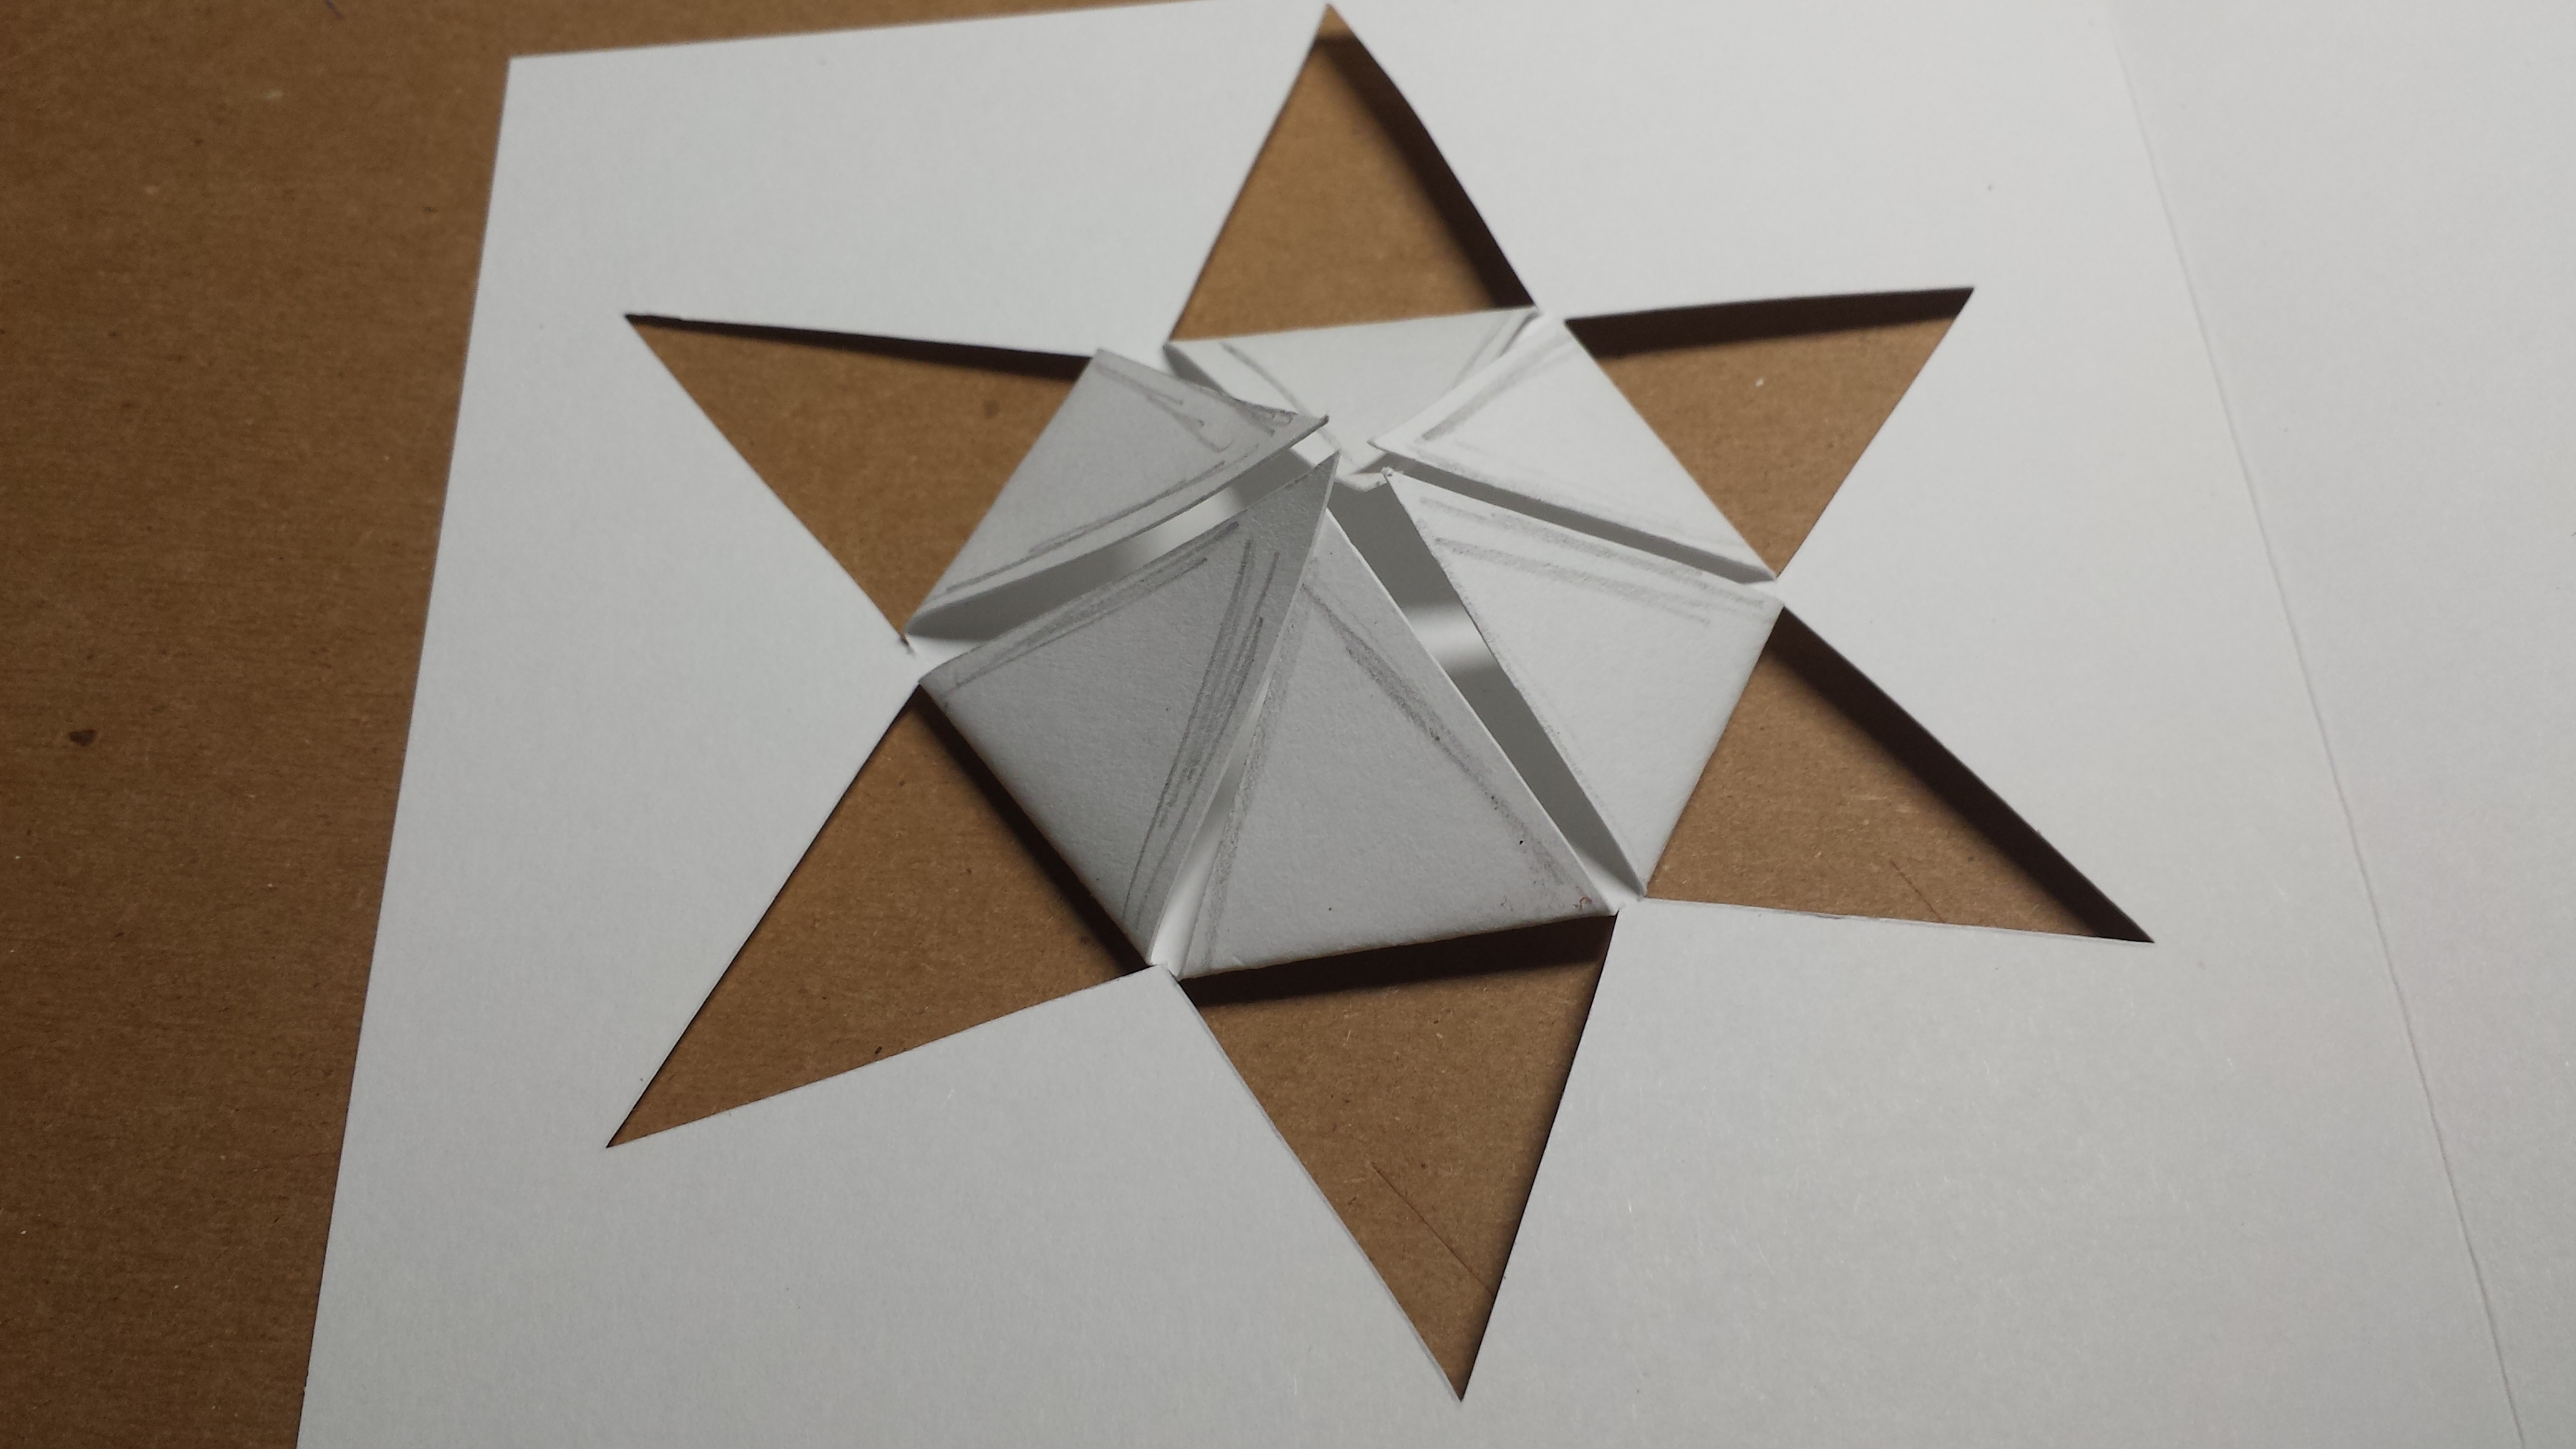
4. Glue the triangles into the center. Erase the pencil lines and cut a star out of a scrap of wrapping paper. Glue the star in the middle of the folded triangles. It might get sticky here but just be patient!
5. Glue the white cardstock onto the inside of the red construction paper
CARD 9
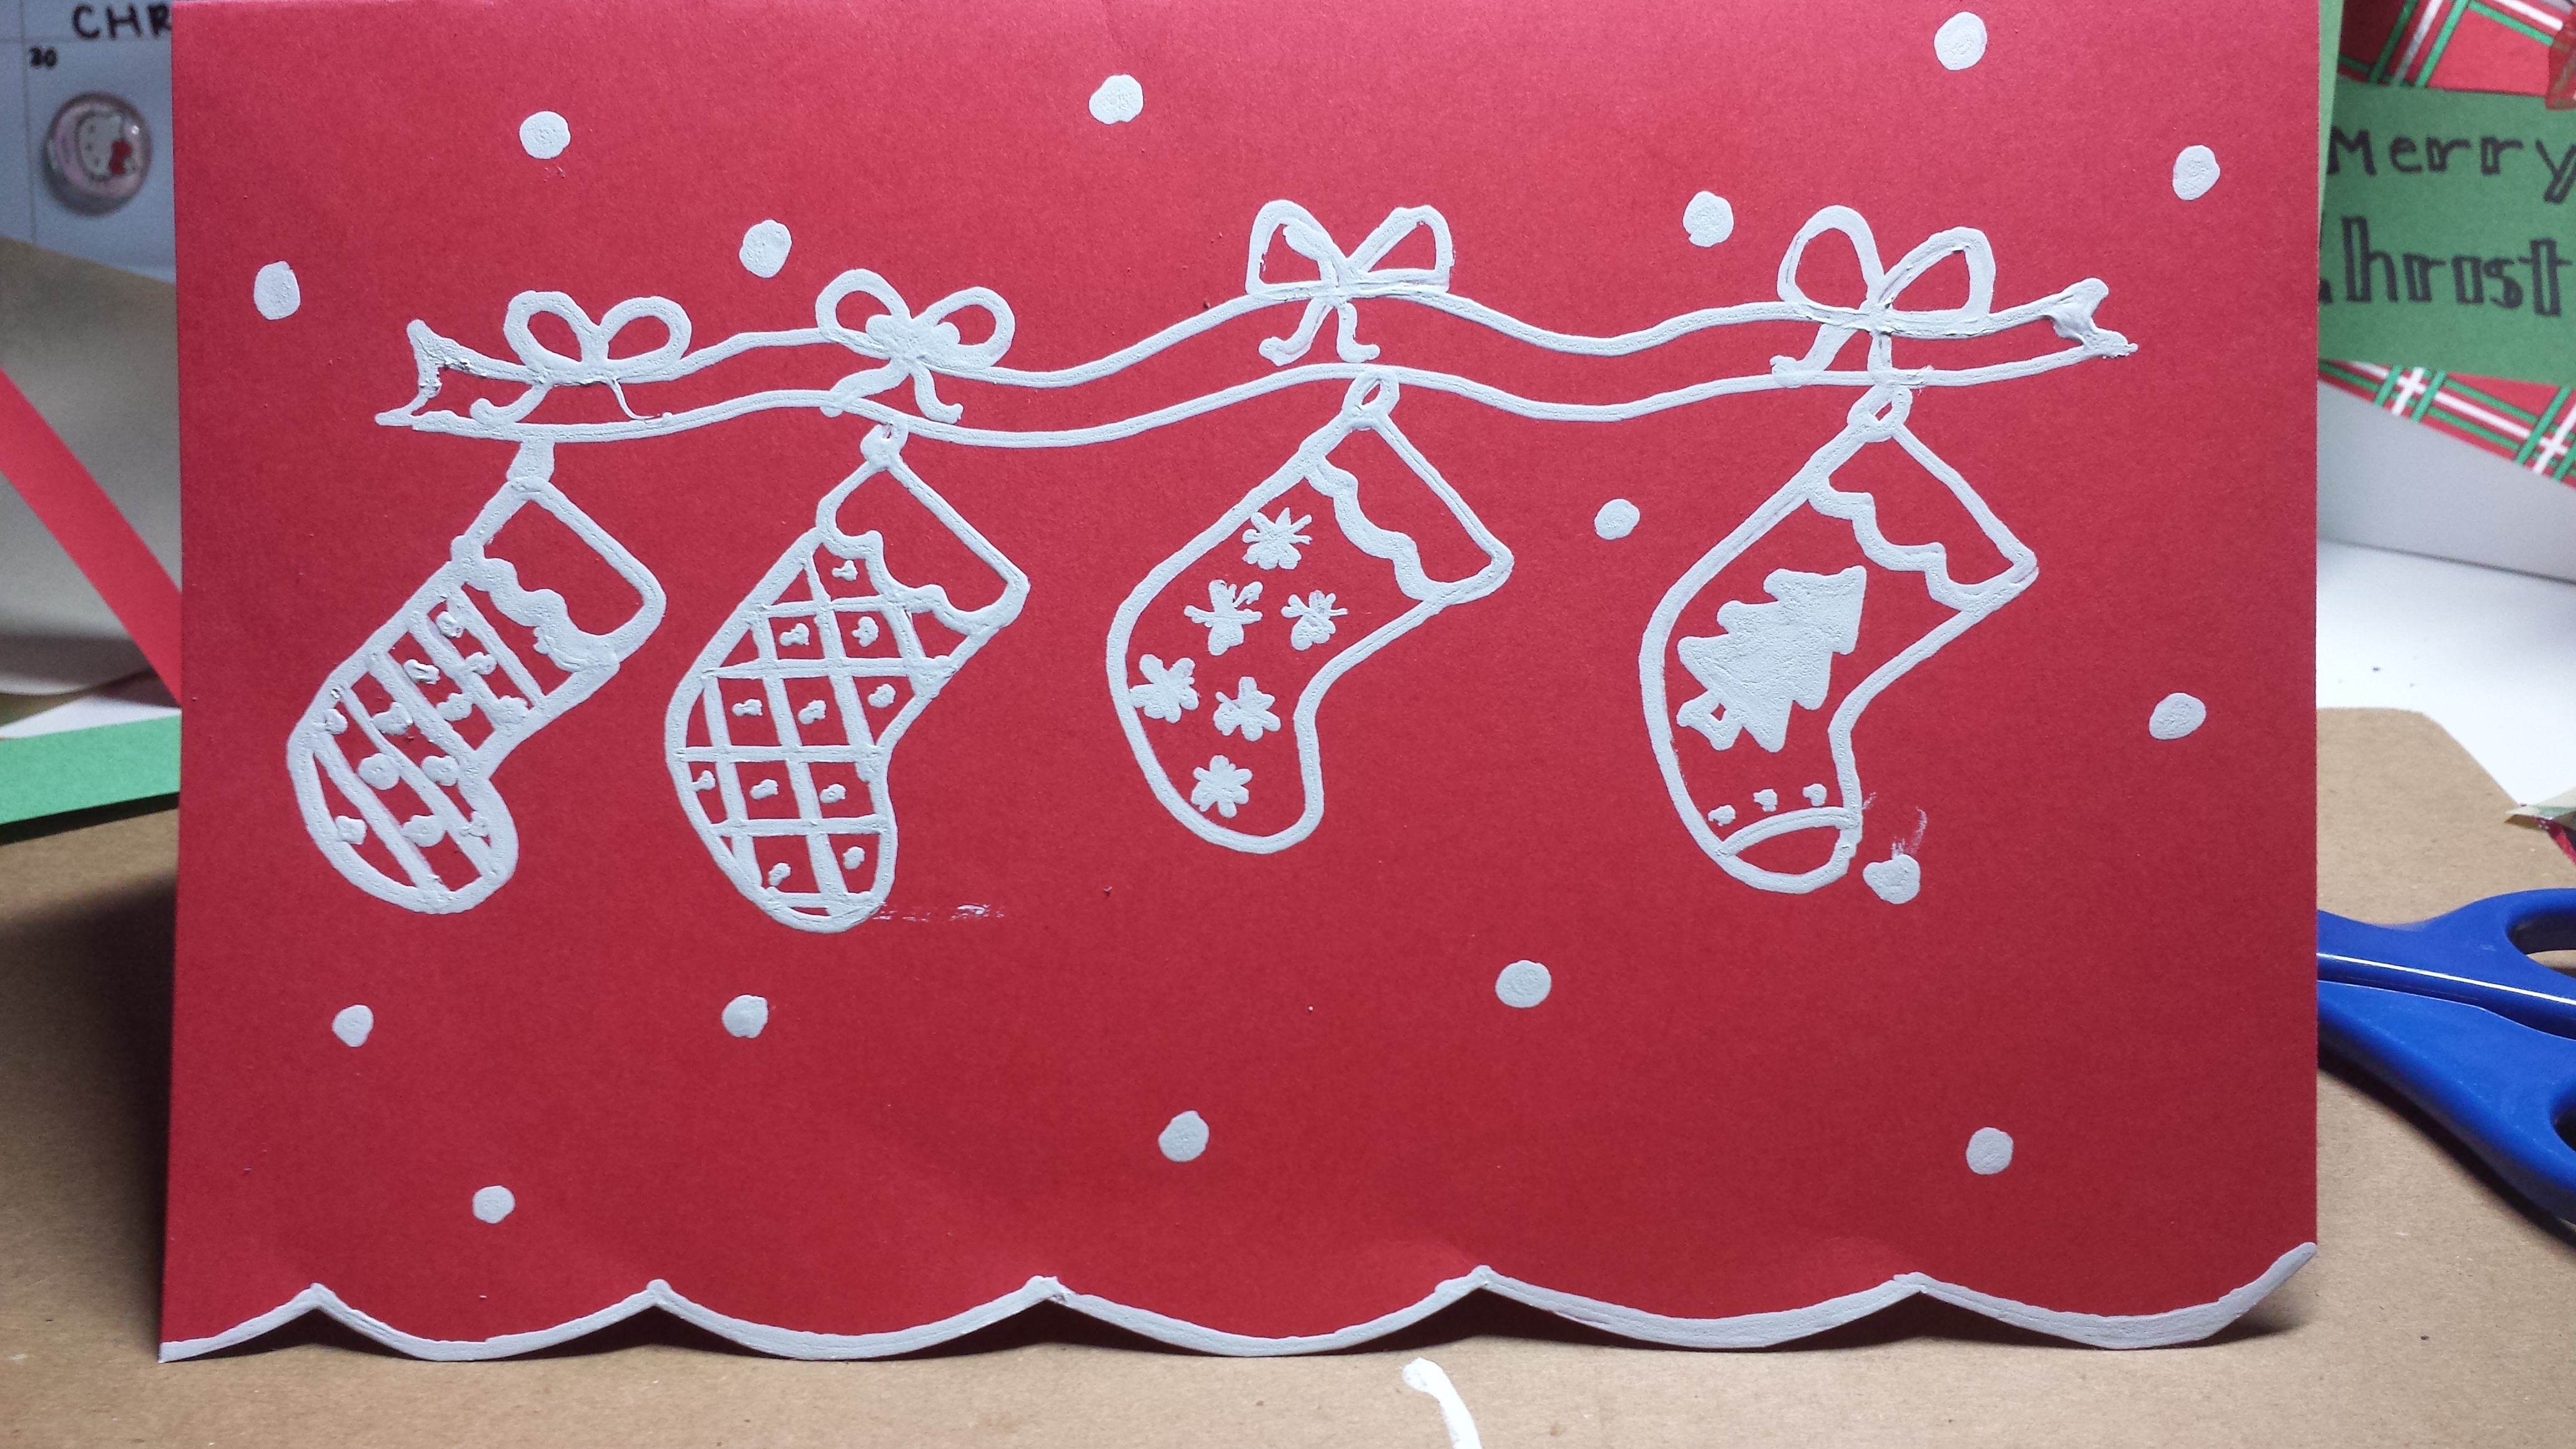
Supplies needed: wite out pen/ white marker, scissors, red construction paper
- Fold your red construction paper in half

2. Cut the edge in a scalloped pattern
3. Take your wite out pen/ white marker and draw some stockings attached to a ribbon and decorate them! I included an example of what I did below
CARD 10

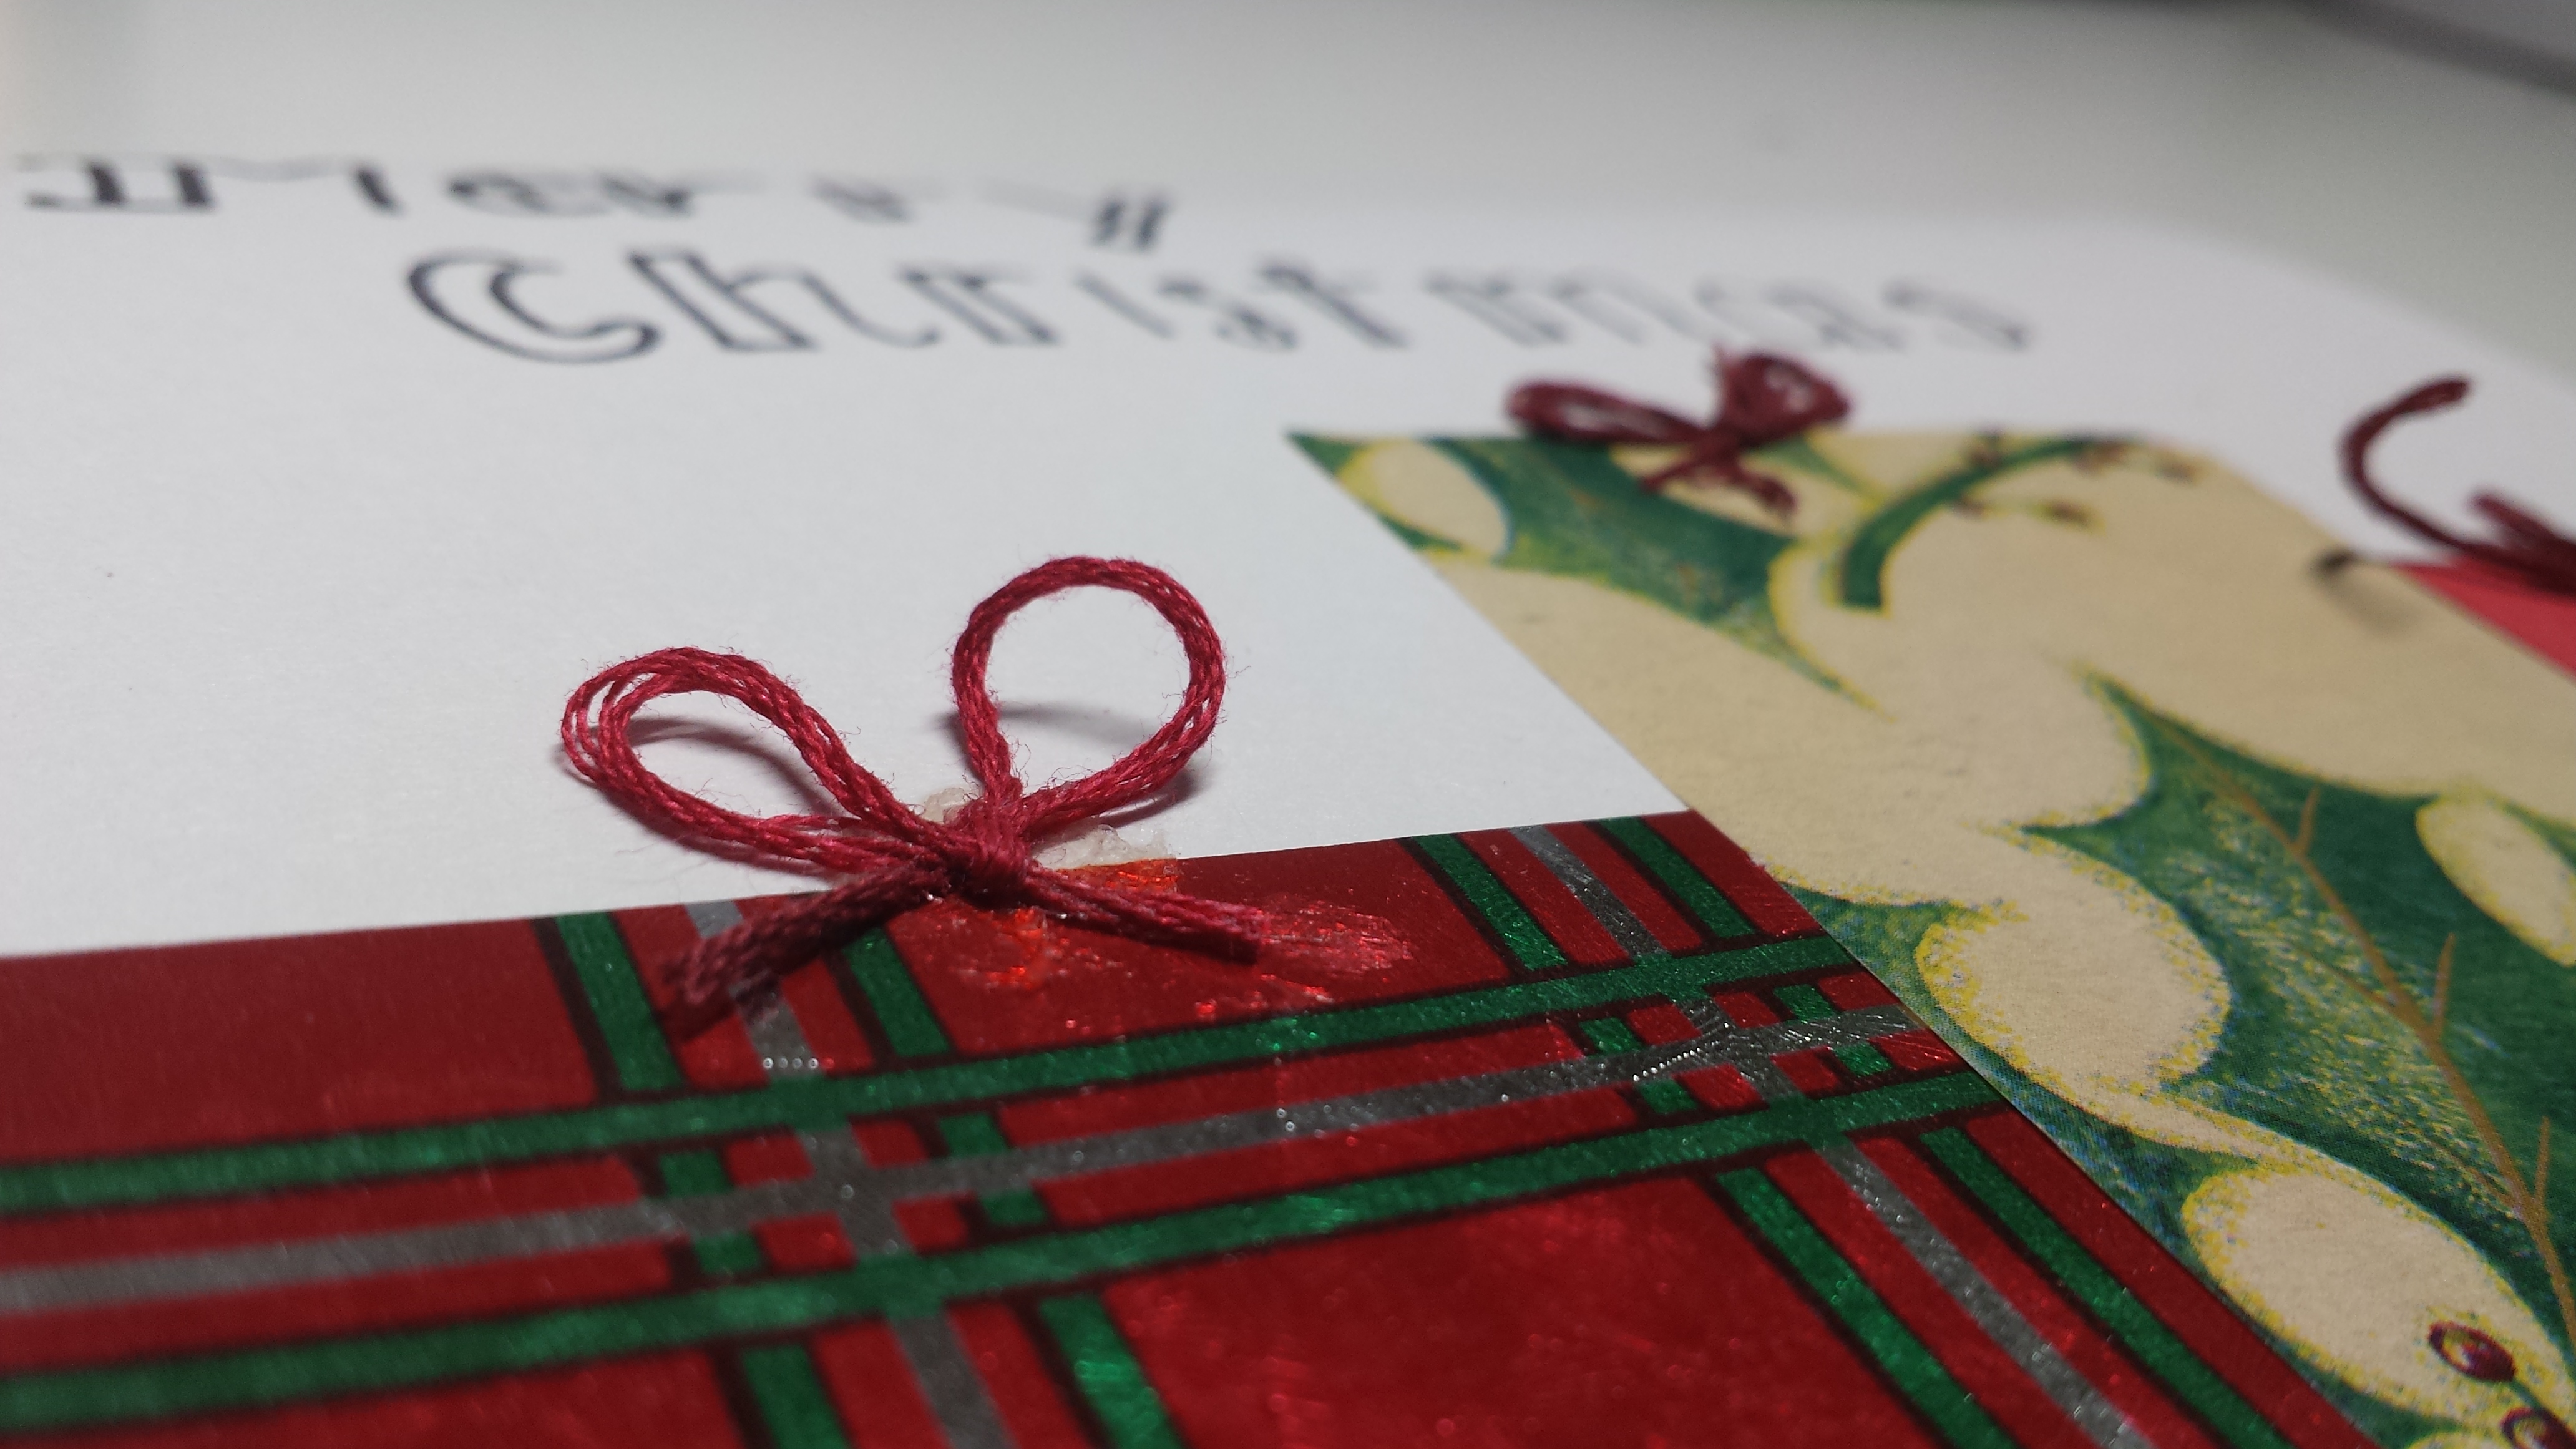
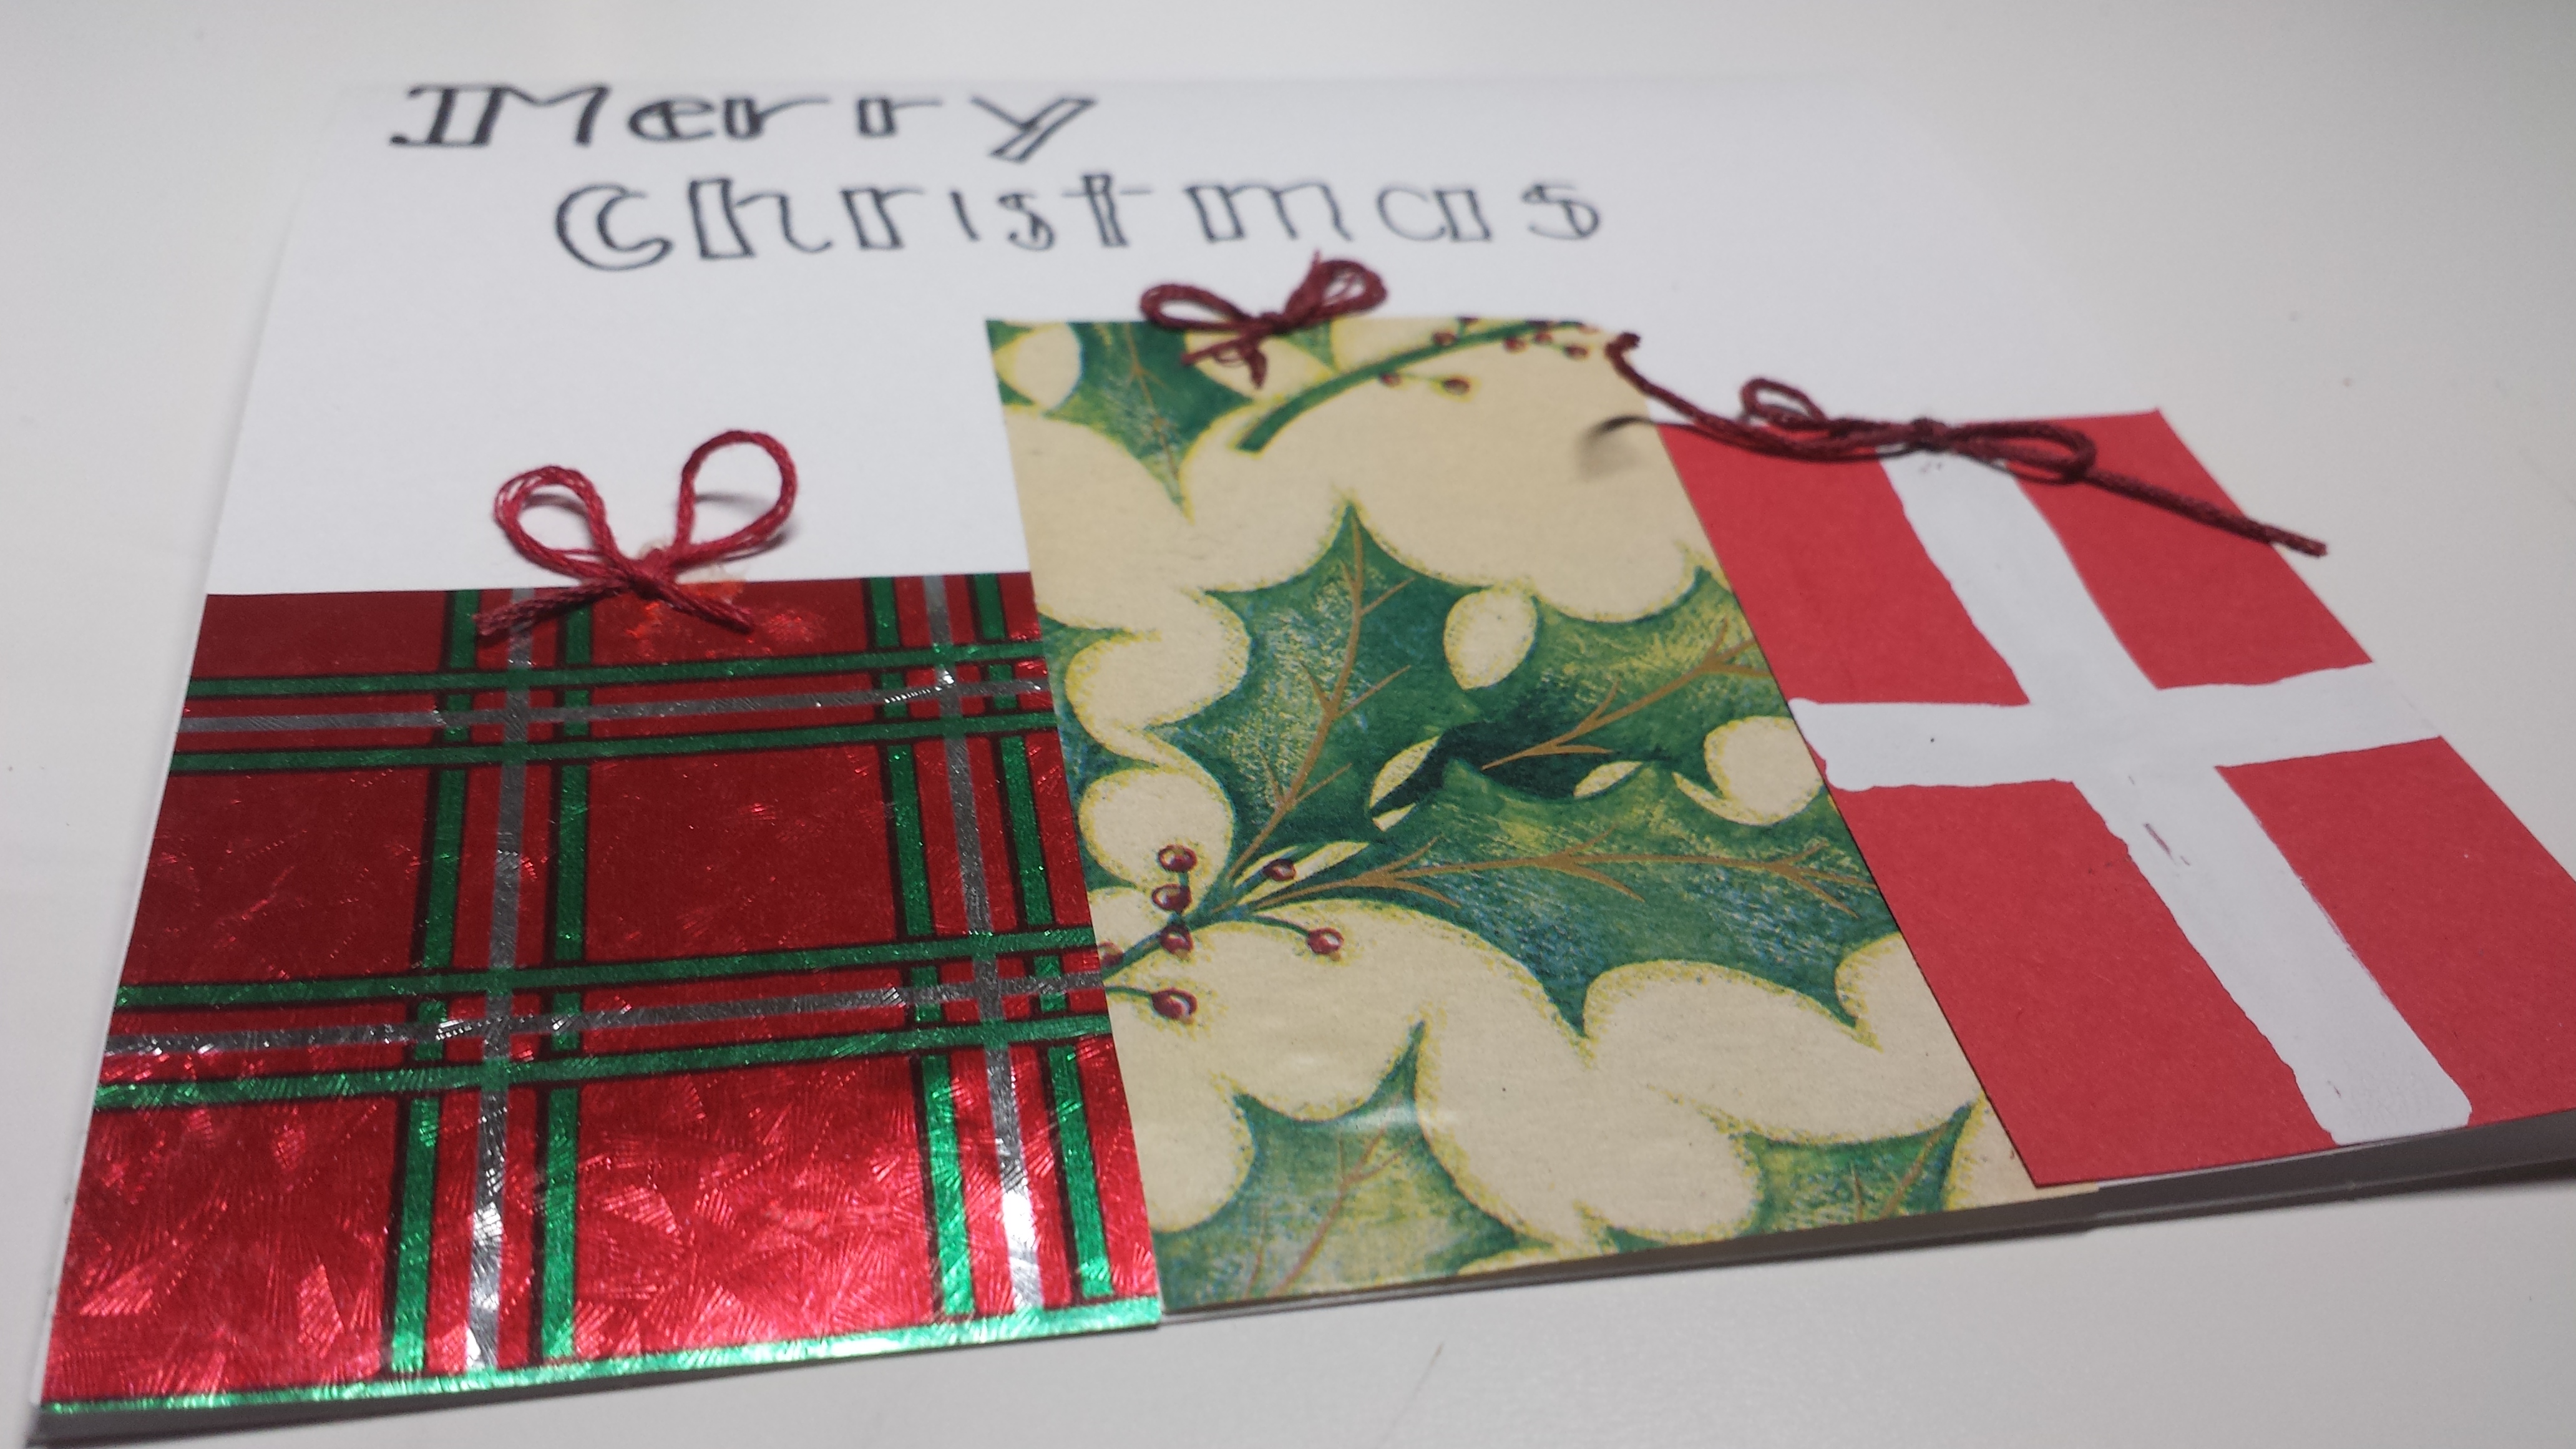
Supplies needed: scraps of ribbon, construction paper, and wrapping paper, white cardstock paper, sharpie, scissors, glue, markers
- Cut your scraps of paper into rectangles and glue them to the bottom of your white cardstock paper that has been folded in half. These will be your presents.
- Decorate the rectangles with markers and ribbon bows
3.Write a festive message above the squares
For the designs that focus on the inside of the card, you can decorate the front of your cards anyway you want! Feel free to use markers or the white out pen to write any festive message of your choice.
And that’s it! Ten super quick and easy card ideas for the festive season! If you decide to make any of them, tweet me photos (@Kasual_kook) or tag me in your Instagram photos (@kasual_kook). If you have a favorite, I’d love to know! Subscribe with your email to be notified of my other Christmas posts because I will be posting at LEAST once a week during the month of December for blogmas! 🙂
Kasual kook xx

5 responses to “10 Quick and Easy DIY Christmas Cards!”
[…] is tomorrow so if you haven’t made your cards for your family yet, see a post I made here. Have a Merry Christmas […]
LikeLike
[…] check out the rest of my blogmas in December where I posted one post a week throughout the month!! Christmas cards, traditions, and festive […]
LikeLike
Hei taas! Pakko tulla heti kertomaan vieraiden reaktio mustaan pastaan ja hetkkuresepriin. Yksi vieras jopa nuoli lautasen (osittain viinin vaikutuksesta) ja musta pasta sopi teemaan tosi hyvin, maku ei juuri ollut erilainen, se on vaan mustekalan musteella värjättyä… Kiitos vielä Hanna! Vaikutat tosi symppikseltä, ja te miehenne kanssa arvostatte oikeasti hyvää ruokaa ilman turhia tiukkapipoiluja, toivottavasti teistä kuullaan vielä pitkään!
LikeLike
I just had a similar cotnsreavion with a friend yesterday. You don’t have to feel like a bad person for saying it’s not working out and ending a relationship you know if wrong for you.
LikeLike
Your answer lifts the intnlligeece of the debate.
LikeLike